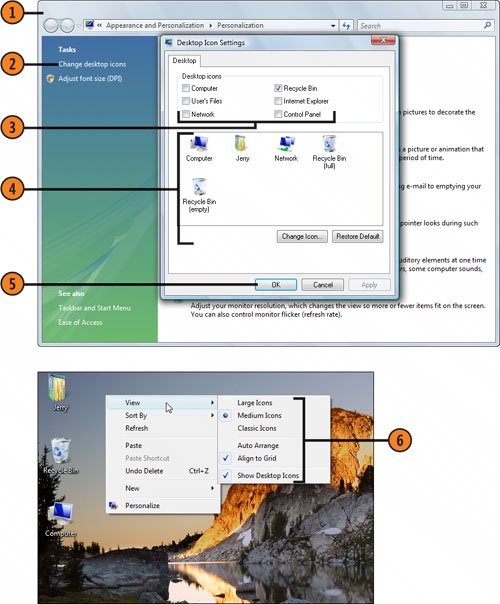
Customizing the Desktop Icons
| You can display all the standard Desktop icons, hide them, or show only the ones you want. You can also change the image for each icon and adjust its size, and then arrange the icons however you want to see them on your Desktop. Select and Modify the Icons
 Tip
|
How to Wow: Photoshop for the Web
ISBN: N/A
EAN: 2147483647
EAN: 2147483647
Year: 2006
Pages: 286
Pages: 286
Authors: Jan Kabili, Colin Smith