| After you create a 3-D or even a 2-D shape, you can use 3-D rotation options to change the orientation and perspective of the shape. You can also create a 3-D rotation effect using one of the preset 3-D rotation styles, or you can use the 3-D rotation tools to create your own 3-D effect (New!). The settings control with the customization tools include the 3-D rotation (x, y, and z axis), text rotation, and object position (distance from ground). Add a 3-D Rotation Effect to a Shape 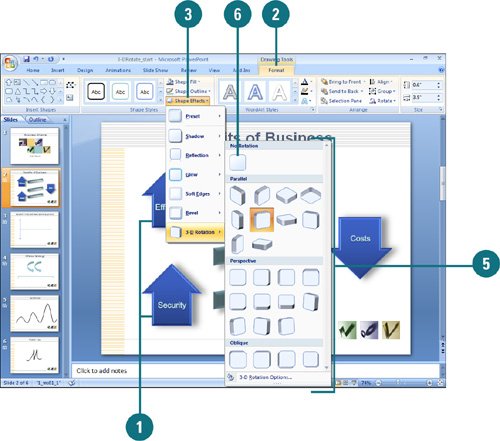
 Click the shape you want to apply a new or different shape effect. Click the shape you want to apply a new or different shape effect.
 Click the Format tab under Drawing Tools. Click the Format tab under Drawing Tools.
 Click the Shape Effects button, and then point to 3-D Rotation. Click the Shape Effects button, and then point to 3-D Rotation.
The current effect appears highlighted in the gallery.  Point to an effect. Point to an effect.
A live preview (New!) of the style appears in the current shape.  Click the effect you want from the gallery to apply it to the selected shape. Click the effect you want from the gallery to apply it to the selected shape.
 To remove the 3-D rotation effect, click the Shape Effects button, point to 3-D Rotation, and then click No Rotation. To remove the 3-D rotation effect, click the Shape Effects button, point to 3-D Rotation, and then click No Rotation.
Add a Custom 3-D Rotation Effect to a Shape 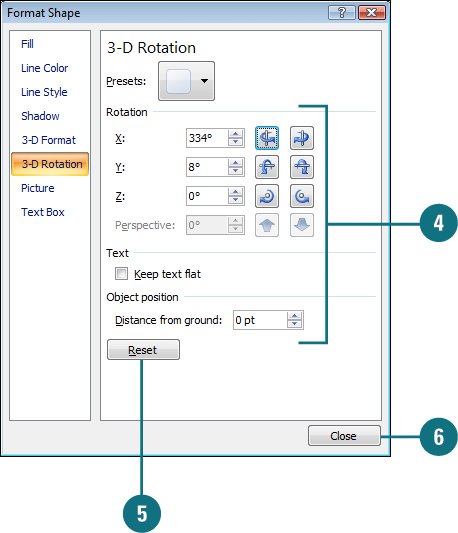 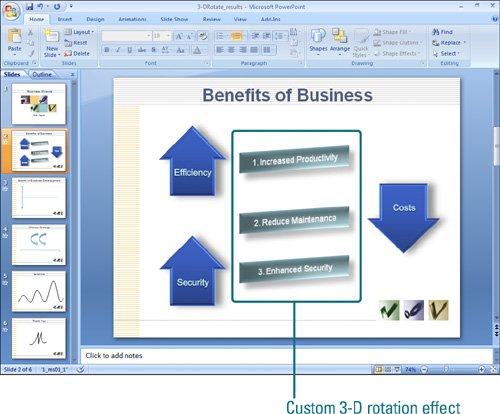
Click the shape you want to apply a new or different shape effect. Click the Format tab under Drawing Tools. Click the Shape Effects button, point to 3-D Rotation, and then click 3-D Options. Specify the following custom options: Rotation x and y. Change the orientation of the x (horizontal axis) and y (vertical axis). Use the arrow buttons to nudge the position left, right, up, and down. Rotation z. Change the position higher or lower than the shape. Use the arrow buttons to nudge the position clockwise or counter-clockwise. Rotation perspective. Change the field of view. Enter a number from 0 (parallel camera) to 120 (wide-angle camera). Use the arrow buttons to narrow or widen the view. Text. Select the Keep text flat check box to prevent text in a shape from rotating (always stays on top). Object position. Enter a distance from ground number to move the shape backward or forward in 3-D space.
All your changes are instantly applied to the shape. To remove 3-D formatting and restore default setting, click Reset. Click Close.
|