Flylib.com

Books Software


Unit Testing


Unit Testing

To test the Printer Management application:

  1. Set the path of the bin directory of J2SDK by executing the following command at the command prompt:

    set path=%path%;D:\j2sdk1.4.0_02\bin;
    
  1. Set the classpath of the lib directory of J2SDK by executing the following command at the command prompt:

    set classpath = %classpath%;d:\j2sdk1.4.0_02\lib;
    
  1. Copy the PrintFile.java, PrintComp.java, and CreateBookInterface.java files to a folder on your computer. On the command prompt, use the cd command to move to that folder where you have copied the Java files. Compile the files using the following javac command:

    javac *.java
    
  1. To run the Printer Management application, specify the following command at the command prompt:

    java PrintFile
    
  1. Click the Print Text tab in the user interface of the Printer Management application.

  2. Select the File->Open command from the File menu of the Printer Management Application. Browse and open the text file that is to be printed using the Open dialog box. The selected file appears in JTabbedPane, as shown in Figure 5-5:

    click to expand: this figure shows the printer management application that displays the content of a sample text file.
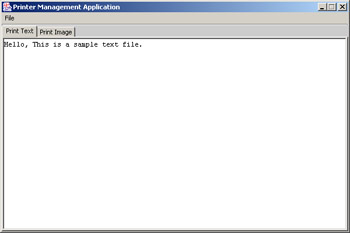
    Figure 5-5: Printer Management Application Window

  1. Select the File->Page Setup & Print command. The Page Setup dialog box opens, as shown in Figure 5-6:

    click to expand: this figure shows the page setup dialog box that has three panels: paper, orientation, and margins. the paper panel provides fields to specify the size and source of the page. the orientation panel allows the end user to specify the page orientation. the end user can set the page margins using the left, right, top, and bottom text boxes in the margin panel.
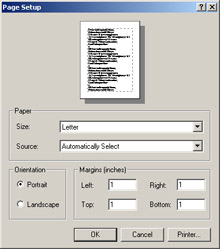
    Figure 5-6: Page Setup Dialog Box

  1. Click the Printer button on the Page Setup dialog box. A new Page Setup dialog box appears, which displays the name , status, type and location of the current printer, as shown in Figure 5-7:

    click to expand: this figure shows printer information, such as status, type, and port type where the printer is connected.
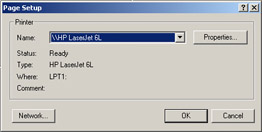
    Figure 5-7: Displaying the Printer Status

  1. Click the Network button to displays all the printers available on the network, as shown in Figure 5-8:

    click to expand: this figure shows all the shared printers that are available in the network. to check the status of each printer, the end user needs to select the appropriate printer from the shared printers list box.
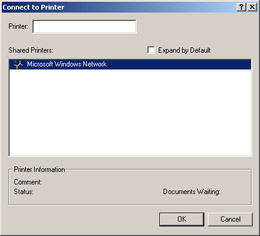
    Figure 5-8: Connect to Printer Dialog Box

  1. Click the OK button on the Page Setup dialog box. A Print dialog box opens, as shown in Figure 5-9:

    click to expand: this figure shows the print dialog box that allows the end user to specify the print range and the number of copies required to be printed.
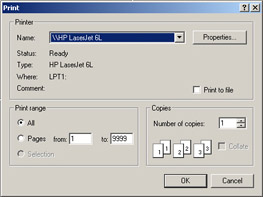
    Figure 5-9: Print Dialog Box

  1. Click OK to print the current file.

  2. Click the Print Image tab. The image view of the Printer Management application appears, as shown in Figure 5-10:

    click to expand: this figure shows the print image tabbed pane in the printer management application window.
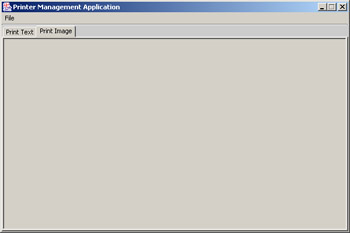
    Figure 5-10: Printer Management Application with Print Image Tabbed Pane

  1. Select File->Open to open an image in the Print Image tabbed pane, as shown in Figure 5-11:

    click to expand: this figure shows a sample image in the print image tabbed pane of the printer management application window.
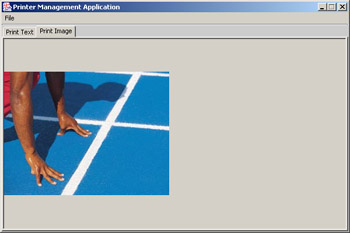
    Figure 5-11: Displaying an Image File in the Print Image Tabbed Pane

  1. Select File->Print->Print Default to print the current page. Select File->Print->Print Custom to print a customized book, as shown in Figure 5-4. When the end user selects the page format using the Page Format check box and specifies the number of pages in Number of Pages test box of the Book Interface dialog box. Now, clicks the Add in the Book button in the Book Interface dialog box. The results are displayed in the list box of the Book Interface, as shown in Figure 5-12:

    click to expand: this figure shows the book interface dialog box that displays a book in the list. in this book, the end user sets the page format of the first two pages as landscape.
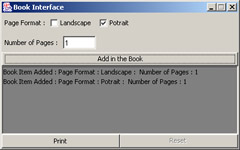
    Figure 5-12: Displaying a Book Interface dialog

  1. Click the Print button to print the book items.


Chapter 6: Creating a Text Editor Application

The New Input/Output (NIO) API provides the java.nio and java.nio.channels packages for buffer management, advance I/O file system, and file locking mechanism. The java.nio package contains the ByteBuffer classes that allow you to store the contents of a text file. To read, write, and lock the text files, you can use the FileLock and FileChannel classes available in the java.nio.channels package.

This chapter explains how to develop a Text Editor application using the java.nio and java.nio.channels packages and create, edit, print, and save text files.

Architecture of the Text Editor Application

The Text Editor application allows you to read, write, print, and lock a specific text file. You can also change the color and font of the text file. The Text Editor application provides various editing and formatting features, such as cut, copy, paste, undo, redo, select all, find, and word wrap.

The Text Editor application uses the following files:

  • Editor.java : Creates a user interface that contains a menu bar and a text area. There are five menus on the menu bar: File, Edit, Format, Locks, and Help. Each menu contains several menu items. You can use these items to perform various tasks , such as opening, saving, or printing a file.

  • ActionPerform.java : Implements the commands to create, open , save, lock, or copy a file. It also implements commands to find a word in a file. In addition, this class also implements the commands to cut, copy, paste, undo, redo, set font, set text color, and insert date in the file.

  • FontClass.java : Creates a font dialog box that provides options to change the type, size , and style of the font in the text file.

  • {% if main.adsdop %}{% include 'adsenceinline.tpl' %}{% endif %}

    ColorClass.java : Creates a color dialog box with sliders. You can use this dialog box to specify the Red Green Blue (RGB) value and change the color of the file text.

  • PrintClass : Opens a print dialog box that allows you to print a document. You can also use this dialog box to change the properties of the document, such as page layout and paper quality.

  • Help.java : Creates a help dialog box that lists the steps to use the Text Editor.

Figure 6-1 shows the architecture of the Text Editor application:

click to expand: this figure shows the files that the text editor application use. it also shows the sequence in which the application uses the files.
Figure 6-1: Architecture of the Text Editor Application

The Editor.java file calls ActionPerform.java to perform the file edit, format, and lock operations. After the ActionPerform.java file implements these operations, it returns the results to the Editor.java file. The Editor.java file then displays the results to the end user. The ActionPerform.java file calls the PrintClass.java file to print a file. To change the font type, size, and style of the text file, the ActionPerform.java file calls the FontClass.java file. The ActionPerform.java file calls the ColorClass.java file to change the color of the file text.

If an end user selects the help file option, the Editor.java file calls the ActionPerform.java file, which, in turn , calls the Help.java file. The Help.java file lists the steps required to use the Text Editor.