7.4 Building an Application from Scratch
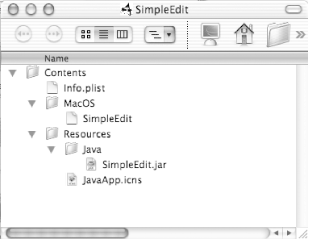
| This section builds a Mac OS X application from scratch. It will start with the base SimpleEdit JAR file that was built in Chapter 4 and Chapter 5, and then add the necessary elements to convert it to a full Mac OS X application bundle. It will build out the directory structure shown in Figure 7-5; you might want to refer to this figure as you walk through this example. Figure 7-5. Minimal directory structure 7.4.1 Directory LayoutCreate a new folder called SimpleEdit in your home directory ( ~ ) by using the Finder. Add a folder inside this new directory called Contents . This is where you'll add the Info. plist file. Next, create a MacOS folder (no space) inside the Contents directory. Here, add a "stub" file that acts as a native launcher stub for the application. Create a Resources folder inside Contents . This is where you will add an icns file, an icon that will be displayed in the Finder and standard file dialogs. Finally, add a Java directory to the Resources folder. This is where you'll put the required Java libraries (JAR files). 7.4.2 Property ListDirectly inside the Contents folder, add an Info.plist file with the contents shown back in Example 7-2.
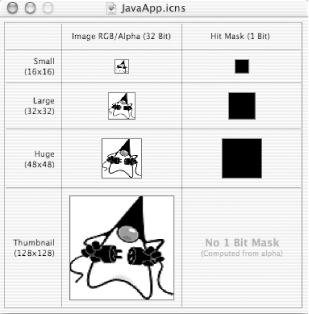
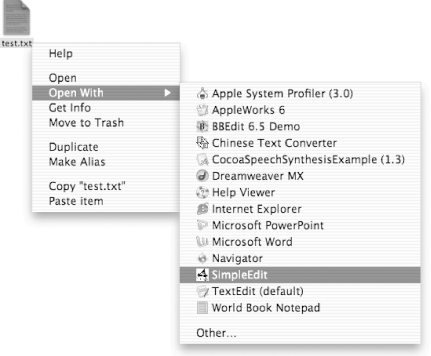
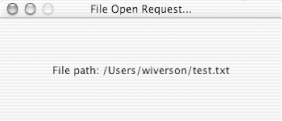
Once you have a base Info.plist file, use the Property List Editor to make any necessary additions or changes. 7.4.3 Launcher StubTo launch your application, you'll need a small native stub file. Copy the file JavaApplicationStub from the directory /System/Library/Frameworks/JavaVM.framework/Versions/A/Resources/MacOS . You can rename this stub whatever you want, as long as the stub file matches the entry for CFBundleExecutable in Info.plist . A new stub is included with each JVM release from Apple, and you'll generally want to use the latest available stub. 7.4.4 Application IconIn the Resources folder inside Contents , add an icns file (a Mac OS X icon file). For development purposes, you can borrow an icon file from another application to test, but you should eventually use the IconComposer tool (shown in Figure 7-6) to create attractive icons. You can find IconComposer in /Developer/Applications/ . Figure 7-6. IconComposer It's also worth pointing out that the photorealistic icons used by Mac OS X are sometimes best created in a commercial application and then imported into IconComposer. Specifically, Adobe Photoshop does an excellent job of creating an application icon, including generating transparency masks, and IconComposer will import Photoshop's PSD files. 7.4.5 Java LibrariesObviously, you need to add your Java application code to the package. Copy the SimpleEdit.jar file into the Java directory inside the Resources folder. If you were building an application that relied on several other Java libraries, you'd want to place those libraries here as well, and update the Info.plist classpath entry (using the $JAVAROOT/ directive to indicate this relative, dynamic path ). 7.4.6 Finder RecognitionFinally, rename the base directory from SimpleEdit as SimpleEdit.app . The Finder will automatically recognize the new folder name and display the folder as an application (hiding the .app extension, even if the Finder preferences are set to always show file extensions). You can now use the Finder to drag and drop files on the application's icon. Assuming you've added the Finder "Open" file handlers (as described in Chapter 5), you'll also be able to open files by using standard features such as the Finder's "Open With" command (as shown in Figure 7-7). The default handler in Chapter 5 displays a dialog showing the path of the file shown in Figure 7-8. Depending on your application, you'll probably want to use the passed-in path to open the file and read the data by using standard Java file I/O APIs. Figure 7-7. Open With command Figure 7-8. SimpleEdit "Open File" notification Congratulations! You've now built a complete Mac OS X application. |
EAN: 2147483647
Pages: 105
