3.2 Code Editors
| More than a few code editors are available for Mac OS X, and no work on Java would be complete without at least mentioning these integrated development environments (IDEs). I've broken them up into several categories: those that are open source, those that are free, and those that are sold commercially. I'm a big fan of open source tools, but all the tools mentioned here get the job done, so pick your own poison . 3.2.1 Open Source ToolsMany available open source tools have been ported to or run under Mac OS X. These tools are all free (as are the tools in the next section), but also make their source code available. 3.2.1.1 NetBeansNetBeans is a full-featured , commercial-grade IDE that was acquired and open-sourced by Sun Microsystems. Written in Java, it's easily configured to run on Mac OS X. You can download it for free from http://www.netbeans.com/. To install and configure NetBeans, pull down a current version of the software. I'm currently using NetBeans 3.4.1. Go to the NetBeans web site, click on the download link, and agree to the NetBeans license. You can then download a release for Mac OS X in disk image format. On my system, the downloaded file was called NetBeansIDE-release341-MacOSX.dmg . Mac OS X will mount it, and you can then launch NetBeans from the disk image. Before starting up NetBeans, though, you should copy the contents of the disk image into a folder on your hard drive, such as /Applications/netbeans . I created this folder in the Finder and then copied the contents of the NetBeans disk image into the new folder. You can then drag the disk image to the trash to "eject" it. NetBeans comes in a Mac OS X package called NetBeans Launcher. However, since we're all geeks here, let's look more closely inside this package. Control-click the launcher icon and select Show Package Contents. Navigate inside the revealed Contents directory. You'll see several files associated with Mac OS X packages (many of which are discussed in detail in Chapter 7), as well as MacOS and Resources folders. Open Resources , and then netbeans , and you'll find yourself in the actual NetBeans distribution. Figure 3-1 shows this directory structure. Figure 3-1. NetBeans directory structure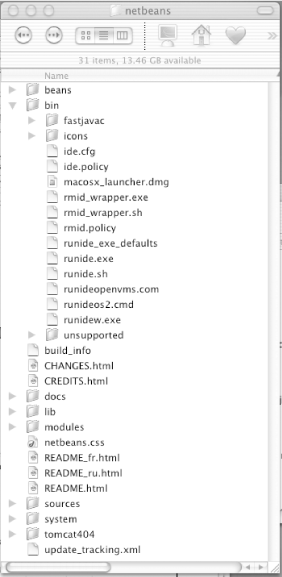 Inside the distribution's bin directory, you will find several scripts and other files. Modify the contents for the ide.cfg file as follows : -J-Xverify:none -J-Xdock:name=NetBeans -J-Xms64m -J-Xmx250m -J-Dcom.apple. hwaccellist=ATIRage128_8388608 -jdkhome /Library/Java/Home
The -J option specifies that the following option should be passed to the underlying JVM. Note that I've extended the maximum amount of memory available by default to 250 MB by using the -Xmx switch. You can play around with similar options, depending on your system's configuration.
You can actually run NetBeans with either the Apple look and feel (also known as Aqua) or with the Swing-standard Metal look and feel. There are advantages to both approaches. The Metal look and feel includes a user interface that is identical to the one you would see on other platforms, and also seems to be more stable than Aqua. The Aqua interface, though, is much more familiar to the Mac OS X user , and some native widgets seem to work better under Aqua than Metal (for example, the scrollbar). Note that NetBeans relies heavily on the second mouse button, which can be emulated on Mac OS X using Control-click on a single mouse button system. To actually launch the IDE, you should specify a look and feel and a user directory. The default look and feel is Metal. As of this writing, user directories are incompatible between Metal and Aqua. I created two files and two directories to test the various options; you can do the same. Figure 3-2 shows NetBeans running with the Metal look and feel. Figure 3-2. NetBeans running with the Metal look and feel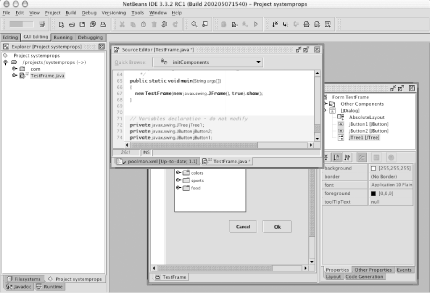 To launch NetBeans using the Metal look and feel, I first created an empty directory, /netbeans_userdir , on my system. Then I created a launch_metal.sh script with the contents shown in Example 3-2. Example 3-2. Launching NetBeans with the Metal look and feel./runide.sh -userdir /netbeans_userdir To launch the Aqua look and feel, I created a launch_aqua.sh script with the options shown in Example 3-3. As with the Metal setup, you should create a directory for these settings. I used /netbeans_aqua . Example 3-3. Launching NetBeans with the Aqua look and feel./runide.sh -userdir /netbeans_aqua -ui com.apple.mrj.swing.MacLookAndFeel -fontsize 11 For Aqua fans, Figure 3-3 shows NetBeans running with that look and feel. Figure 3-3. NetBeans running with the Aqua look and feel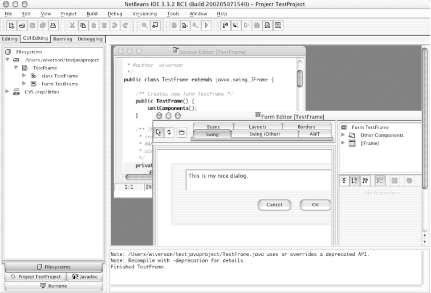
Try both versions and see which one you prefer. Note that the form designer will draw user interface widgets in the selected user interface as well. To build applications that take advantage of Apple-specific options and to activate the NetBeans type-ahead feature in the text editor for the Apple extensions, add the following JAR file to the "Filesystems" tab: /System/Library/Frameworks/JavaVM.framework/Versions/CurrentJDK/Classes/ui.jar You can then right-click on the "JAR" entry and choose "Tools Figure 3-4. Adding Mac OS-specific type-ahead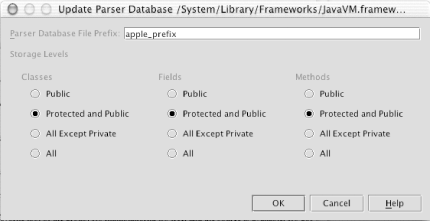 NetBeans is probably one of my favorite IDEs. It's multiplatform , free, and the source is available. It's got a great API for writing extension modules. It supports CVS, and it's got a free, built-in auto-update mechanism. That said, it's also a bit of a Mac OS X newcomer, and rough edges pop up occasionally; still, a number of active NetBeans developers now use Mac OS X as their primary development environment. For more information on NetBeans, check out NetBeans: The Definitive Guide , by Boudreau, Glick, Greene, Spurlin, and Woehr (O'Reilly). 3.2.2 Free ToolsSomewhere between open source and commercial tools lies freeware commercial software. You can't download the source code, but the price certainly can't be beat. 3.2.2.1 JBuilder PersonalBorland's JBuilder is another Java IDE that migrated over to Mac OS X. Borland officially supports Mac OS X as a release platform, meaning that if you purchase JBuilder, you can obtain support using it on a Mac. It has a wide, interesting feature set, and the Personal edition is free. You could purchase versions with additional features and commercial support, but you could also just play around with the Personal edition and get a feel for the editor and its overall responsiveness. Figure 3-5 shows JBuilder in action. For more information on Borland's JBuilder or to download a copy, visit http://www.jbuilder.com/. Figure 3-5. Borland JBuilder Personal edition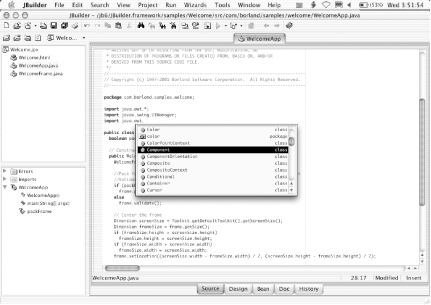 3.2.2.2 Project BuilderProject Builder is the latest incarnation of a set of GUI tools originally developed for the NeXT operating systems, now available for free to Mac OS X developers. It has interesting features and some curious omissions, but it also happens to be free, which gives it a certain appeal . Even if you don't use Project Builder for day-to-day development, you may want to use the default code generated by the assistants to give you a head start on application building. If you've installed the Developer Tools CD, [1] you'll find Project Builder in the /Developer/Applications directory. Start up Project Builder and select "File
Figure 3-6. Creating a new project with Project Builder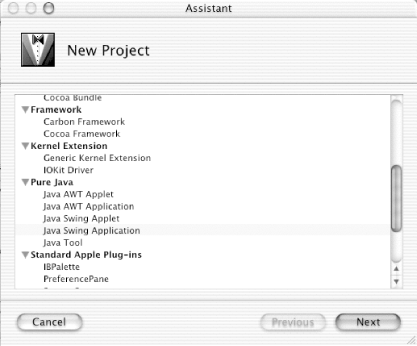 When given a choice, choose "Pure Java Project Builder indexes and updates the parser database at project creation, and occasionally when you write code. You can more or less ignore this update. Although it takes time, it runs in the background, so you can still open Java source files while it's working. Once you've gotten past these steps, you'll see an editor window similar to that shown in Figure 3-7. Figure 3-7. The Project Builder user interface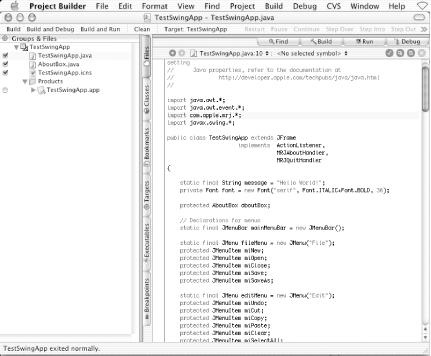 Be aware of the extent to which Project Builder focuses on Mac OS X development. For example, while browsing the source of the generated "Pure Java Swing Application", you'll see this line in your code: import com.apple.mrj.*; Several other Apple-specific classes are imported by default. Thus, using Project Builder's templates is a great way to get a feel for Apple extensions to the Java platform, but unless you pay attention, it can be a rude shock to see com.apple.* ClassNotFoundException s when you try to run your "Pure Java" application on another platform. For now, select "Build Figure 3-8. A simple "About" dialog box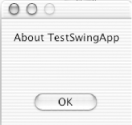 Many other build options are also available. Go to the Project menu, select "Edit Active Target," and click on the "Application Settings" tab. Then click on the "Expert" button and change the "Java Figure 3-9. Per-window menu bar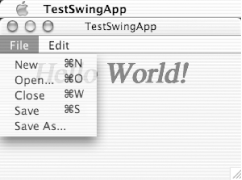 Project Builder is a sophisticated tool, but this text tries to be as IDE-neutral as possible, focusing on the underlying code rather than development tools. That said, you should explore Project Builder further, especially if you expect to develop several Mac OS X-specific applications, or if you use multiple programming languages. 3.2.2.3 JavaBrowser In addition to Project Builder, Apple includes a tool called JavaBrowser (found in /Developer/Applications/ ) for inspecting Java libraries, which are generally housed in JAR, ZIP, and class files. While this tool has only a few of these archives installed initially, you can easily add your own libraries to browse with this tool. Use the "File Figure 3-10. JavaBrowser navigation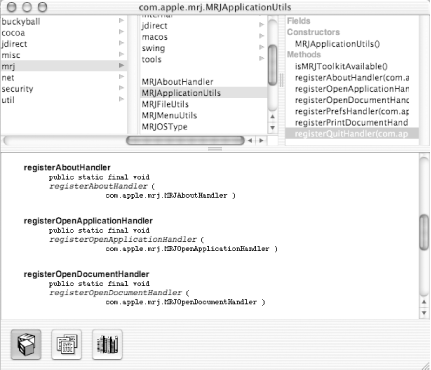 As shown in Figure 3-11, JavaBrowser can search for specific details very quickly, and results can be double-clicked to find additional information. This goes well beyond the class names , and even into the types of parameters and return values from methods. Figure 3-11. JavaBrowser Find capabilities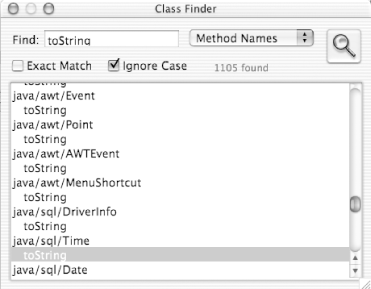 I strongly recommend you use JavaBrowser, and always add the latest versions of your source files and classes to it; you'll have your own library of code that you've written, which can really help when you've forgotten the signature of that odd method you wrote a few months ago. 3.2.3 Commercial ToolsLast but not least, plenty of not-free, not-open-source tools are out there. Don't let my description prejudice you, though; these tools can be very useful. First, paying for a tool generally means that you get some form of professional support. This support can be valuable at 2:00 A.M., when you can't get something seemingly trivial to work. Having someone a phone call away can save the day.
3.2.3.1 Metrowerks CodeWarriorMetrowerks CodeWarrior is excellent native IDE for Mac OS X, and I strongly recommend it for Mac OS X development (especially if you will target multiple languages). Metrowerks earned tremendous respect back when Apple transitioned to the PowerPC chip for providing a compiler and IDE in the early through mid-1990s, and they have done an excellent job of tracking Apple technologies ever since. For more information on Metrowerks CodeWarrior, visit http://www.metrowerks.com/. 3.2.3.2 Macromedia Dreamweaver MXMacromedia Dreamweaver is principally a tool for building HTML-based user interfaces, but it includes support for building JSP-based web applications as well. It understands JavaBeans, JSP tags, JDBC, and web services, and it can build surprisingly sophisticated applications quickly. It also features integration with other tools such as Fireworks and Flash. Chapter 12 describes how to install popular databases, and Chapter 13 connects to these databases by using JavaServer Pages (JSP). Macromedia Dreamweaver MX lets you do this visually by defining a connection and a query, as shown in Figure 3-12. Figure 3-12. Setting up a Dreamweaver database connection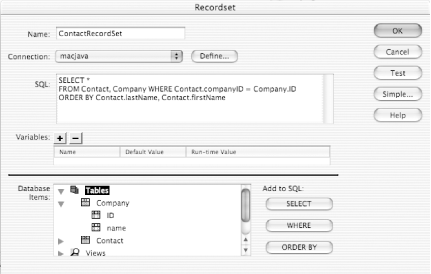 This connection, once defined, can create complex, interactive web pages visually, as shown in Figure 3-13. Figure 3-13. Dreamweaver interface construction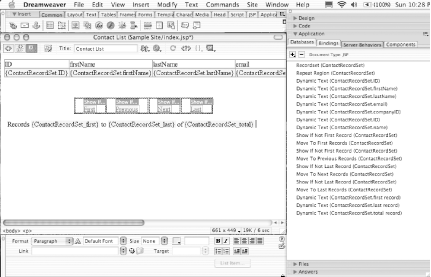 If you are using a web server locally, you can configure Dreamweaver MX to preview the application inside of the tool, as shown in Figure 3-14. Figure 3-14. Dreamweaver preview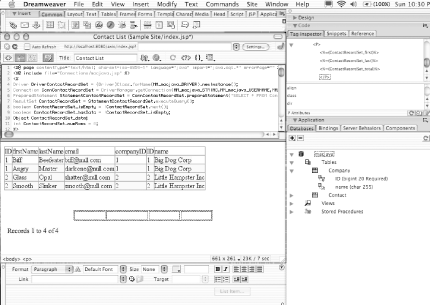 Dreamweaver MX is a highly productive tool used to create simple web applications very quickly. If most of your web application development consists of simple web user interface construction with lots of queries, you should probably evaluate Dreamweaver MX. For more information on the MX product line, visit http://www.macromedia.com/. |
EAN: 2147483647
Pages: 105

 Update Parser Database." This will bring up a dialog box, allowing you to name the parser database (for example,