Project: An Interactive Presentation
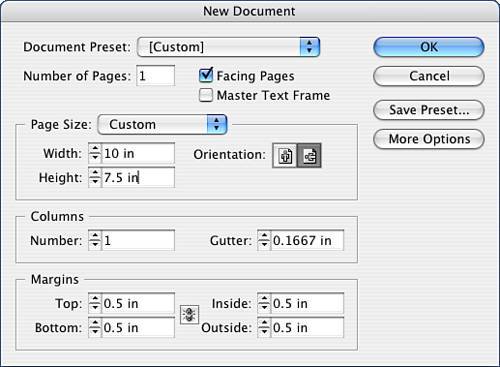
| We'll be creating a presentation in 15 easy steps: STEPS
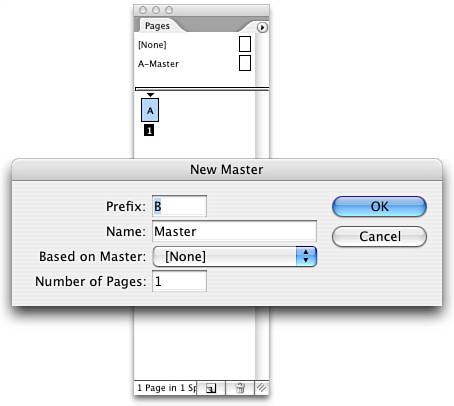
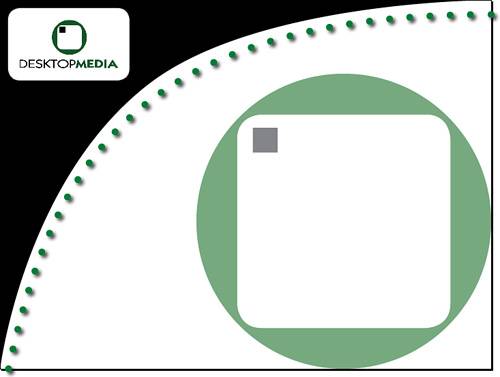
Step 1: Setting Up Your Document FormatLaunch InDesign and go to the File pull-down menu. Select New, Document and fill out the New Document window as indicated in Figure 8.3. You will be creating a landscape layout. Figure 8.3. Fill out the window as indicated. Orient yourself to the layout, and set up your workspace as you would like. We will be creating master pages for the title slide as well as the basic slides that follow the title. Additionally, we will be creating icons that will assist individuals navigating through the presentation. To accommodate these goals, we will work with the Pages palette and the Library palette. Let's start with the Pages palette. Step 2: Setting Up Master PagesGo to the Window pull-down menu and open the Pages palette. You are going to modify your master page. Double-click Master A at the top of the palette. This will be your master for the opening or title slide as well as your closing slide. Create a graphic frame that fits the entire page and select File, Place. Then navigate to your project files and select DM_BGRD_DUO.eps. You will notice immediately it doesn't fit the frame. Go to the Object pull-down menu and select Fitting, Content to Frame. Because this will become a muted background, we will not be concerned about raster resolution considerations. Now let's create a rectangle with the following dimensions: w: 4.5", h: 3.5". Fill the object with the color swatch called Paper; this is the mechanism InDesign uses to convey the status of white or knockout. With the rectangle still selected, go to the Object pull-down menu and select Corner Effects. Select the Rounded effect and enter a size of .5". Click OK. Go to the File pull-down menu, select Place, navigate to your projects folder, and select DMLogo.eps. Select all three elements (by holding down the Shift key and clicking each element, one at a time) and align them vertically and horizontally using the alignment buttons in the Control palette or the Alignment palette (see Figure 8.4). Figure 8.4. The finished master page A. Step 3: Creating Multiple MastersNow that you've edited master page A, let's create another master. Go to the Pages palette, access the palette menu, and select New Master. Fill out the window as indicated in Figure 8.5. Figure 8.5. Fill out the window as indicated and click OK. Double-click Master B at the top of the Pages palette. We will use Master B for the majority of the slides in this presentation. We will create a border on Master B to visually anchor the slide as well as a repeating graphical element to anchor our content or media. Create a large circle with these dimensions: w: 6", h: 6". Tuck it into the lower-right corner at the following x,y coordinate: 4,1.5. Step 4: Tagging Elements with ColorOpen the Swatches palette; at the bottom of your list, you should see a newly imported spot color. Apply the spot swatch color that was imported with the logo, PMS 8322, to the large circle and apply a tint of 50% so that it looks faded. Draw a square from the center out by positioning your cursor over the center point of the large circle and holding down the Option key (Mac) or Alt key (Windows) and Shift key as you draw. You will create a perfect square from the center out. Stop short of the circle's edge, and then fill this square with the color Paper. Go to the Object pull-down menu and select Corner Effects, Rounded, .5". Select the circle and the square and center these objects both horizontally and vertically to each other. Draw a small square, .5" on all sides, positioned at 5.15, 2.6. Fill it with black and tint it 50% as well. This element will frame the content of each slide. See Figure 8.6 to gauge your progress so far. Figure 8.6. The faded logo. Step 5: Working with the Pen ToolCreate an element in the upper-left corner to anchor the opposite side of the slide. I did this by taking the Pen tool and clicking the lower-left corner of the slide, clicking the upper-left corner, clicking the upper-right corner, clicking and dragging a curve point between the two corners, and then closing the shape by clicking the original starting point. Fill this with black. Use Figure 8.7 as a guide for creating this element. Figure 8.7. 1. Click to start the shape. 2. Click (don't drag) for the second point. 3. Click (but don't drag) for the third point. 4. Click and drag on top of point #1 to create the curvature.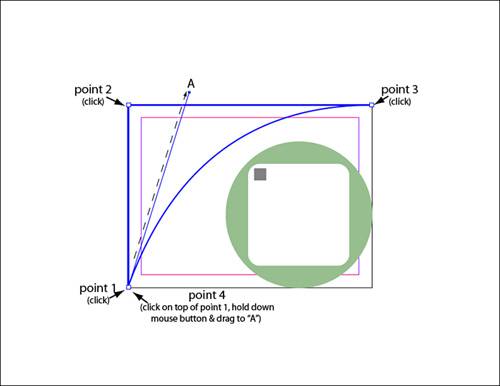 Create a rounded rectangle at the following coordinates and dimensions: x: .15", y: .15", w: 2.5", y: 1.5". Fill it with white, and place the DMLogo.eps on top of this rectangle. You will have to scale it 50% for it to fit. Select both the rectangle and logo and align the elements by centering them both horizontally and vertically. I have added one more sweeping element. Select the Pen tool and click and drag a curve point in the lower-left corner of your slide. Click and drag another curve point in the upper-right corner of your slide. Stroke this vector with 10 points, dot style; tag it with the spot color; and apply a drop shadow using the default settings. Your master page B should look like Figure 8.8. Figure 8.8. The finished Master page B. Step 6: Adding More PagesYou can add more pages to your layout a couple of ways. You can drag and drop a master into the main body of the Pages palette, or you can go to the palette menu and select Insert Pages. Use either method to insert six pages after page 1, based on the B master. Then add an eighth page based on the A master. Figure 8.9 shows what the Pages palette should look like when you're done. Figure 8.9. The Pages palette after adding the necessary pages based on the corresponding masters.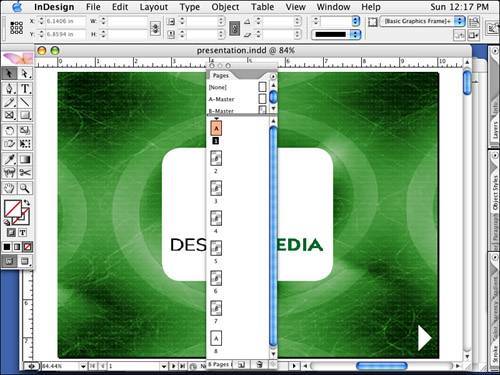 Step 7: Working with LibrariesLet's turn our attention to repeating graphical elements, namely the navigation icons we will use. We'll create a library for these elements and introduce you to this interface. Go to the File pull-down menu and select New, Library. Give it a name such as navigational icons and place it in your projects folder for Chapter 8. A new, floating palette named navigational icons should appear in your window, as shown in Figure 8.10. Now let's make some icons Figure 8.10. The empty Library palette.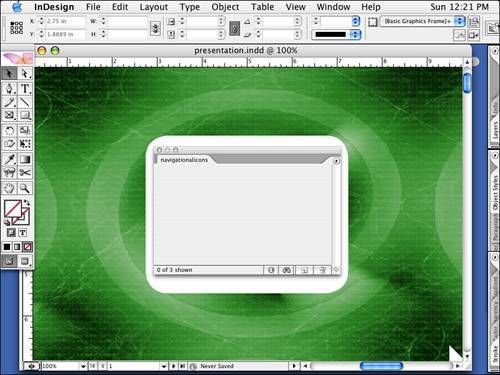 Select the Rectangle tool and click with it somewhere on your pasteboard. A dialog box will appear; type .5" for both the width and height and fill this square with black. Select the Delete Anchor Point tool, hidden under the Pen tool in the Tool palette and delete one of the points on your square. You now have a triangle! Rotate the triangle so that it points to the left. Drag and drop this icon onto your library and name it previous page. Note
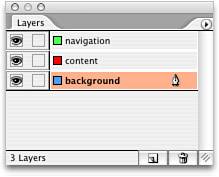
Go to the Edit pull-down menu and copy your triangle. Next, go back to the Edit pull-down menu and select Paste in Place. Go to the Window pull-down menu and select Object & Layout, Transform. Using the Transform palette menu, select Flip Horizontal. Drag and drop this triangle into your library and name it next page. Finally, create a .5" black square, drag and drop it into the Library palette, and name it home. You now have navigational icons you can drop into place (see Figure 8.11 for the finished page). Later we'll create hyperlinks for them. Figure 8.11. Your navigation icons in the Library palette.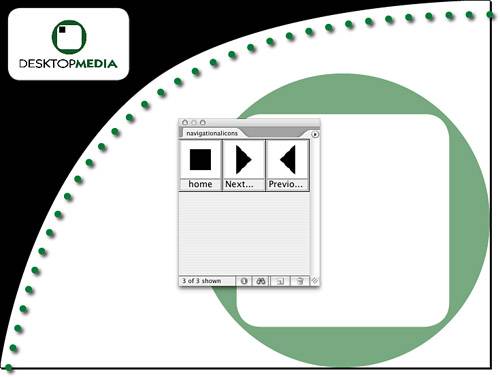 Step 8: Creating LayersNow, we're going to manage the elements on our slides with layers. Open the Layers palette and you will see Layer 1. Double-click Layer 1 and rename it background. Let's create a new layer called content by either using the Palette menu or clicking the new layer icon at the bottom of the Layers palette. Finally, create another new layer and name it navigation (see Figure 8.12). Figure 8.12. This is how the Layers palette should look. Tip
Step 9: Adding a Heading and Bulleted TextDouble-click page 2 in the Pages palette; it should look like the master page B we just finished. Note
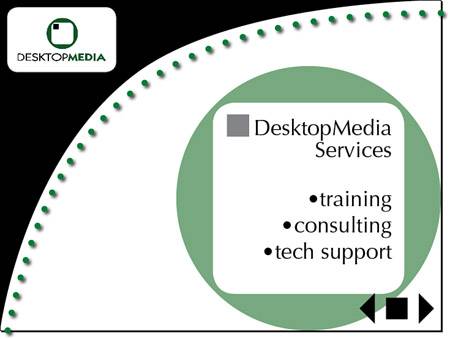
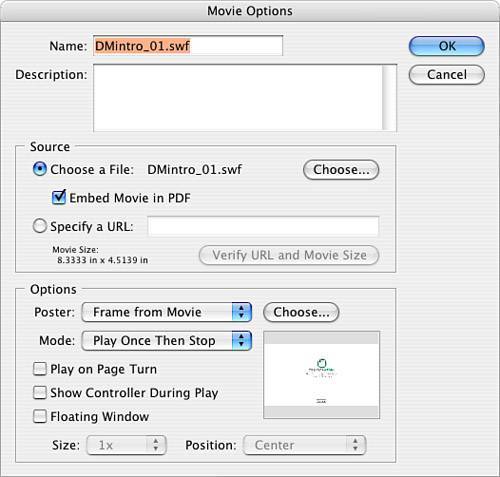
Click the content layer and then draw a text frame large enough to fit the rectangle with rounded corners on your page 2 layout. Type a title beside the 50% black square and format it as you see fit. The font should be consistent with your company standards. I've used Optima, 36 points, right-aligned. I am leaving the text black. Insert a return or two. Check your work against Figure 8.13. Figure 8.13. The slide width heading and returns; note that the carriage returns are red because the content layer is red.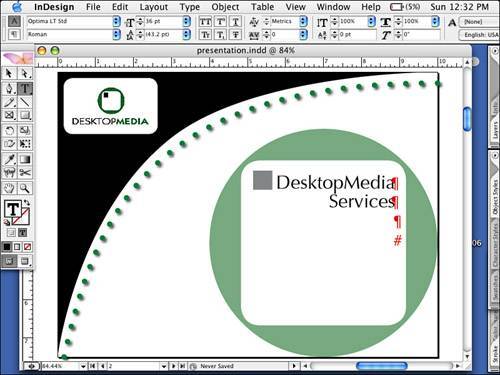 For the body of the slide, the content should probably reflect the upcoming slides. Like an outline, these main bullets will become the headings of the subsequent slides. We will make a bulleted list, but you could also make it a numeric list if you want. Step 10: Creating Style SheetsYou can find a bullet you like by going to the Glyphs palette and selecting a typeface you want you use for your headings. Again, I've chosen Optima 36-point type, 36-point leading, right-aligned. Type some headingsI've used the services of my company. If you like the way this looks, you can create a style sheet. Select the formatted text, go to the Paragraph Style palette, select New Style, give it a name, and click OK. You've now created your own new style sheet (see Figure 8.14). Now for future slides, you can simply type your text and tag it! Figure 8.14. The new paragraph style sheet.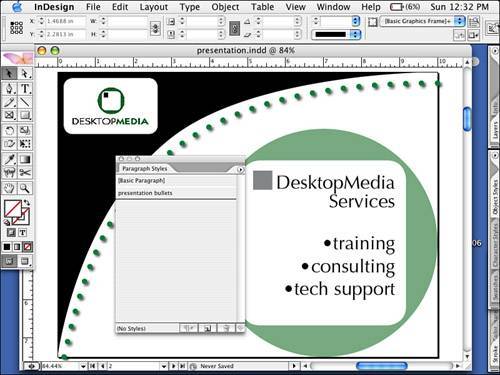 Step 11: Adding Library ElementsNavigate to page 1, click the navigation layer, and then drag and drop your next page library element down to the lower-right corner of your slide. It will probably be difficult to see, so apply a fill of Paper to this triangle. Your title slide is complete and should look like Figure 8.15. Figure 8.15. Slide one completed. Navigate to page 2 and add all three icons to the bottom-right corner of your slide. See Figure 8.16 for the completed slide. Figure 8.16. Slide two completed. Step 12: Adding Animation and MoviesNavigate to page 3. Now we are going to add a brief Flash animation. Click the Content layer, go to the File pull-down menu, and select Place. Navigate to your project files folder and select DMintro_01.swf from the list of files. Click somewhere on your pasteboard to work with the movie. Later you'll move it into position on the page. Scale DMintro to fit in the opening on the right side of the slide. With the movie selected, go to the Object pull-down menu and select Interactive, Movie Options. Here you can control how the movie looks, control how it is played, or replace it with another movie. First, select Movie Frame As Poster under Options; then browse for a frame. See Figure 8.17 to fill out your remaining options for slide three. Figure 8.17. Fill out your movie options as shown. Now you need to add a little instruction so that the recipient will know what to do once inside the PDF. Create a caption under the movie with a text box and tell the audience to click the movie to play it. You have just placed an interactive element on your page, and although you can't play the movie in InDesign, you will be able to after you make this layout a PDF. Add your three navigation icons to the lower-right corner of your slide (see Figure 8.18 for the completed slide). Figure 8.18. Slide three completed. Note
Slides one, two, and three are now complete. The next four slides should be constructed as follows:
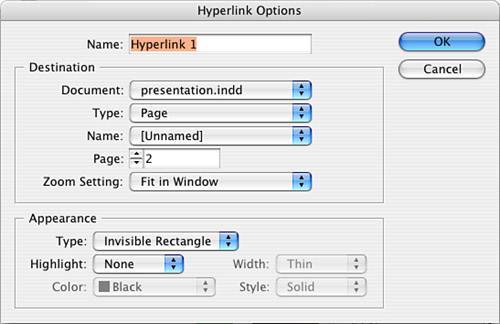
Slides two through seven should have all three library elements lined up as follows: previous page, home, next page. Navigate to slide two and line up these icons in the lowerright corner. Select all three icons and copy them to the clipboard. Navigate to the next slide and paste text in place from the Edit pull-down menu. Execute this for each slide. On slide eight (the last slide), execute the paste in place but delete the last triangle (next page) because there is no next page. Select the remaining two icons and fill them with Paper swatch. Click through all eight slides and make sure that everything looks consistent. Step 13: Creating Hyperlinks for Icon NavigationAfter all the slides are in place and will not be moved around, it's time to add the hyperlinks to the navigation icons. Navigate to the first page in your file and open the Hyperlinks palette. With the icon on page 1 selected, either select New Hyperlink from the Hyperlinks palette menu or click the New Hyperlink button at the bottom of the palette and fill out the window as shown in Figure 8.20. Figure 8.20. Hyperlink options. Note
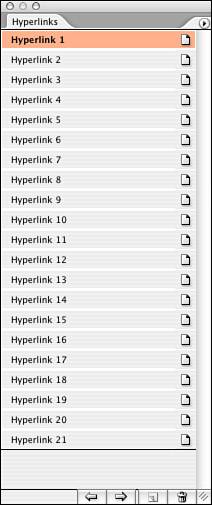
Click OK. One hyperlink down, 20 to go! Navigate to page 2, which will have three hyperlinks. Select the first icon (previous) and create a new hyperlinkonly this time you want it to hop back to page 1 and fit in the window. Select the middle icon (home) and create a new hyperlink. Home will always link to page 1. Select the last icon; create a new hyperlink; and select page 3, Fit in Window. Repeat these steps for the next five slides, with the previous icon hopping back a page, the next icon hopping forward a page, and home always hopping back to page 1. The last slide will have only a previous icon and a home icon. See Figure 8.21 for the finished Hyperlinks palette. Figure 8.21. The finished Hyperlinks palette. Caution
Save your work. At this point, your presentation is complete. Step 14: Printing a Composite ProofYou might want to print a copy of this and look at it on paper. Go to the File pull-down menu and select Print. Choose the appropriate settings for the printer that is available to you. On the General tab, go to the File pull-down menu and select Print. Again choose the appropriate settings for the printer available to you. On the General tab, choose one copy. On the Setup tab select 8.5" x 11" and Horizontal orientation. Center your output, but leave the Scale setting alone. On the Marks and Bleed tab, turn on crop marks. On the Output tab, if possible, print a color composite (CMYK) output for your work; if not, choose Grayscale. On the Graphics tab, the default settings should work. The remaining tabs can be ignored for now. Print and review your proof, make any necessary adjustments, and save your changes. Then print it again. When everything meets with your approval, it's time to export your presentation as a PDF, open the PDF, and test your interactive elements. Step 15: Exporting a PDFGo to the File pull-down menu and select Export. Make sure that the format choice is for PDF, name the resulting file, and navigate the file to your finished projects folder. Fill out the dialog box per Figure 8.22. Figure 8.22. This is how you should fill out the initial General tab. You can leave the color unchanged on the Output tab. Or, if you choose to convert to RGB, select Convert to Destination and then select an RGB profile best suited to your projector.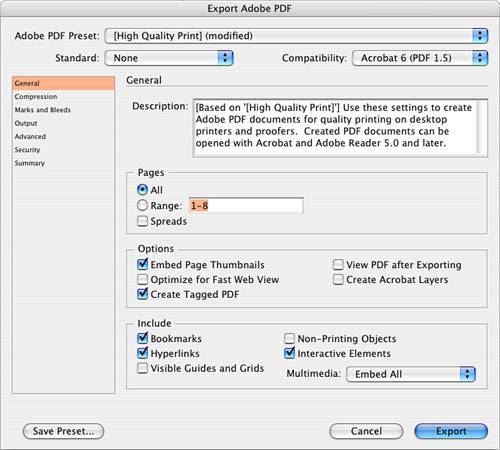 Caution
Open your PDF and inspect it for both content and interactive elements. You should be able to click the icons and move through your slides as you intended. You should also be able to play the movies by clicking them. Note
|


EAN: 2147483647
Pages: 148