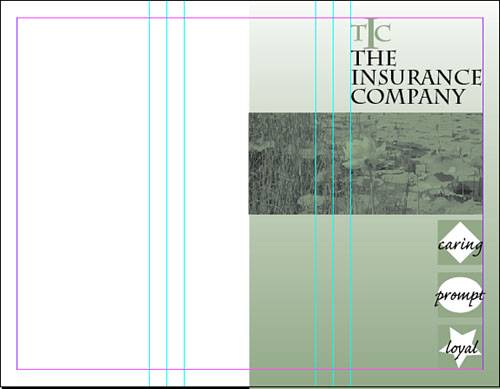
Project: Trifold Brochure
| We'll be creating a brochure in 16 easy steps: STEPS
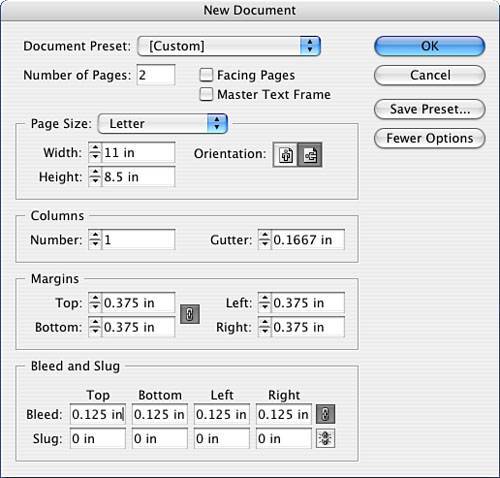
Step 1: Setting Up Your Document FormatLaunch InDesign and go to the File pull-down menu. Select New, Document and fill out the New Document window as indicated in Figure 7.1. You will be creating a two-page landscape layout with bleed, which will visually assist you in placing your background image for the CD cover. Figure 7.1. Fill out the window as indicated. Step 2: Placing GuidesLet's create some guides and position them along the fold lines. Check with your print service provider to find out whether they want actual stroked lines (often they are dashed lines) or whether the guides alone will suffice because the printer will add fold marks during production. Often, fold indicators are placed outside the trim edge of the page, just like crop marks. First, go to the master page by double-clicking Master A in the Pages palette. Go to the Layout pull-down menu, select CreateGuides, and fill out the resulting dialog box as indicated in Figure 7.2. Figure 7.2. Fill out the window as indicated for this three-column setup. The rules you are creating will act as fold rules or guides.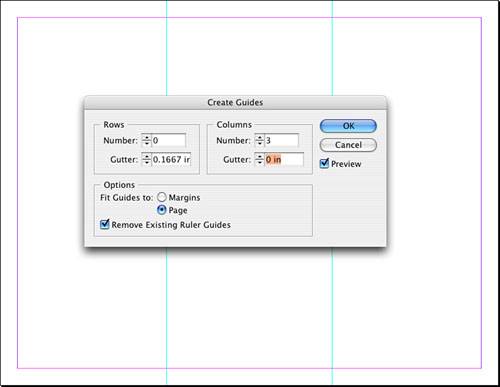 Now, let's set margins for the individual columns. Click the first guide you just created and take note of its x coordinate, which should be about 3.667". Drag a ruler guide from the left ruler and drop it just to the left of the first guide. With it still selected (click it and it should change color to indicate it is selected), go to the x coordinate box and type in 3.667-.375". Your new ruler guide will snap to 3/8" from the left of the guide. Tip
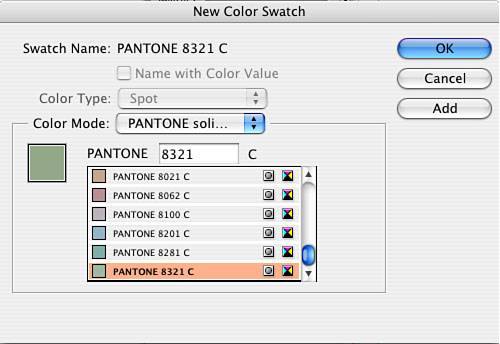
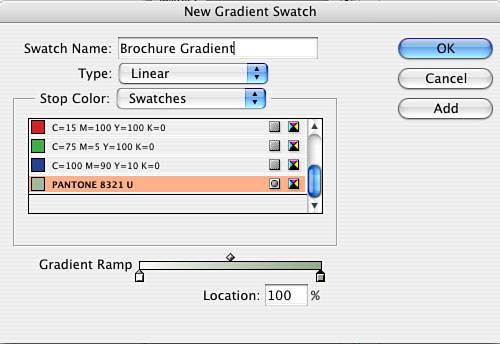
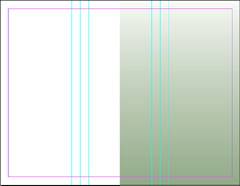
Drag another rule to the right of your fold guide and, with it still selected, type 3.667+.375" in the x coordinate box. Your new rule should snap 3/8" to the right of the fold guide! Repeat these steps with your other fold rule. Double-click page 1 in your layout; the results should look like Figure 7.3. Figure 7.3. The finished results! Experiment with math in the control palette; try adding inches and picas togetherfor example, 1.24" + 3p0.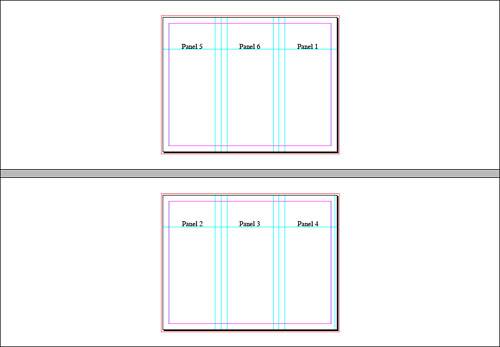 Step 3: Adding a SwatchLet's add a swatch. This will be the second color for the brochure. You might use your company's color or choose a color complementary to a product or service line. For this project, I've chosen PANTONE 8321. Go to the Swatches palette, pull down the Swatch palette menu (triangle), and fill out the dialog box according to Figure 7.4. Figure 7.4. Choose a spot color. Note that I have chosen a coated spot color because I am going to use a coated stock. Always choose your colors based on printed samples. PANTONE offers swatch fans with PANTONE colors printed on both coated and uncoated stock. Step 4: Creating a GradientGo back to the Swatches palette and pull down the menu once again, except this time select New Gradient Swatch. Give the new gradient a name, such as brochure gradient, and click the first stop (the little square) on the gradient color ramp (the bar at the bottom of the screen containing graduated color). If PANTONE 8321 isn't already selected, click it and the stop will fill with that color. Click the other stop to assign a different color, scroll through your list to Paper, and click it (see Figure 7.5). Click OK. You should see a new gradient swatch in your palette. Figure 7.5. This is how the New Gradient Swatch dialog box should be filled out. Step 5: Directing a GradientLet's create a rectangle with the following coordinates: x: 5.5", y: .125", width: 5.6375", height: 8.75". Tag the fill of the box with your new gradient swatch. Select the Gradient tool in the Tool palette and drag it vertically, starting at the bottom of the box straight up (hold down the Shift key) to the top of the box (see Figure 7.6). Figure 7.6. This is how your layout should look so far. Step 6: Importing a LogoGo to the File pull-down menu, select Place, and navigate to the Chapter 7 project files folder. Select logo.eps and drag the logo to the far right panel. Tuck it into the upper-left corner intersection of your margin guide and ruler guide (the x,y coordinate should be 7.705,.375). Note
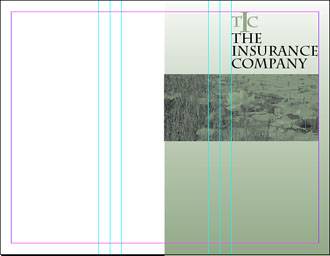
Step 7: Creating the Title for the BrochureDraw a text frame to line up with the left margin of panel one, line up under the logo (approximately y: 1.215), and line up on the right margin with a height of 1.25. Type in your headline with whatever font you choose. I have used Charlemagne Std, Bold, 32-point type and 30-point leading. Use Figure 7.7 to monitor your progress. Figure 7.7. Here's how your logo and title should look. Step 8: Placing an Image and Coloring ItNow let's place an image and do something different. Draw a picture frame with the following coordinates and dimensions: x: 5.5", y: 2.475", width: 5.625", height: 2.25". Go to the File pull-down menu and select Place. Navigate to the Chapter 7 project files folder and select lilly1gray.tif. Use the Direct Selection tool and click and hold your mouse down over the image. You should see another vector and a dimmed image representing the entire picture as well as the frame you drew representing the cropped area. Position the image so the lily is somewhat centered in the frame. Now, let's apply color to the background. With your rectangle frame tool selected (not the picture itself), go to the Swatches palette. With the Fill swatch selected (clicked forward), click your spot color. The background of the picture box should change. This is a nice effectnot quite a duotone, but a nice effect nonetheless (see Figure 7.8). Figure 7.8. The image should extend all the way to the bleed. Step 9: Creating Graphical ElementsSomewhere off on your pasteboard (the area on either side of your pages), we are going to make some graphical elements that will repeat through the layout. They will anchor the cover panel and be used again to distinguish three areas of your company, service, or product. Let's start by making a square 1" in dimension. Color the fill of this square with your spot color. Make two more by dragging your square and holding down the Option (Mac) or Alt (PC) key. This is known as a drag copy. Let go of your mouse before you let go of the Option key and you will create a copy. Your goal is to create three squares. Let's create different graphics to layer on top of these squares. I have chosen a diamond, an oval, and a star, but feel free to experiment and draw your own using your Rectangle, Ellipse, and Polygon tools. To make the diamond, I drew a square and then rotated it. The oval is self-explanatory. I created the star by first double-clicking the Polygon tool found in the same place you also found the oval and then setting the star attributes to 5 points and 40% inset. We'll refer to these three graphical elements as icons now. Select each pair of objects (icons) and align their centers using either the Control palette or the Alignment palette. Next, I drew a text frame across the middle of each icon and typed in three action words to describe the company or service. They will serve as subheads on the inside of the brochure. Choose whatever type you like. I've used Caflisch Script Pro Regular, 34 points. After you tweak the three elements of each icon, group them together by selecting the multiple elements (Shift-clicking) and selecting Object, Group. Stack the icons down the right side of your front panel, and align the right sides of your icons with the right margin. Your front panel is done! You can use the Alignment palette, select all three icons, and choose to align their right edges. You can also use the Distribute Vertical Centers option. Review your work by comparing it to Figure 7.9. Figure 7.9. The logos, stacked down the right side of the front panel. Step 10: Transforming ElementsIf you want to make this brochure a selfmailer, the next few elements will be important. As I've indicated in previous chapters, it's extremely important that you understand postal regulations and ensure that the placements of the return address and the addressee are compliant. Make sure your addressee area is not so low that the post office's automated postal readers can't scan the address or barcode. If this is not going to self-mail, design this panel vertically with the company logo and contact information. Let's place another logo. Go to the File pulldown menu, navigate to your projects folder, and select logo.eps again. Click your cursor on the middle panel. Scale the logo to 75% by using the Scale fields in the Control palette. Now rotate the logo 90° and fit it to the intersection of the top margin and the leftmost of the three vertical guidelines on the right. Draw a text frame 2.75" wide and 1" high. Type in the company name and addressagain, choose whatever font you want. Rotate this box 90° and tuck it under the logo. Create the last element on this panel by creating a text box with a width of 3.5" and a height of 1.25". Stroke the box with 4 points and color the stroke with your spot color. Rotate the box 90° and place the addressee box slightly overlapping both the image and the gradient. Again, the position should be in keeping with your postal regulations. As an optional exercise at the end of the chapter, I cover the great new feature of InDesign CS2: mail merge. So, if you want to produce a piece such as this in house, you can merge this file with your own data. See the completed middle panel in Figure 7.10. Figure 7.10. The completed panel.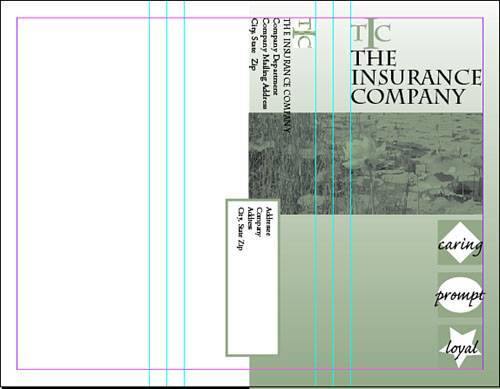 Step 11: Creating Text WrapThe last panel of the brochure tells the company story. Create a frame that fits from the bleeds on three sides to the first fold line and fill it with your spot color. Draw another frame, a text frame, to fit the margin guides for this panel. Go to the Type pull-down menu and select Fill with Placeholder Text. Type in a subhead at the beginning of this text box for this panel, such as The Company Story, and format it in larger type. Draw another rectangle that is 1" wide and .75" high. Fill it with paper and move it to the upper-left corner of your brochure to fit the margins. Place another copy of the logo on top of this white box and center these two elements to each other using the alignment buttons found in the Control palette. Group these elements together. Let's wrap the text around it. Go to the Window pull-down menu and select Type & Tables, Text Wrap. A new palette appears. Choose the second icon, Wrap Around Bounding Box, and you should see the text wrap. Feel free to tweak the wrap by changing the values in the Offset fields or moving the bounding box with the Selection tool. Review your work with Figure 7.11. Figure 7.11. The company story. Save your work in your finished projects folder. Step 12: Fitting Content to FrameLet's move on to the inside of the brochure. Advance to page 2 (either by clicking next to the page number at the bottom of the window or using the Page palette and double-clicking page 2). Draw a picture box to fit the entire inside of the brochure, including the bleed. Place the lilly1gray.tiff image inside this rectangle frame. With the frame selected, go to the Object pull-down menu and select Fitting, Fit Content to Frame. Don't worry about distorting the imagethat's intentional. Open the Swatches palette and drag and drop the spot swatch on top of the lily picture. Unlike the cover panel, where the background was colored and the image itself remained black, the image will change to the spot color. The image will look faded and will become the background of the inside of the brochure (see Figure 7.12). Figure 7.12. The inside panels. Step 13: Creating and Linking Text BlocksDraw three separate text frames to fit the three columns, each with a y coordinate of 1.5" and a depth of 4.25". Link them together by clicking with the Selection tool, the out port from text box 1 to anywhere in text box 2. Click the out port of text box 2 and anywhere in text box 3. Click in text box 1 with the Text tool and select Fill with Placeholder Text from the Type pull-down menu. Select all the text and format it with your chosen typeface, using 12 points and a first line indent of 12 points. Make sure guides and frame edges are turned on under the View pull-down menu. Go back to page 1, select all three icons, and copy them to the Clipboard. Move back to page 2 and paste the three icons down onto the page. Position each icon in the upper-left corner of each margin intersection of each panel (see Figure 7.13). Figure 7.13. The inside panels with background image, icons, and placeholder text.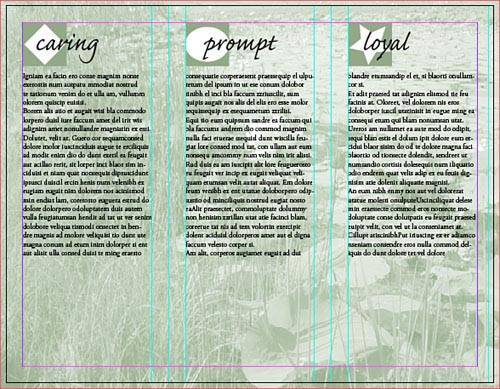 Step 14: Using the Pen ToolIf you are up to the task of creating a wavy vector, select the Pen tool and click and drag a wavy line across the inside spread beginning on the left bleed and ending on the right bleed. Format the line to 20 points, using a dotted style. Tag the line with your spot color, go to the Object pull-down menu, and apply a drop shadow. If you are not up to the pen work, simply create a straight line across the inside spread and format it in the same way. Position this rule around y 6". Below this rule draw a text box all the way across the bottom of the brochure from margin to margin. The coordinates and dimensions are as follows: x: .375", y: 6.625", width: 10.25", height: 1.125". Fill the box with placeholder text and format the text with your company typeface (I've used Adobe Garamond Pro, semibold, 12 points). The last element is another text box. Draw it below the last line from the far left margin to far right margin. Type in one headline referencing the copy above. Format the text. I have used Caflisch Regular, 40 points, centered. With your arrow keys, move the box down so that the baseline of the text sits on the bottom margin. Figure 7.14 shows the inside panel finished. Figure 7.14. The completed page 2.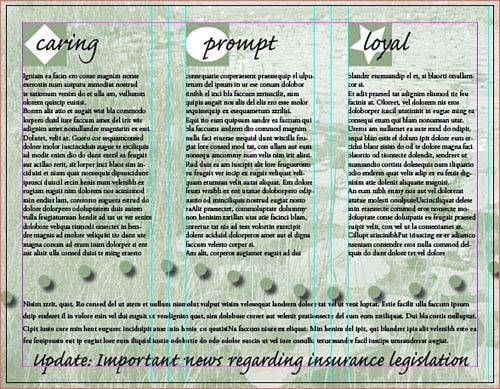 Save your work. Step 15: Printing a Composite ProofYou might want to print a copy of this and look at it on paper. Go to the File pull-down menu and select Print. Choose the appropriate settings for the printer that is available to you. On the General tab, go to the File pulldown menu and select Print. Again, choose the appropriate settings for the printer available to you. On the General tab, choose one copy. On the Setup tab, select 8.5" x 11" and vertical orientation. If your brochure has images or elements that bleed and you want to see that, print to something larger than 8.5" x 11". Leave the Scale setting as is. On the Marks and Bleed tab, turn on crop marks. On the Output tab, if possible, print a color composite output for your work; if not, select Grayscale. On the Graphics tab, the default settings should work. The remaining tabs can be ignored for now. If you cannot print to a tabloid size paper, you have to reduce the layout in the Setup Tab using the Scale to Fit feature. Be sure to mark the composite proof as "scaled" so your service provider understands that the proof does not represent your job as the actual size. Print and review your proof. Make any necessary adjustments, save your changes, and print it again. Step 16: Optional Exercise: Data MergingGo back to page 1 and look at the middle panel. Assuming you intend to create a selfmailer, look closely at the box you've created for the addressee. If you were going to produce this piece in-house, wouldn't it be nice if you could merge your list of addresses with your InDesign document? Now, in CS2 you can! Your data source for this exercise can be a comma-delimited file or a tab-delimited file, meaning your data is separated by commas or tabs. This can be accomplished in most database or spreadsheet applications when you save the filelook for file format options and choose accordingly. For this exercise, we'll use a file called text.txt. Zoom in on the middle panel of page 1 and remove any copy inside the addressee text box. Go to the Window pull-down menu and select Automation, Data Merge (see Figure 7.15). Figure 7.15. The new Data Merge palette. The Data Merge palette actually steps you through the process because the directions are housed right in the palette window. Follow the instructions by first selecting the data source file from the palette menu (click the triangle and select Data Source) making sure that you choose the tab-delimited option for your text. Navigate to text.txt in the Chapter 7 project files folder, select the file, and click Open. You will see a list of all the headings from the file appear in the palette (see Figure 7.16). Figure 7.16. The Data Merge palette with your imported data source data fields. Make sure there is a text insertion point in your box and click on the first data field in the Data Merge palette (in our project example, that's Contact First). Press the spacebar and click Contact Last; then press Return and click Company. Press Return again, click Street, press Return, and click City, State, Zip until your text box looks like Figure 7.17. Figure 7.17. Your text box with the data fields in place.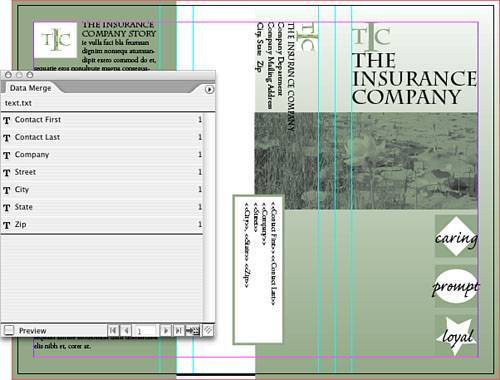 Now you are ready to merge. If you want to see a preview of the merge, select Preview from the Palette pull-down menu. Now you are ready to create a merged document. Go to the Palette menu and select Create Merged Documents. For the purpose of this exercise, merge all the records and leave the rest of the settings at their defaults. Click OK. InDesign creates a separate untitled file, which is the merged document with a new page generated for each record. Your original is preserved and is referred to as the target document. After you've inspected your merged document for any errors, you are ready to send your file to your output device. Figure 7.18 illustrates a sample merged document. Figure 7.18. The finished merged document.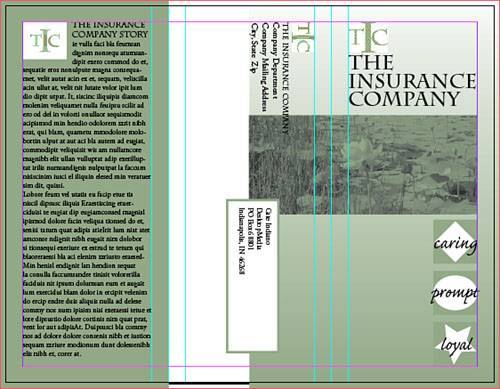 |

EAN: 2147483647
Pages: 148
- ERP System Acquisition: A Process Model and Results From an Austrian Survey
- The Second Wave ERP Market: An Australian Viewpoint
- Enterprise Application Integration: New Solutions for a Solved Problem or a Challenging Research Field?
- Data Mining for Business Process Reengineering
- Intrinsic and Contextual Data Quality: The Effect of Media and Personal Involvement