Section 11.2. Forms-Based Authentication in Detail
ASP.NET 2.0 forms-based security is based on a set of tables that must be created in your database, typically SQL Server or SQL Server Express. Fortunately, ASP.NET provides a utility named aspnet_regsql.exe , located in the <Drive:>\Windows\Microsoft.NET\Framework\versionNumber folder on your Web server, that sets up the tables for you. (The version number will be determined by which version of the 2.0 framework you have installed on your machine.) This utility program will create the required database and all its tables.
The easiest way to use this utility is to run aspnet_regsql.exe utility from the .NET command box with no arguments. A wizard will be started that will walk you through the process.
|

The database is .\SQLEXPRESS , the authentication type is Windows, and the name of the db is aspnetdb . For more details, see the MSDN article "Installing the SQL Server Provider Database".
11.2.1. Create the Application
To begin, create an empty directory called Security . In the IIS manager (accessed through the Control Panel), create a virtual directory to point to the Security folder, and after it is created, right-click the new virtual directory and select Properties.
In the Properties window, click the ASP.NET tab, and then click Edit Configuration. Within the ASP.NET Configuration Settings dialog, click the Authentication tab, and within that tab, set the Authentication mode to Forms , and the Membership provider class to AspNetSqlMembershipProvider , as shown in Figure 11-5.
Click OK to close all the dialogs. A web.config file is created (or updated) for you in the Security folder, as shown in Example 11-1.
Figure 11-5. Set Authentication to Forms

Example 11-1. web.config file generated
<?xml version="1.0" encoding="utf-8"?> <configuration xmlns="http://schemas.microsoft.com/.NetConfiguration/v2.0" <system.web> <authentication mode="Forms" /> <membership defaultProvider="AspNetSqlMembershipProvider" /> </system.web> </configuration>
In VS2005, create a new web site in the same location. A dialog box will open warning that you have a web site in that location; choose Open Existing Site, as shown in Figure 11-6.
Figure 11-6. Open Existing Site
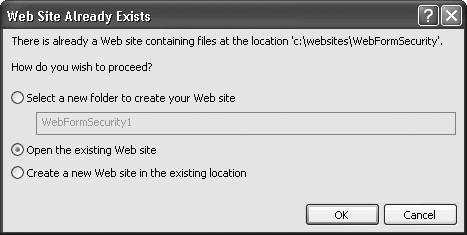
This instructs Visual Studio to use the site you've created, complete with the web.config file available for that site.
11.2.1.1. Creating accounts
Your initial goal will be to have two pages: a default page that displays different information to users who are logged in than to users who are not yet logged in and a login page that allows the user to log in.
To have users log in, however, you must create a database of users. So, you'll want a page that lets your users create an account. Let's start there, by creating a new page called CreateAccount.aspx . Click the Website  Add New Item menu item or right-click the top level folder in the Solution Explorer and select Add New Item. From the Add New Item dialog, select Web Form and type in the form name. Be sure to select the correct language from the drop-down.
Click the Design tab for your page, and then click the Login tab in the toolbox. Drag an instance of CreateUserWizard onto your page, as shown in Figure 11-7.
Figure 11-7. CreateUserWizard
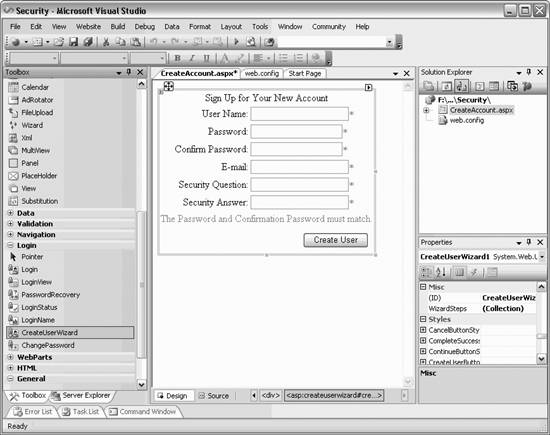
The CreateUserWizard prompts the user for a username, a password (twice), an email address, and a security question and answer. All of this is configurable through the declaration is created by this control in the content file or, more commonly, through the smart tag, as shown in Figure 11-8.
Figure 11-8. CreateUserWizard tasks
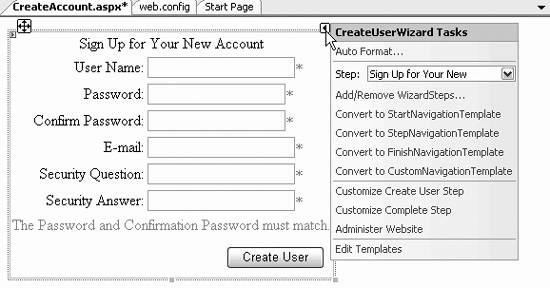
Click on the control and scroll through the Properties window to find the ContinueDestinationPageURL . Click the Browse button and choose the create account page ( CreateAccount.aspx ), so you'll be brought back to the same page after the new user is confirmed. Finally, set the CreateAccount.aspx page as your Start page and fire up the application. You will be prompted to add a new user, as shown in Figure 11-9.
Figure 11-9. Testing Create Account wizard
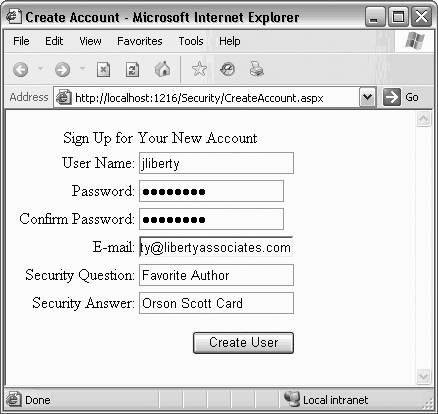
When you click Create User, the account is created, and you are brought to a confirmation screen. Click Continue, and you are brought back to the Create Account screen to create a second account.
|
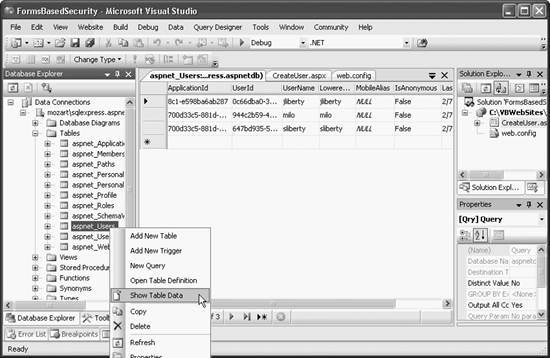
Add a couple of accounts, stop the application, and examine your database. You should find that within SqlExpress a database named aspnetdb has extensive tables, including the aspnet_Users table, which you can display by right-clicking and choosing Show Table Data, as shown in Figure 11-10.
Figure 11-10. Personalization Database Updated
11.2.1.2. Creating the welcome page
With your user database in place, you are ready to create your welcome page that will welcome the logged in user.
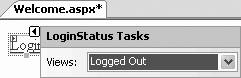
Add a new page called Welcome.aspx . Drag a LoginStatus control from the Login section of the toolbox onto the new page.
A link marked Login is placed on the page. Click the smart tag and you'll see you are looking at the template for when no user is logged in, as shown in Figure 11-11.
Figure 11-11. Not Logged In
You can set the properties of the LoginStatus control, for example, to change the text of the link with the Login Text and Logout Text properties. You can also drop down the view window to see the link and text for Logged In status.
Drag a LoginView control from the toolbox, and drop it onto the page below the LoginStatus control. Here you may enter text and controls that will be displayed based on whether or not the user is logged in. This control has two views, visible from the smart tag: Anonymous Template and Logged In Template. Which template's contents will be displayed will be decided by whether or not the user has yet logged in.
Click on the smart tag and confirm that the view is set to Anonymous Template and type some text in the box, as shown in Figure 11-12.
Figure 11-12. Not Logged In view

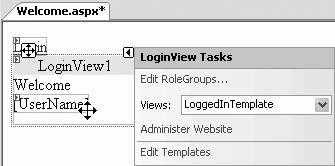
Now set the LoggedInTemplate . Since the user will be logged in when this template is displayed, you can use the LoginName control to welcome the user by name. After typing some text onto the LoginView template, drag the LoginName control right onto the LoginView template, as shown in Figure 11-13.
Figure 11-13. The Login Name control
11.2.1.3. Creating the Login page
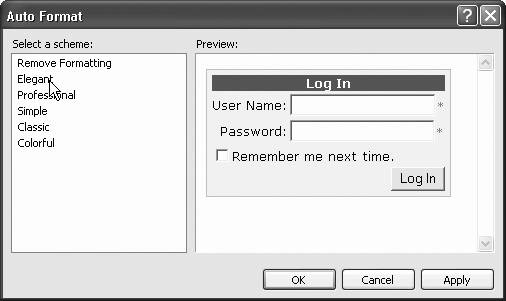
You are ready to create the Login page for users to log in to the system (after having created an account). Add a new page named Login.aspx . Change to Design view, and drag a Login control onto the page. To make this look a bit more professional, click on the AutoFormat link from the smart tag, as shown in Figure 11-14, and pick one of the predefined formats for the control, as shown in Figure 11-15.
Figure 11-14. Creating the Login control
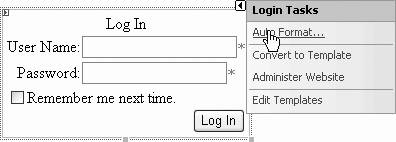
Figure 11-15. Pick Auto Format for Login control
Make sure that the Welcome page is the start page and run the application. The welcome page will display its "Not Logged In" message. Click the link to go to the log in page.
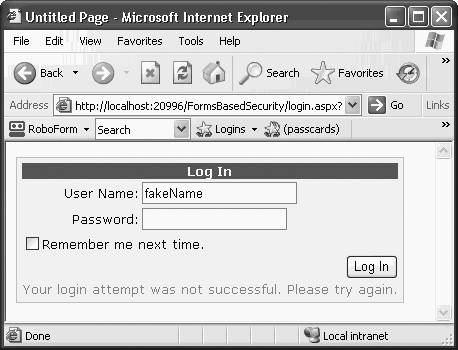
Enter a false name or an incorrect password. The Login control will show you your mistake, as shown in Figure 11-16.
Figure 11-16. Incorrect Logins are caught
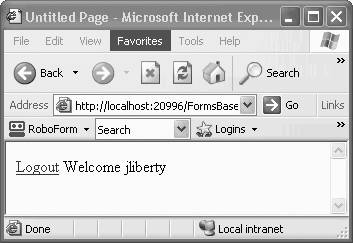
Enter the correct name and password, and you are brought back to the Welcome page. Your status as logged in is noted, you are greeted by name, and you are offered the opportunity to log out, as shown in Figure 11-17.
Figure 11-17. Logged In view
11.2.2. Adding a Password Reminder
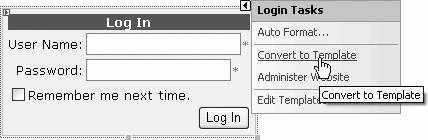
To add a password reminder, you must change your existing login control to a template by clicking on the smart tag and choosing "Convert to Template," as shown in Figure 11-18.
Figure 11-18. Convert to Template
The display will change to a template you can modify, adding a link titled (for example) Recover Password, as shown in Figure 11-19.
Set the NavigateURL to the name of the page that will hold your PasswordRecovery control, and then click the smart tag and choose End Editing.
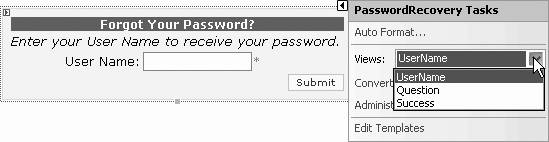
Your next step is to create the new .aspx page to link to ( RecoverPW.aspx ). Drag a PasswordRecovery control onto this new page, and click the smart tag to choose the view you wish to edit, as shown in Figure 11-20.
In the Properties window for the PasswordRecovery control, set the SuccessPageUrl property to Login.aspx . You may want to confirm or change the Success text and other text fields (e.g., QuestionInstructionText , QuestionLabelText ).
|
Figure 11-19. Adding Password hyperlink to Login Template
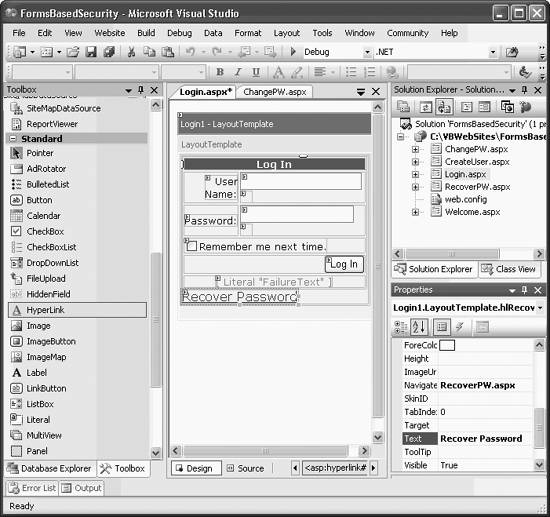
Figure 11-20. Password Recovery control
On the Welcome page, add a link to ChangePW.aspx (which you'll create shortly), and while you're at it, add a link for CreateAccount.asxp in case you want to add any additional users.
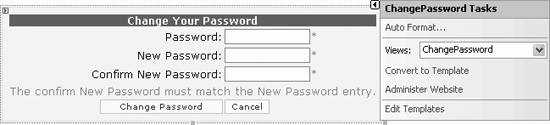
Create the ChangePW.aspx page and drag on a ChangePassword control (see Figure 11-21). Use the smart tag to format the control to match the others you've created.
Set the ContinueDestinationPageURL property to Login.aspx . On Login.aspx , make sure the DestinationPageURL property of the Login control is set to Welcome.aspx. You may want to confirm or change the Success text as well as the other text fields (e.g., ChangePasswordTitleText , ChangePasswordFailure text).
Figure 11-21. Change Password Control
Run the application. You should be able to log in and out, change your password, and so forth. You have added the essential aspects of form-based security without writing any code.
EAN: 2147483647
Pages: 173