| Web sites tend to reuse many of the same elements and layout from page to page. This provides a consistent look and feel across the entire site. It also speeds up development time when you can reuse your images and code. You can, of course, cut and paste your images and layout elements from page to page. This approach, however, is not without its own problems. For example, changing the layout on one page means that you have to make the same changes by hand on all your pages, which can be tedious and prone to mistakes. Dreamweaver's solution to this error-prone process of reusing page layouts is templates. Dreamweaver templates are special documents you can build that contain the layout for your site's pages. The template contains the structure and elements used for page layout, along with regions you designate as editable that will be used later for adding content. When you use a template to create a page, it remains attached to that template even after the unique content of the page is added (unless you detach it yourself). This lets you make changes to the template document and have those changes applied to all pages that are attached to it, a very powerful ability that saves you time and helps prevent errors. There are essentially two ways to create templates in Dreamweaver. You can create a template document from scratch or use an existing document as a template. NOTE No matter which method you use to create a template ”making it from scratch or saving an existing document as a template ”Dreamweaver places the template in a folder named Templates in your site's root folder. If this folder does not exist, it is automatically created when you save your first template.
Starting a New Template There are two ways to create a new template document in Dreamweaver. The first and most obvious method is to use the File menu, like so: - Select File, New.
- In the New Document dialog box, select Template Page under the General tab.
- Select the type of template page to create from the Template Page list. Unless you're using a server-side technology such as ASP or ColdFusion, select HTML Template.
The second way to create new templates is in the Assets panel. This is convenient because the Assets panel is also the place where you keep track of and use your templates. To use the Assets panel, do the following: - Select Window, Assets to open the Assets panel.
- Select the Templates category (see Figure 6.17).
Figure 6.17. The Templates category of the Assets panel is the place to create and use templates for your site. 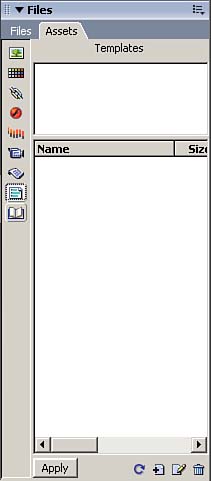
- Click the New Template button at the bottom of the Assets panel, or select New Template from the context menu. An untitled template document is added to the list.
- Enter a name for the template.
- Click Edit to open the document.
Saving a Document as a Template You can also choose to save an existing document as a template by following these steps: - Open the document in the Document window.
- Select File, Save As Template.
- In the Save As Template dialog box, enter a name for the template.
NOTE If you add a template region to a document that is not already a template (using the Insert, Template Objects command, for example), Dreamweaver automatically converts the document into a template. Unless you disable it, a warning dialog box pops up informing you of this when you add a template region.
Either method you use to create templates places them in the Templates folder in the site's root folder. Creating Editable Regions After you have created a template and designed your layout, you need to indicate which sections can be edited in documents that use the template. When you choose which parts of the document are editable, the rest of the document is locked from accidental changes. All templates need to have at least one editable region to be useful. If you try to save a template with no editable region, Dreamweaver will give you a warning message. An editable region must contain an entire block in your document. If you are using a table for layout, you can make the entire table editable or just an individual cell . You can make multiple cells of the table part of the same editable region if you don't make the entire table editable. To create an editable region on a template, do the following: - Select the region you want to make editable.
- Select Insert, Template Objects, Editable Region. You can also (Ctrl-click) [right-click] and select Templates, New Editable Region from the context menu or select the Editable Region button on the Templates category of the Insert bar.
- In the New Editable Region dialog box, enter a unique descriptive name for the region (see Figure 6.18). You can use spaces, but not any characters that are used to define HTML or JavaScript elements such as question marks, quotation marks, curly brackets, or angle brackets.
Figure 6.18. A descriptive name for your editable region helps you easily identify the purpose for the section. 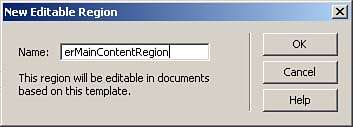
- Click OK to finish adding the region. The editable region is displayed in the designer as a box with a tab showing the region's name (see Figure 6.19).
Figure 6.19. Editable regions are shown in the template as a box with a tab indicating the region's name. 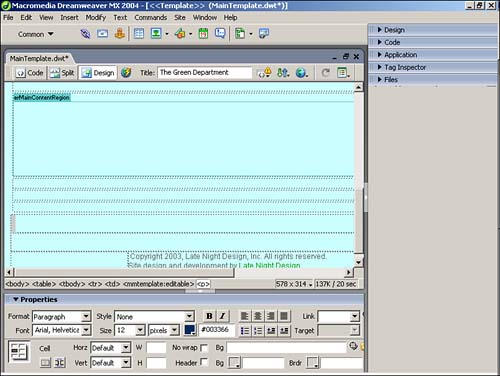
TIP You might decide later that a region you previously marked as editable should be locked. You can remove editable regions by selecting the region you want to detach and selecting Modify, Templates, Remove Template Markup.
Creating Optional Regions Dreamweaver allows you to mark regions as optional. Optional regions can be used to specify content that may or may not be shown in the final document. Thus, if certain pages need to show repetitive content ”such as a disclaimer or copyright notice ”and others don't, you can turn the optional regions on and off as each page requires. In Design view, the tab of the optional region is preceded by the word if . Based on the condition set in the template, a template user can define whether the region is viewable in pages she creates. Here's how to insert an optional region: - Select the element or section you want to make optional.
- Select Insert, Template Objects, Optional Region from the menu. You can also select Templates, New Optional Region from the context menu or click the Optional Region button on the Templates category of the Insert bar.
- Specify the options for the region in the Optional Region dialog box. These options are described in the next section.
- Click OK to create the optional region.
Setting Optional Region Options Optional region options are set in the New Optional Region dialog box (see Figure 6.20). This dialog box is used to set template parameters and define the conditional statements that determine whether the optional region should be shown. Figure 6.20. The New Optional Region dialog box is used to specify parameters and conditional statements used to control an optional region's display. 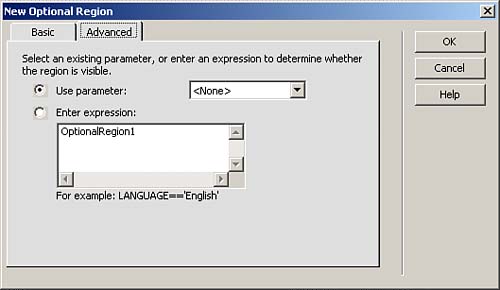
On the Basic tab of the New Optional Region dialog box, you can define a new template parameter for the region. Template parameter values can be set for each page that uses the template and are used to determine whether the region is displayed. If you have multiple optional regions, simply use the same parameter name for each one. To define a template parameter, do this: - Open the New Optional Region dialog box for an optional region.
- In the Basics tab, enter the name of the parameter.
- Make sure Show By Default is checked if you want pages created with this template to have this parameter set to TRUE by default. Uncheck it if you want the region to be hidden by default.
- Click OK.
You can also choose existing template parameters from a pop-up menu by clicking the Advanced tab and selecting the parameter you want to use. Note that only existing para meters are displayed in this menu. Editable Optional Regions Editable optional regions can be added as well. To add an editable optional region, follow these steps: - Position the pointer where you want the region positioned in the document. A selection can't be changed into an editable optional region, so do not select any elements or text.
- Select Insert, Template Objects, Editable Optional Region, or click the Editable Optional Region button on the Templates category of the Insert bar.
- Specify the options for the region in the Optional Region dialog box as described previously.
- Click OK to create the editable optional region. It is shown in the editor with tabs for both the editable and optional content.
Creating Repeating Regions Templates can also contain regions that repeat. Repeating regions are used to allow the template's user to expand sections of the document in a controlled manner. For example, a template might have a table to which the template author can add new rows. Making a row of the table repeatable enables the table to expand without requiring that you give up control of the layout. Repeating Tables A repeating table can be used to provide a structured way to expand a document. The table row can contain one or more editable cells that the template user can fill with content. To insert a repeating table to a document, do the following: - Put the insertion point in the document where you want the table.
- Select Insert, Template Objects, Repeating Table from the menu. The Insert Repeating Table dialog box appears (see Figure 6.21).
Figure 6.21. You can also click the Repeating Table button on the Templates category of the Insert bar to open the Insert Repeating Table dialog box. 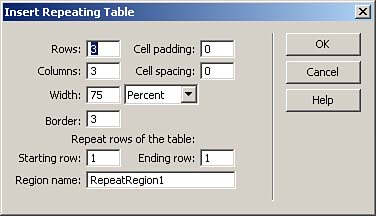
- Enter the values for the table in the dialog box. Rows, Columns, Cell Padding, Cell Spacing, Width, and Border are standard table attributes that you can set accordingly . The following parameters are unique to repeating tables:
-
Starting Row ” Specifies the first row to use in the repeating region. By default this is row 1, but it can be changed if the first row contains information, such as column headings, that shouldn't be repeated. -
Ending Row ” Specifies the ending row of the table to use as the repeating region. This can be the same as the starting row for simple tables, or it can be one or more rows later to repeat more complex table layouts. -
Region Name ” Lets you specify a unique name for the region. - Click OK to insert the table.
Repeating Regions A more freeform repeating option is the repeating region. Repeating regions typically contain tables, but they can also contain other elements and attributes. Repeating regions are not editable by themselves, but they can contain one or more editable regions inside themselves to allow the region to be customized. To create a repeatable region, do the following: - Either select the existing content you want to make into a repeating region or place the insertion point where you want it to go.
- Select Insert, Template Objects, Repeating Region from the document menu, or (Control-click) [right-click] the document and select Templates, New Repeating Region from the context menu. The New Repeating Region dialog box appears (see Figure 6.22).
Figure 6.22. The New Repeating Region dialog box is used to give a unique name to a repeating section of a template. You can also open the dialog box by clicking the Repeating Region button on the Templates category of the Insert bar. 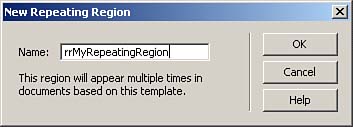
- Enter a unique name for the region in the New Repeating Region dialog box.
- Click OK.
- Insert one or more editable regions in the repeating region to enable the template user to customize it.
Making Attributes Editable To allow the template user to set certain attributes of an element, but not control anything else about it, you need to make certain attributes editable. For instance, you might want to allow a different iconic image in the heading of the page and allow the template user to specify a new value for the src attribute. You could make only this attribute editable while leaving other attributes locked, such as the height and width. To create an editable attribute for an element, follow these steps: - Select the element in the Document window.
- Select Modify, Templates, Make Attribute Editable from the main menu. The Editable Tag Attributes dialog box appears (see Figure 6.23).
Figure 6.23. Templates can have elements that are locked but contain editable attributes. 
- Select the attribute you want to make editable from the list. Only attributes that are currently defined for the element are shown ”if the one you want isn't shown, click Add and enter the attribute name.
- Check the Make Attribute Editable box.
- Enter a descriptive label for the attribute in the Label field. This is necessary to make it easier to identify what the attribute is for when a template-based page is created.
- Select the type of attribute. This tells Dreamweaver what type of data the attribute contains and how to prompt the template user for a value. Select one of the following:
-
Text ” Specifies a text element. For example, use this for alignment attributes so the user can enter left , center , or right . -
URL ” Specifies a link or an image source attribute. Using this type enables Dreamweaver to automatically keep track of and update the link path . -
Color ” Specifies a color value. A color picker is used to prompt the template user to enter a color. -
True/False ” Specifies a Boolean value. Use this to set attributes that have only true or false values. -
Number ” Specifies a numeric value. For example, this could be used to specify an image height and width. - Enter a default value for the attribute. This should be a value consistent with the type you chose.
- If you want to make other attributes of the element editable, you can repeat steps 3 “7 without leaving the dialog box.
- Click OK to apply the changes.
|