| Before you start using Dreamweaver to design your Web site, you should first define your Dreamweaver site. Defining a site refers to setting up a directory structure locally and, when appropriate, on the remote server where the site will appear. After your site is defined, you can begin working on your new pages and sites in an organized fashion. Most readers will already have an idea of how best to create directory structures, and many of you might be running Web servers of your own. This experience will be helpful to you as you proceed to set up both your computer and any remote server for Macromedia Dreamweaver. In fact, if you already have a Web server set up, you can jump right into the following tasks . If you don't have a local or remote hosting service for your site, now would be a good time to begin looking into Web hosting options and finding the best situation for your needs. NOTE To learn more about the types of hosting available and to find a hosting provider, please see the following article in The Web Host Industry Review , http://thewhir.com/find/web- hosts /articles/.
Defining the Site Locally The first thing you'll need to do before being able to do any editing or design work with Dreamweaver is to create a local folder. Follow these steps: - Make a new folder on your computer to store pages and Web site components . I called mine greendept . In that folder, create an images subfolder, where you can store any images you'll use with the site.
- Open Dreamweaver, and from the main menu, select Site, Manage Sites.
- In the Manage Sites dialog box, click the New button and choose Site. The Site Definition dialog box appears (see Figure 6.1) and you should see two tab options, Basic and Advanced.
Figure 6.1. For any site you work with, you'll use the Site definition dialog box to name the site and set options for how you want to use it. The Basic tab is a wizard to help easily guide you through; more advanced users can click the Advanced tab and enter their ownparameters. 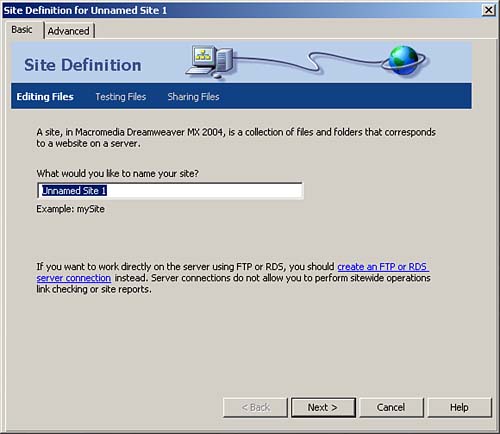
- Click the Advanced tab. To the left, you'll see a list of category definitions for the site you're creating. For now, you're concerned only with Local Info . You'll have the opportunity to add other definitions later in this chapter.
- Be sure that Local Info is highlighted. In the Site Name text box, add a name to identify this specific site from others you may have already created, or will create in the future.
- In the Local Root Folder text box, type in the path to the site folder that you created. If you can't remember the complete path to the folder or are unsure of it, click the folder icon to browse your computer for the folder. After you've found the new folder, highlight it and click (Choose) [Select]. You'll now see that the path has been added to the Local Root Folder.
- If the Refresh Local File List Automatically check box is unchecked, check it.
 | Files not updating properly? See "Refreshing Files" in the "Troubleshooting" section at the end of the chapter. |
- Now add the path to the images folder by typing in the path to that folder in the Default Images Folder text box. You can also browse to the folder and add it. If you don't already have a folder defined, select Browse and then select a new folder through the dialog box. After you've created the new folder, you can select it and continue.
- Leave the remainder of the dialog box as is, and click OK to apply your changes. You'll add the remote server information in the next section.
- Click Done to close the Manage Sites dialog box.
To see the new site added, select Window, Files from the main menu. Creating the Best File Structure With simple sites comprising just a few pages and images, file structure isn't an area of extreme concern. However, when sites grow to contain hundreds, thousands, or even greater numbers of files, it becomes imperative to architect a good file structure system to accommodate them. The use of a local root folder is a good beginning. In this area should be any top-level files, such as the index page, and the main pages for the site. But if your site contains a great number of articles and resources, you might have to break this down into much greater detail. Let's say you are an e-zine and regularly publish articles, columns , comics, and classifieds. It is in your best interest to create subfolders for each of these, keeping things organized by topic. Similarly, if you are using media other than images on your site, you might want to create subfolders for various media, such as images, audio, video, and so on. The one potential problem that can arise out of creating too many subdirectories is that the resulting URLs can be very long, which makes them difficult to remember and bookmark and, depending on the way they are fashioned, even likely to cause problems with page validation (see the Peer to Peer section at the end of this chapter for more information). A good exercise is to sketch out the file structure ahead of time. This will provide you a blueprint from which to work as you proceed in the building of your site. Although it's not always easy to anticipate the future, keep in mind that the site, if successful, will grow in size and that growth will need to be accommodated. |
Setting the Remote Information Now that you have your local site established, the next step is to set up a connection to your remote server that allows you to transfer files between your local workstation and the server where your site is hosted. Gather all the information you have about your remote server. In most cases you'll be using FTP, but there are other connection options, as described in Table 6.1. Table 6.1. Remote Information Options | Option | What It Does | | None | Select this if you simply want to build your site on your local computer. You can always consider transfer options later. | | FTP | This is the File Transfer Protocol. This method is in widespread use for transferring files from a local machine to a remote machine. | | Local/Network | If you are working on a network or running Web server software locally, select this option. | | RDS | This is Remote Development Services. It is used by people working with dynamic content in ColdFusion. | | SourceSafe Database | A special Microsoft database that enables powerful management features for teams working on sites, SourceSafe must be installed and in use if you want to use this option. | | WebDAV | Certain servers use the Web-based Distributed Authoring and Versioning tools. If you are using a WebDAV system, select this option. |
In most instances, you'll be using FTP, which is the process discussed here. If you are certain that you'll be using a different method, simply select the necessary option from the drop-down menu. Select FTP if you plan on moving your files to a live Web server, or select None if you plan on creating your site locally and figuring out what to do with it later. To set up FTP, you need to obtain the following information: -
FTP host name -
Login name (this is your user ID information) -
Password (this is a password selected by or provided to you by your service provider) -
Any additional information provided by your service provider regarding required settings Typically, your service provider will have configured your login to default to the remote root folder. This folder corresponds to the local root folder because it will be the folder where the top-level documents and the subdirectories can be found. With your FTP information in hand, you're ready to add the remote server information to the site you just defined. Follow these steps: - From the main menu, select Site, Manage Sites. The Manage Sites dialog box appears (see Figure 6.2).
Figure 6.2. Highlight the appropriate site in the Manage Sites menu to select it. 
- Highlight the site you want to modify by clicking it.
- Click Edit. The Site Definition dialog box appears.
- Select the Advanced tab, and under Category, highlight the Remote Info entry. A drop-down menu appears with a number of options. Select FTP. The dialog box updates with the necessary fields.
- Enter your FTP host, host directory, login, and password. I recommend checking the Save check box. Unless your provider requires you to use passive FTP, leave the Use Passive FTP check box blank. Passive FTP is used for additional security but is not required in most cases (see Figure 6.3).
Figure 6.3. When you've finished filling out the Site Definition dialog box, your site will have most of the features necessary to manage the various files. 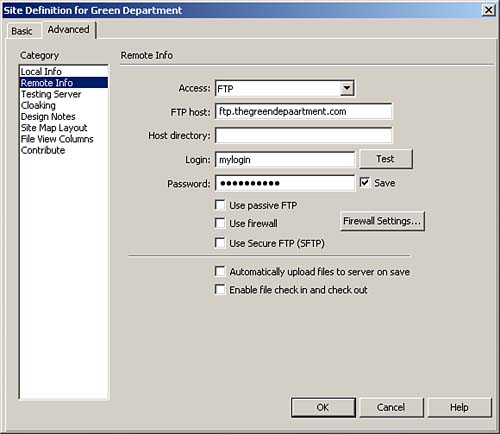
- Click OK to apply the changes and click Done to close the Manage Sites dialog box.
In most cases, this will be enough information to get you started. Click the Test button to see whether, in fact, you get a connection. If you do, terrific ! If not, carefully look over the information you entered and see whether everything is up to par. If it is and you are working from within a network and still having trouble, you might be behind a security firewall. If you are, you need to get those settings from your system administrator and enter them into the appropriate areas. The two other options on the dialog box are as follows : -
Automatically upload files to server on save ” If you check this option, Dreamweaver automatically transfers the site to the remote server when you save the site. Because this can actually upload files that are in the process of being edited, I don't recommend choosing this option unless you are using an external versioning system such as SourceSafe. -
Enable file check in and check out ” If you want to enable this feature, click once in the check box. The advantage of enabling this feature is that if multiple people are working on the site, Dreamweaver helps you manage team files, preventing overwriting and the need for additional edits. To connect to and view your remote site, do the following: - Make sure the Files panel is open (select Window, Files).
- Select your site from the Site panel list by clicking it once to highlight it.
- From the Files panel button bar, click the Connect button shown in Figure 6.4.
Figure 6.4. Clicking this icon connects you to a remote site. After you are connected, clicking it disconnects you. 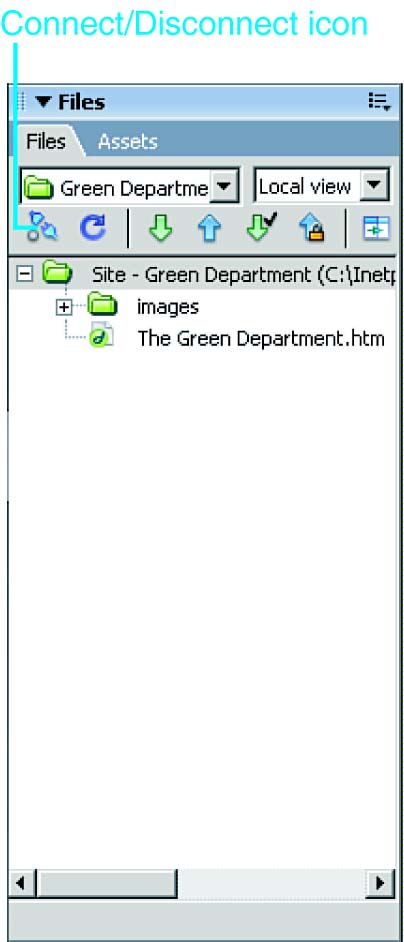
- Dreamweaver connects with the site. Select Remote View from the drop-down box found to the far right.
You'll now see the current structure of the remote site. This changes as you publish files to the server (see Figure 6.5). Figure 6.5. Using the Files panel to set features on your remote site allows quick access and updates to the files within your project. 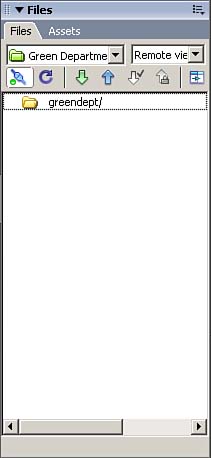
Importing an Existing Web Site If you have existing Web sites on your local computer or a Web server you want to maintain with Dreamweaver, you'll need to first import them. Importing a Local Site If you want to bring a site that resides on your local computer into Dreamweaver, follow these steps: - Select Site, Manage Sites. The Manage Sites dialog box appears.
- Click the New button. The Site Definition dialog box appears.
- Define the Site Name just as you did in the previous section.
- Type in the path to the Local Root Folder for the site, or find the Root Folder for the site by using the browse feature. Highlight the site and click the Select button. Dreamweaver begins importing all the site files and directories. This might take a minute or two, depending on the size of the site you're importing.
- After the import is complete, click OK. The Site Definition dialog box closes , leaving the Manage Sites dialog box open. You'll now see the name of the site you just defined in step 3.
- Click Done.
Your site is now available from the Files panel, where you can see it in its entirety (see Figure 6.6). Figure 6.6. The Files panel on the right shows the imported site. 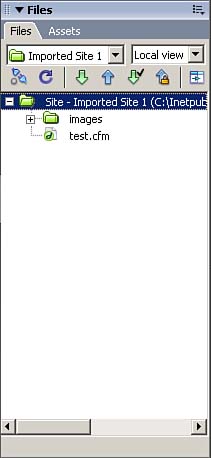
Importing a Remote Site If you have a site on a server and would like to add it to Dreamweaver for management and editing, here's how: - Begin by creating a local folder just as you did for a new site.
- Create a new Dreamweaver site and add the remote site options into the remote info text boxes. This time, use the information matching the Web server and location within that server where your remote Web site resides. Click OK.
- In the Files panel, find the newly added remote site, highlight it, and then connect to it by using the Connect button.
- To import the entire site, click the root folder on the remote site.
- Click the Site drop-down menu, and then select Get File(s) (the arrow pointing down). Dreamweaver asks whether you're sure you want to get the entire site. Because you do, click Yes; the site will now be transferred to the local folder you created in step 1. This might take a few minutes, depending on how large the remote site is.
After the site is resident on your local machine, you can edit it as you see fit and then later transfer the edited files back to the remote server (see Figure 6.7). Figure 6.7. The remote site is now available on your local drive. 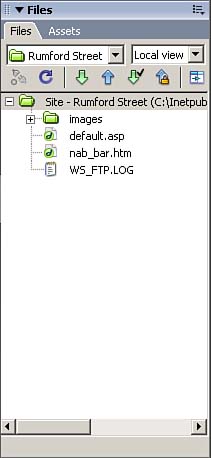
NOTE If you are working on only one section of the site, you might want to transfer only the directories and files you'll be working on. Generally speaking, having all a site's assets on hand helps you get the most out of Dreamweaver MX tools, such as site mapping.
|