| Here's a simple, typical procedure for configuring a data source: - Start the ColdFusion MX Administrator (probably accessible at one or both of the URLs provided at the end of the previous section).
TIP If you haven't already done so, now is a good time to maximize debugging information. In the ColdFusion Administrator, under Debugging and Logging, click Debugging Settings. (See Figure 32.3.) Check all available boxes and click Submit Changes. Figure 32.3. The ColdFusion Administrator browser-based interface. 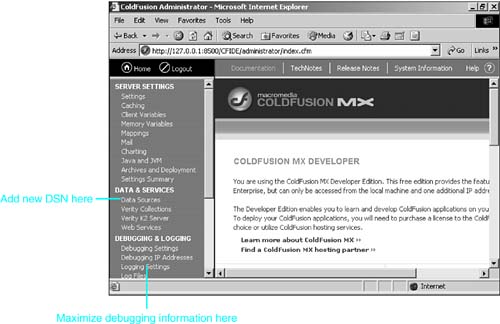 - Under Data & Services, click Data Sources. (Refer to Figure 32.3.)
The Add New Data Source dialog will appear. - At a minimum, on the Add New Data Source dialog, provide a name for the System DSN and choose a database driver type from the drop-down menu. In Figure 32.4 the DSN happens to be the same as the database file (greendept), but you're making up a new DSN, and it can be anything you want, as long as it has not already been used for another DSN and it conforms to the rules for ColdFusion variable naming. For instance, the name can't contain any spaces. (If you break the rules, you'll get an error message: Trying to create a datasource with a name that is invalid. Datasource Names must match ColdFusion variable naming conventions .) Then click the Add button.
Figure 32.4. The Add New Data Source dialog. The greendept DSN is about to be added, so it doesn't yet appear in the Connected Data Sources list. 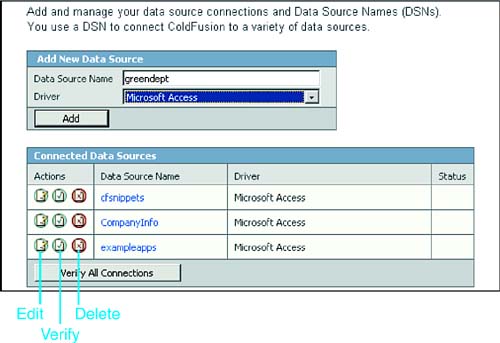
WARNING If the DSN contains any spaces, you get an error message when you try to add the name. - The Data Source dialog appears for the selected driver. For instance, Figure 32.5 shows the Microsoft Access Data Source dialog.
Figure 32.5. The Microsoft Access Data Source dialog. Fill in the full path and filename for the database file, and optionally a description. 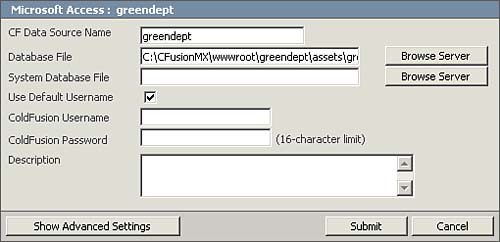
- In the Database File box, provide the full path to the database file on the ColdFusion server hard disk, which in Figure 32.5 is the local C: drive. You can click the Browse button and navigate to the database file. In Figure 32.5, the path to the database file (only partially visible in the box) is C:\CFusionMX\ wwwroot \greendept\assets\greendept.mdb .
Optionally, you can also provide a description of the database in the Description box.
Click Submit.
You should see something similar to Figure 32.6, including the Datasource updated successfully message, and the entry in Connected Data Sources, with OK in the Status column.
Figure 32.6. This is what you see when you have added a DSN that ColdFusion can access successfully. 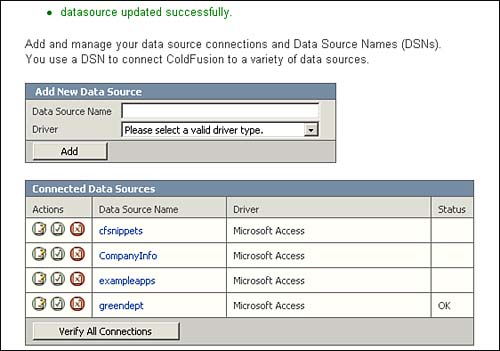
 | If you get a message such as Connection verification failed for data source: greendept or you see "Error" in the Status column, see "Troubleshooting" at the end of this chapter. |
Notice the Actions column on the left in Figure 32.4. You can return to this screen at any time and use the three buttons in this column to edit, verify, or delete the DSN. These actions do not affect the database file itself, only the DSN. |