Preparing Your System for Installation with an ORiNOCO Gold (Hermes Chipset) Card
|
| < Day Day Up > |
|
Many Kismet users begin their WarDriving experience using NetStumbler in Windows. Because NetStumbler was designed to use Hermes-based cards such as the ORiNOCO Gold card, many users have this card and want to use the same card with Kismet. Unfortunately, the stock drivers for this card do not allow the card to enter monitor mode. This requires patching the ORiNOCO drivers and the pcmcia-cs drivers. A kernel upgrade may not be required, but the source code for the Linux Kernel must be on the system.
Getting pcmcia-cs Patched and Working
In order to set your ORiNOCO card into monitor mode, you need to patch the pcmcia-cs and the ORiNOCO drivers. Patching both of these has, traditionally, been a poorly documented process, though it is relatively straightforward. In as much, this process is detailed in the following sections of this chapter.
Installing pcmcia-cs
The first thing you need to do is obtain a version of pcmcia-cs that has a monitor mode patch available. The current version with a patch, at the time of this writing, is pcmcia-cs-3.2.3. The Shmoo group provides updated information on the pcmcia-cs patches on their Web site (http://airsnort.shmoo.com/_orinocoinfo.html). Because Slackware 9.1 ships with pcmcia-cs-3.2.5 you will actually need to downgrade to pcmcia-cs-3.2.3. When a patch for pcmcia-cs-3.2.5 becomes available, this will no longer be necessary and you will be able to patch the installed version of pcmcia-cs. In order to install the pcmcia-cs modules, you must have root privileges, and so you will need to use the su command to switch to root if you have not already done so. See Figure 4.1.
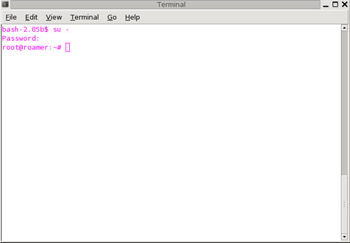
Figure 4.1: Using the su Command to Switch the User to root
First, download the pcmcia-cs. You can download any version from: http://prdownloads.sourceforge.net/pcmcia-cs, or download the 3.2.3 directly from: http://prdownloads.sourceforge.net/pcmcia-cs/pcmcia-cs-3.2.3.tar.gz. Next, save or copy pcmcia-cs-3.2.3 to /usr/src, as shown in Figure 4.2. If you did not install the kernel source package when installing Slackware 9.1, you need to install that package from the Slackware CD-ROM.
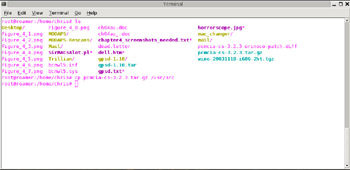
Figure 4.2: Copying pcmcia-cs to /usr/src
| Note | All of the examples in this chapter use pcmcia-cs-3.2.3 for the pcmcia-cs version and Linux kernel 2.4.23 for the Linux kernel version. If you are using a different version of pcmcia-cs or a different Linux kernel version you need to substitute the pcmcia-cs and kernel versions for those shown in these examples. |
The pcmcia-cs-3.2.3.tar.gz file is a compressed tarball. To install it, you need to uncompress it, and then un-tar it, as shown in Figure 4.3.
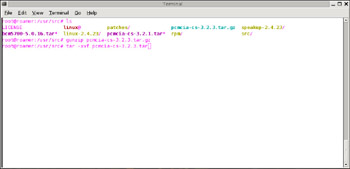
Figure 4.3: Uncompressing and Un-tarring pcmcia-cs
This creates the directory /usr/src/pcmcia-cs-3.2.3. Change to this directory, as shown in Figure 4.4.
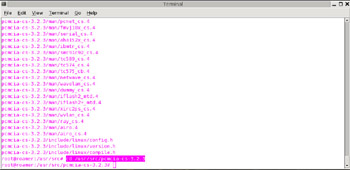
Figure 4.4: Change to the /usr/src/pcmcia-cs-3.2.3 Directory
Next, you need to build the new pcmcia-cs modules. This is accomplished in three steps:
-
Type make config to configure the pcmcia-cs module for compilation.
-
Enter make all to compile the pcmcia-cs module.
-
Type make install to install the new pcmcia-cs module.
These three steps are demonstrated in Figures 4.5, 4.6, and 4.7.
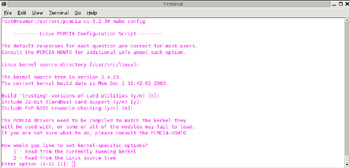
Figure 4.5: Configuring the New pcmcia-cs
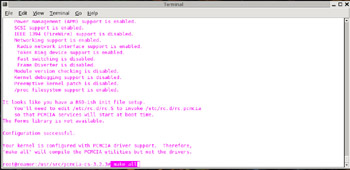
Figure 4.6: Compiling the New pcmcia-cs
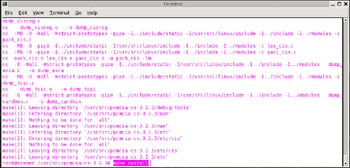
Figure 4.7: Installing the New pcmcia-cs
Unless you have made any changes to the default paths, you can choose the default for each of the questions asked during the make config phase.
The new pcmcia-cs-3.2.3 module is now installed and ready to be patched.
Patching the ORiNOCO Drivers
Now that you have installed pcmcia-cs-3.2.3, or another pcmcia-cs module that can be patched, you need to apply the ORiNOCO Monitor Mode Patch for your pcmcia-cs version. A listing of all the pcmcia-cs patches available for download is maintained at http://airsnort.shmoo.com/orinocoinfo.html. Because we have installed pcmcia-cs-3.2.3, we need the pcmcia-cs-3.2.3-orinoco-patch.diff (http://airsnort.shmoo.com/pcmcia-cs-3.2.3-orinoco-patch.diff). Save or copy pcmcia-cs-3.2.3-orinoco-patch.diff into the /usr/src/pcmcia-3.2.3 directory as shown in Figure 4.8.
Figure 4.8: Save or Copy the Patch to the /usr/src/pcmcia-cs-3.2.3 Directory
Using the patch command, patch the pcmcia-cs module, as shown in Figure 4.9.
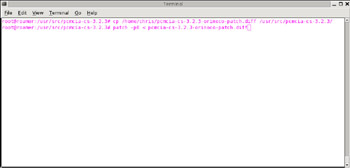
Figure 4.9: Patching the pcmcia-cs Module
If the patch is successful, four files are created:
-
hermes.c
-
hermes.h
-
orinoco.c
-
orinoco.h
You should see the output shown in Figure 4.10
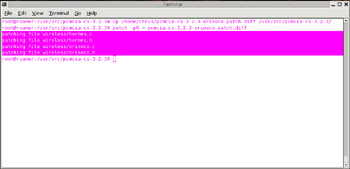
Figure 4.10: Successful Output of the Orinoco Monitor Mode Patch
If you do not see the output shown in Figure 4.10, you have likely missed a step or made a typographical error. Try running the patch command again to remedy the problem, ensuring that the command used is:
patch –p0 < pcmcia-cs-3.2.3-orinoco-patch.diff
Next, change to the /usr/src/pcmcia-3.2.3/wireless directory, as shown in Figure 4.11.
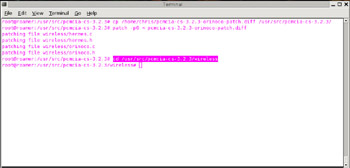
Figure 4.11: Changing Directories to /usr/src/pcmcia-cs-3.2.3/wireless
In order to work properly, the files you just patched need to be rebuilt. Use the make all command, as shown in Figure 4.12.
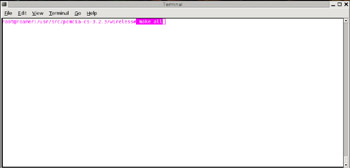
Figure 4.12: Rebuilding the Patched Files
Finally, create a backup directory to store your newly patched pcmcia files, as shown in Figure 4.13.
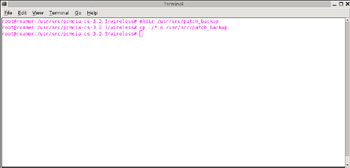
Figure 4.13: Creating a Backup Directory and Copying Your Files
Next, copy the object files (those with the “.o” file extension) from your backup directory to /lib/modules/2.4.23/pcmcia, as shown in Figure 4.14.
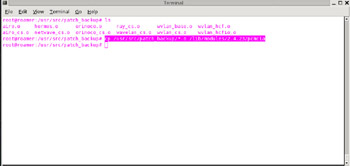
Figure 4.14: Placing the Drivers in the pcmcia Directory
Then, copy the object files (those with the “.o” file extension) from your backup directory to /lib/modules/2.4.23/kernel/drivers/net/wireless, as shown in Figure 4.15.
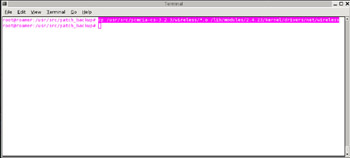
Figure 4.15: Placing the Drivers in the Modules Directory
A backup directory is created to store the files because any kernel upgrades or changes you make will, in all likelihood, overwrite your patched drivers in the /lib/modules tree. By creating a backup directory to store the patched drivers, you can copy them from the backup into the new or modified /lib/modules/<kernel version> tree.
Verifying that It All Works
After you have upgraded your pcmcia-cs version and patched the ORiNOCO driver modules, you should verify that it is all working properly before installing Kismet.
In order for Kismet to function correctly, two things need to be working properly:
-
The ORiNOCO card
-
Monitor mode
If you performed the pcmcia-cs upgrade properly, your ORiNOCO card will work correctly. To verify this, insert your card into your PCMCIA slot and boot up. If you have already started your system, insert the ORiNOCO card and restart the PCMCIA services using the command:
/etc/rc.d/rc.pcmcia restart
You should hear two short “beeps” if the card was properly detected. Next, using the ifconfig <interface> command, where <interface> is the device name of your ORiNOCO card, verify that the card is present.
If information about your ORiNOCO card is not displayed, try bringing the card “up” using the ifconfig command. For instance, if your ORiNOCO card is the eth0 device, type: ifconfig eth0 up and then ifconfig eth0. You should now see information on your card similar to Figure 4.16.
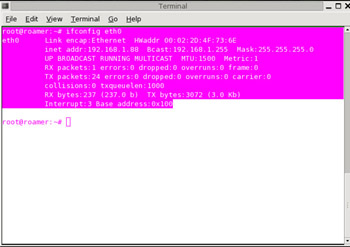
Figure 4.16: Verifying the Presence of the ORiNOCO Card
| Note | Depending on your laptop configuration, you will likely need to type eth0, eth1, eth2, and so on. |
Next, verify that the patch worked correctly using the iwpriv <interface> command. If you correctly patched the ORiNOCO driver modules, you will see monitor listed in the output, as shown in Figure 4.17.
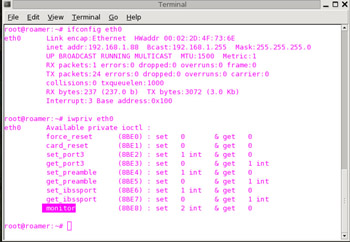
Figure 4.17: Verifying the ORiNOCO Patch Allows Monitor Mode
If monitor is listed as shown in Figure 4.17, you are ready to move on to installing Kismet.
|
| < Day Day Up > |
|
EAN: 2147483647
Pages: 125
- Structures, Processes and Relational Mechanisms for IT Governance
- An Emerging Strategy for E-Business IT Governance
- Linking the IT Balanced Scorecard to the Business Objectives at a Major Canadian Financial Group
- Governing Information Technology Through COBIT
- Governance Structures for IT in the Health Care Industry