Using Digital Cameras with Ubuntu
| Most digital cameras used in connection with Ubuntu fall into one of two categories: webcams (small, low-resolution cameras connected to the computer's interface) or handheld digital cameras that record image data on disks or memory cards for downloading and viewing on a PC. Ubuntu supports both types. Other types of cameras, such as surveillance cameras that connect directly to a network via wire or wireless connections, need no special support (other than a network connection and viewing software) to be used with a Linux computer. Ubuntu supports hundreds of different digital cameras, from early parallel-port (CPiA chipset-based) cameras to today's newer USB-based cameras. You can even use Intel's QX3 USB microscope with Ubuntu. If you prefer a standalone network-based webcam, explore the capabilities of Linux-based cameras from Axis (at http://www.axis.com/products/video/camera/productguide.htm). The following sections describe some of the more commonly used still camera hardware and software supported by Ubuntu. WebcamsWebcams are typically small, low-resolution cameras connected to your computer typically via a USB port. The camera can act in two modes: streaming (for a series of images of a moving object) and grabbing (for a single still image). The most common uses for webcams include videoconferencing and web voyeurism. The latter is not as lurid as it might sound, although some webcam sites are notorious for their pornographic content. Webcams can be used to send almost-live images to an online correspondent; many people include screen grabs of themselves at their computer workstations just because they can.
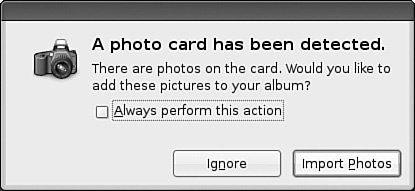
You can use any of the video applications that can access a video4linux device to view webcam or still camera images in Ubuntu. You also can use GnomeMeeting (discussed in Chapter 8, "On the Internet: Surfing the Web, Writing Email, and Reading the News") as a viewer for your webcam. Not all webcams are supported in Linux and the drivers are based on the chipset used, rather than the model or manufacturer. If you are uncertain about whether a specific webcam will work with Linux or Ubuntu, then consult the oracle that is Google before you part with your greenbacks. Tip Sadly the pwc driver that used to be included in the Linux kernel to provide support for Phillips-based webcams was withdrawn over issues to do with binary files being included within the kernel. This effectively cuts off anyone who uses a Logitech or Phillips webcam, although there may be third-party solutions available on the Internet. Handheld Digital CamerasDigital cameras are one of the major success stories of the last few years. Now you can take pictures and see previews of your pictures immediately. The pictures themselves are stored on discs or memory cards that can be easily plugged into Ubuntu for further manipulation using the GIMP or other software. Unfortunately, most of the supplied software that comes with the cameras tend to be for Windows users only, making you reliant on the packages supplied with Ubuntu. Thankfully, due to the good development carried out in Ubuntu and GNOME, you are now able to plug pretty much any camera into your computer using a USB interface and Ubuntu automatically recognizes the camera as a USB mass storage device. You can even set Ubuntu to recognize when a camera is plugged in so that it automatically imports your photographs for you. To do this, you need to set up your settings for removable drives and media. You can find this in the System, Preferences menu. Click the Cameras tab and select the option to import digital photographs when connected (see Figure 11.2). Figure 11.2. Use GNOME's intelligent handling of removable media by setting it to import your photographs automatically.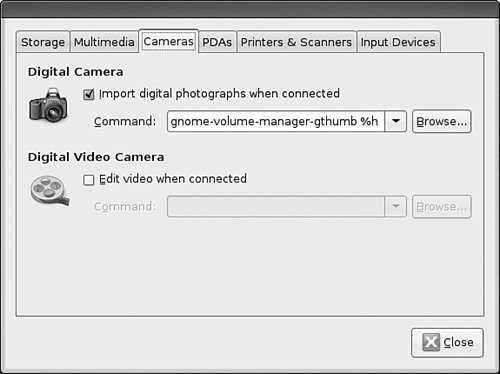 Now whenever you connect a digital camera to your computer GNOME will automatically detect it (see Figure 11.3), and ask whether you want to import the photographs. Figure 11.3. GNOME detects the presence of a digital camera and asks whether the photos should be imported. By default GNOME uses the excellent gThumb package (see Figure 11.4), which, although basic-looking, offers an easy to use interface and powerful cataloging capabilities. Figure 11.4. Make use of gThumb to manage your extensive photo collection.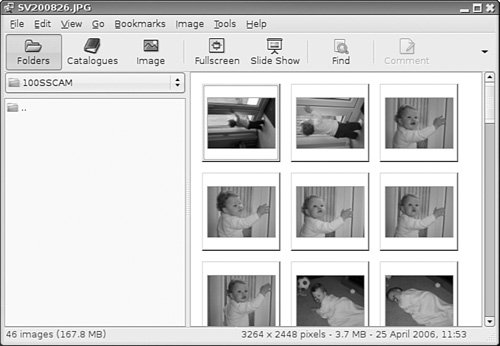 Using F-SpotWith the inclusion of Mono into Ubuntu, Ubuntu now has access to the superb F-Spot photo management application. However, F-Spot is not installed by default, so you will have to do a quick install by using the command $ sudo apt-get install f-spot which retrieves the F-Spot program and the other required components. When F-Spot is installed, you can find it under the Applications, Graphics menu listed as F-Spot Photo Manager. If you have used the popular Google Picasa application, you will feel instantly at home with F-Spot because it is similar in many ways. The first time you open F-Spot, you are asked to import your first batch of photographs as shown in Figure 11.5. You can also assign a tag to them, if you want to track particular types of photographs. You might want to allow F-Spot to copy the photograph to a new directory, Photossomething that will help you organize your photos on the system. Figure 11.5. The versatile F-Spot makes adding photos to your library easy.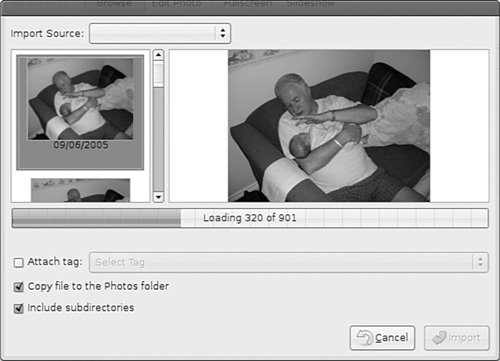 When you are ready, click Import to let F-Spot import the photos into the library. The pictures will appear in the F-Spot library, and will be stored according to the date they were taken. This information is given to F-Spot by the EXIF information that your camera stores each time you take a picture. In Figure 11.6, you can see the standard F-Spot window. Figure 11.6. Browse through your extensive photo collection and correct minor problems using F-Spot. You browse through your photographs using the timeline across the top of the window and you can do some minor editing by double-clicking on any photograph. F-Spot is still in its infancy, but development is ongoing, so keep a eye open for any major updates. |
EAN: 2147483647
Pages: 318