Creating Network Printers
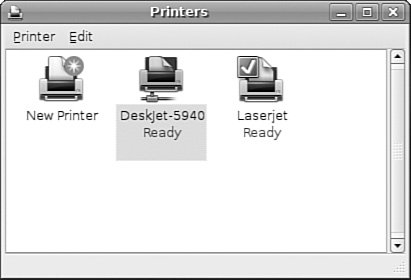
| Setting up remote printing service involves configuring a print server and then creating a remote printer entry on one or more computers on your network. This section introduces a quick method of enabling printing from one Linux workstation to another Linux computer on a LAN. You also learn about SMB printing using Samba and its utilities. Finally, this section discusses how to configure network-attached printers and use them to print single or multiple documents. Enabling Network Printing on a LANTo set up printing from one Linux workstation to another across a LAN, you need root permission and access to both computers, but the process is simple and easy to perform. First, log in or ssh to the computer to which the printer is attached. This computer will be the printer server. Use the hostname or ifconfig commands to obtain the hostname or IP address and write down or note the name of the printer queue. If the system uses LPRng rather than CUPS, you need to edit the file named /etc/lpd.perms. Scroll to the end of the file and look for the remote permission entry: # allow local job submissions only REJECT SERVICE=X NOT SERVER Remote printing is not enabled by default, so you must comment out the service reject line with a pound sign (#): # allow local job submissions only #REJECT SERVICE=X NOT SERVER Save the file, and then restart the lpd daemon. This enables incoming print requests with the proper queue name (name of the local printer) from any remote host to be routed to the printer. After you finish, log out and go to a remote computer on your LAN without an attached printer. Tip LPRng, like CUPS, can be configured to restrict print services to single hosts, one or more specific local or remote users, all or part of a domain, or a LAN segment (by specifying an IP address range). An entry in /etc/lpd.perms, for example, to allow print requests only from hosts on 192.168.2.0, would look like this: ACCEPT SERVICE=X REMOTEIP=192.168.2.0/255.255.255.0 The lpd.perms man page (included as part of the LPRng documentation) contains an index of keywords you can use to craft custom permissions. Don't forget to restart the lpd daemon after making any changes to /etc/lpd.perms (or /etc/lpd.conf). If the computer with an attached printer is using Ubuntu and you want to set up the system for print serving, again use the gnome-cups-manager client to create a new printer. To enable sharing, you must follow a few steps, because by default CUPS is not set up to share printers across a network. First, edit your /etc/cups/cupsd.conf file using the following command: $ sudo gedit /etc/cups/cupsd.conf In this example I have used gedit, but feel free to substitute in your favorite text editor. Then, look for the section that begins with <Location /> and modify it so that it reads as follows: <Location /> Order Deny,Allow Deny From All Allow From 127.0.0.1 Allow From 192.168.0.* </Location> This tells CUPS to share your printers across the network 192.168.0.*, for example. Make sure and change this to match your own network settings. Next you need to edit the /etc/cups/cups.d/ports.conf file to tell CUPS to listen on a specific port. Modify this line Listen localhost:631 to this Listen 631 to tell CUPS to listen on port 631 for any print requests. All you need to do now is open up gnome-cups-manager on your clients and select Detect LAN Printers under the Global Settings menu. After a few short moments, the printer should pop up in your window, as shown in Figure 22.7 Figure 22.7. The highlighted printer has been shared across the network. Ubuntu makes this process as painless as possible. Session Message Block PrintingPrinting to an SMB printer requires Samba, along with its utilities such as the smbclient and associated smbprint printing filter. You can use the Samba software included with Ubuntu to print to a shared printer on a Windows network or set up a printer attached to your system as an SMB printer. This section describes how to create a local printer entry to print to a remote shared printer using SMB. Setting up an SMB or shared printer is usually accomplished under Windows operating systems through configuration settings using the Control Panel's Network device. After enabling print sharing, reboot the computer. In the My Computer, Printers folder, right-click the name or icon of the printer you want to share and select Sharing from the popup menu. Set the Shared As item, and then enter a descriptive shared name, such as HP2100, and a password. You must enter a shared name and password to configure the printer when running Linux. You also need to know the printer's workgroup name, IP address, and printer name and have the username and password on hand. To find this information, select Start, Settings, Printers; then right-click the shared printer's listing in the Printers window and select Properties from the pop-up window. You can use CUPS to configure Samba to use your printers by editing the smb.conf file. In the global section enter the following lines, if they are not already there: ... load printers = yes printing = cups printcap name = cups This tells Samba to use CUPS to provide printing services. Next you need to create a new section in the smb.conf file at the end of the file, as follows: [printers] comment = Use this for All Printers path = /var/spool/samba browseable = no public = yes guest ok = yes writable = no printable = yes printer admin = root, andrew This publishes your printers to the network and allows others to connect to them via Windows clients. Make sure you restart the Samba service using the command shown earlier to make Samba pick up the changes to the configuration file. |
EAN: 2147483647
Pages: 318
