| There will be occasions where you want to introduce a new section or topic and you need more than a simple fade-in or fade-out transition. This is the purpose of text animations, which enable you to enter some text that the animation then manipulates. For example, enter some text in the Aquarium effect, and a bunch of angel fish will start eating the text when the slide starts playing. If you are considering using text animations, be aware of the following: Certain animations use graphics to create the effect. If an animation appears to end suddenly, the only place to lengthen its duration is on the timeline. Captivate ships with 36 effects ranging from Aquarium to Wizard. You cannot create a custom animated effect for use in your movie. Don't animate a block of text. These things work best with headlines. A great rule of thumb is, "If you can't say it on a T-shirt, you can't say it in a text animation." Text animations can't be resized. You get what you are given. The best you can do is place text animations on the slide. Text animations work best on a separate slide. Add either a blank slide or an animation slide to the movie if you are including a text animation. Text animations placed on a slide with existing content will not hide anything under them. These small animations use a transparent background.
To add a text animation 1. | Open a Captivate movie and then open the slide to hold the animation in the Edit View panel.
| 2. | Select Insert > Text Animation to open the Text Animation dialog box (Figure 4.21). Alternatively you can add a text animation by pressing Control-Shift-X or clicking the Text Animation button on the Object toolbar.
Figure 4.21. The Text Animation dialog box. 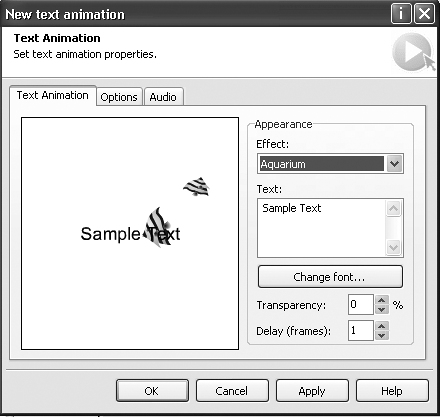
| 3. | Choose the animation effect from the Appearance pop-down menu.
| 4. | Enter the text to be used in the Text input box.
| 5. | Click the Change Font button.
The Font dialog box opens.
| 6. | Make your changes and click OK.
| 7. | If you want the animation to be somewhat transparent, add a transparency value.
The values range from 0 (no transparency) to 100 (invisible).
| 8. | Add a delay value to set the time (in seconds) when the text animation appears on the screen.
| 9. | Click the Options tab to set the timing and transition values for the text animation (Figure 4.22).
Figure 4.22. Set a text animation's timing and transition values in the Options dialog box. 
| 10. | Click the Audio tab to add an audio effect or file to the text animation.
| 11. | Click OK.
| The text animation appears on the slide (Figure 4.23).
Figure 4.23. A text animation on a slide. 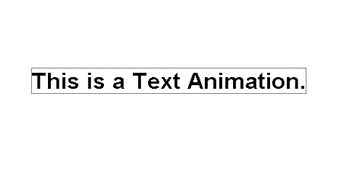
|
 Tip Tip
To set the duration of a text animation 1. | Add a text animation to a slide or double-click an existing text animation.
The Text Animation dialog box opens.
| 2. | Click the Options tab.
The Text Animation timing options open.
| 3. | Either enter a time in the Show For entry box or click the up and down arrows to change the value in tenth-of-a-second increments (Figure 4.24).
Figure 4.24. You can set the duration of a text animation by the numbers. 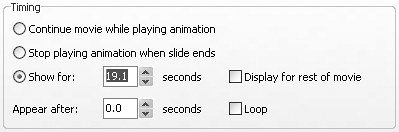
| 4. | Click OK.
|
Alternatively, you can set the duration of a text animation by following these steps: 1. | Open the timeline for a slide containing a text animation.
| 2. | Drag the left or right edge of the text animation object either inward (to increase the duration) or outward (to decrease the duration).
|
To edit a text animation on the timeline 1. | Open a slide containing a text animation in Edit view and click the timeline Splitter.
The timeline opens.
| 2. | Double-click the text animation object to open the Text Animation Properties dialog box.
|
To change the text style for a text animation 1. | Either double-click a text animation in the Edit View panel or double-click a text animation object on the timeline.
The Text Animation Properties dialog box opens.
| 2. | Click the "Change font" button.
The Font dialog box opens (Figure 4.25).
Figure 4.25. You can change the style, type, size, and color of the text used in a text animation. 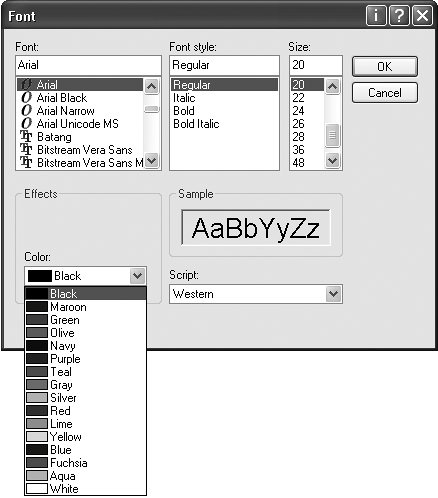
| 3. | Choose a font, font style, and a point size.
| 4. | Choose a color from the Color pop-down list. If you need more colors, click the Other button to open the Color Picker.
| 5. | Choose a script style from the Script pop-down list (Figure 4.26).
Figure 4.26. You can also use non-Latin based scripts when choosing a font. 
| 6. | Click OK to close the Font dialog box and to return to the Text Animation Properties dialog box.
Your changes appear in the Preview area of the dialog box.
|
Tips You are not limited to the color choices that appear by default. Selecting Other will open the color picker, from which you can choose a new custom color. The script style refers to the lettering or character styles used in various non-Latin languages.
|