Working with Painting Tools
You can bring out your inner Rembrandt with the painting tools you are provided with in Photoshop. You can choose to either paint an image from scratch or paint onto an existing image file.
| Note | Photoshop places painted information on the background layer by default. You can separate painted information by placing it on different layers in the file; this enables you to move and work with the painted information independent of other information in the image. See Chapter 8, "Working with Layers," to learn how to place content on different layers in an image. |
Painting with the Paintbrush
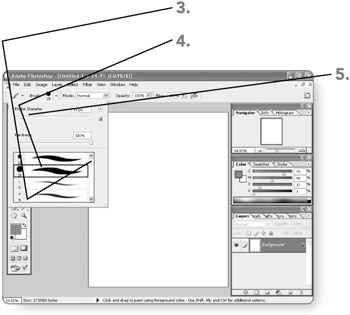
The Brush tool enables you to use the mouse to create freehand strokes with any of a number of brush shapes . Photoshop CS includes a large variety of different brushes for you to choose from. These brushes include both traditional strokes and some more unique brushes including star-, grass-, and leaf-shaped brushes.
-
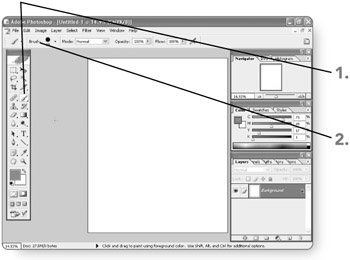
Click on the Brush tool in the toolbox. It will become the active tool.
-
Click on the Brush Preset picker button in the options bar. A list of different brush options will appear.
-
Click on the scroll buttons to browse the different brushes.
-
Click on the desired brush . It will be selected.
-
Press and hold the mouse button and then drag the slider to adjust the size of the brush.
-
Select the foreground color using the method of your choice. The color you select will become active for the paintbrush.
-
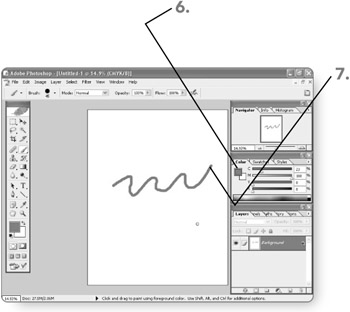
Drag on the picture in the work area. As you drag, your brush stroke will appear.
Tip If you paint or draw on the image and make a mistake, immediately press Ctrl+Z or choose the Undo (tool) command on the Edit menu to undo the mistake.
Painting with the Pencil
Technically speaking, the Pencil tool functions as a drawing tool in Photoshop, recoloring pixels as you drag along with the tool. The following example illustrates how to use the Pencil tool:
-
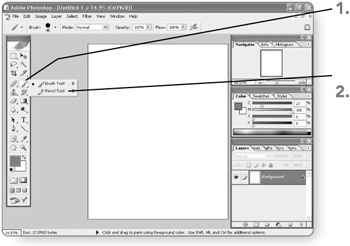
Press and hold the mouse button over the Brush tool in the toolbox. A list of tools will appear.
-
Click on the Pencil tool . The Pencil tool will become the active tool.
-
Choose the desired settings in the options bar. Your selections will become the active settings for the tool.
-
Select the foreground color using the method of your choice. The color you select will become active for the Pencil tool.
-
Drag on the picture in the work area. As you drag, your brush stroke will appear.
Painting with the Airbrush
We've all been to a county fair or amusement park where there was a carnie airbrushing t-shirts with people's names or caricatures. Your dreams of being a carnie can now come true because there is an Airbrush tool in Photoshop that mimics real-life airbrushing.
-
Click on the Brush tool in the toolbox. It will become the active tool.
-
Choose a brush and other desired settings in the options bar. Your selections will become the active settings for the tool.
-
Click on the Set to Enable Airbrush Capabilities button on the options bar. The button will appear pressed, and the airbrush will become active.
-
Select the foreground color using the method of your choice. The color you select will become active for the Airbrush tool.
-
Drag in the work area. As you drag, your brush stroke will appear.
EAN: 2147483647
Pages: 179
- Structures, Processes and Relational Mechanisms for IT Governance
- A View on Knowledge Management: Utilizing a Balanced Scorecard Methodology for Analyzing Knowledge Metrics
- Measuring ROI in E-Commerce Applications: Analysis to Action
- Governance in IT Outsourcing Partnerships
- Governance Structures for IT in the Health Care Industry