Saving the Sliced File in HTML
When you need to save the sliced file in HTML format, use the Save for Web command on the File menu, as demonstrated here.
-
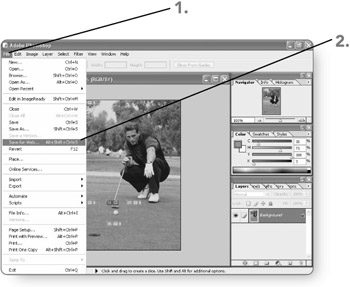
Click on File . The File menu will appear.
-
Click on Save for Web . The Save For Web dialog box will open , with its Optimized tab selected.
Tip If you previously used the Save For Web command to save a JPEG or GIF image and specified a matte, you're going to want to be sure to remove that matte color. Click on the Optimize menu button (the round button with the arrow on it) in the Save For Web dialog box and then click on Edit Output Settings in the menu. Open the drop-down list that has HTML selected in it by default and then click on Background. Open the Color drop-down list, click on None, and then click on OK to return to the Save For Web dialog box.
-
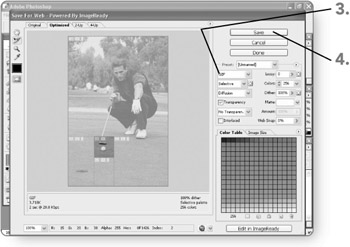
Click the desired Optimized file format . It will be selected.
-
Click on Save . The Save Optimized As dialog box will open.
-
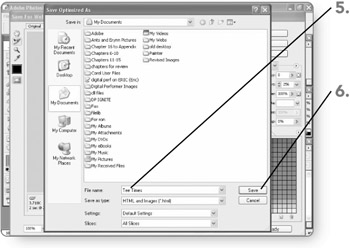
Edit the File name text box entry as necessary. The name you specify will be applied to the HTML file.
-
Click on Save . The Save Optimized As and Save For Web dialog boxes will close. Only the original image will be open in Photoshop. You can find the new HTML file in the folder where you saved it.
| Tip | Use the File, Open command in your Web browser to open and preview the new HTML file. (Note that you can use Save As to resave the file using the shorter .htm extension instead.) You can even click on the hotspot to test the link. When you copy or move the Web page, be sure to copy or move the accompanying images folder created by the HTML saving process. That folder holds the actual sliced image content. |
EAN: 2147483647
Pages: 179