Chapter 20. WML, ASP, JSP, Servlets, and Perl
| CONTENTS |
- XML and Active Server Pages
- XML and Java Servlets
- Java Server Pages
- XML and Perl
- Wireless Markup Language
This chapter covers a number of topics, including Wireless Markup Language (WML), a popular XML application targeted at cordless phones, PDAs, and other relatively simple devices that support the Wireless Application Protocol (WAP). WML is easy to use; you can find it in many places these days, and WAP servers are popping up all over. This chapter takes a look at creating WML documents and viewing them in WML browsers (often called microbrowsers).
This chapter is also about using XML with existing server technologies such as Active Server Pages (ASP), Java Server Pages (JSP), Java servlets, and Perl. A lot of companies are jumping on the XML-on-the-Internet bandwagon, with a resulting explosion of XML Internet software take a look at Microsoft's page at http://msdn.microsoft.com/xml/demos/default.asp for a survey. One popular server-side technology is the Simple Object Access Protocol (SOAP). SOAP is a simple protocol for message exchange in a distributed environment and those messages are written in XML. SOAP is often used to send commands in HTTP headers because remote method invocation protocols such as Microsoft's DCOM haven't really proven simple enough or adaptable enough to be extended to the Internet. In fact, Microsoft is one of the heavy hitters in SOAP, which may make you wonder what its future plans are for DCOM. IBM and Lotus are also involved.
More on SOAPWith a common name like SOAP, it's hard to search the Internet for more information unless you're really into pages on personal cleanliness and daytime television. For more information, check out this starter list: |
-
http://msdn.microsoft.com/xml/general/soapspec.asp
-
http://www.oasis-open.org/cover/soap.html, http://www.develop.com/soap/
-
http://www.develop.com/soap/soapfaq.xml
This chapter takes a look at how to create XML documents from the server side. To do that, I'll extract data from a database file, db.mdb, written in common Microsoft Access format, on various servers. Then I'll format that data using XML and send the resulting XML back to the client. This database file was written to be a simple example, holding just the names of eight students and a letter grade for each student, as shown in Table 20.1.
| Student | Grade |
|---|---|
| Ann | C |
| Mark | B |
| Ed | A |
| Frank | A |
| Ted | A |
| Mabel | B |
| Ralph | B |
| Tom | B |
I'll start by using ActiveX Data Objects (ADO) on a server to search db.mdb and create an XML document displaying the results with Active Server Pages.
Server-Side ProgrammingThe first half of this chapter, which describes server-side programming, moves through many technologies fairly quickly. Unfortunately, there's no way to provide all the background you need to program in Active Server Pages, Java Server Pages, Java servlets, and Perl here; you can find that background elsewhere if you need it. When discussing WML (an XML application) in the second half of the chapter, I don't make any such assumptions. There, I'll start from the ground up. |
XML and Active Server Pages
Active Server Pages (ASP) is a Microsoft Internet server-side technology that lets you create Web documents on the fly; it runs on servers such as the Microsoft Internet Information Server (IIS). In this case, I'll search db.mdb for the names of the students and return them in an XML document like this, using <document> as the document element and <student> for each student:
<?xml version="1.0"?> <document> <student> Ann </student> <student> Mark </student> <student> Ed </student> <student> Frank </student> <student> Ted </student> <student> Mabel </student> <student> Ralph </student> <student> Tom </student> </document>
The main trick in the .asp file is to make sure that your code creates an XML document because the default document type is HTML. If the content type item in the HTTP header doesn't indicate that a document is XML, the browser won't treat it as an XML document (and probably will treat it as HTML). You do this in the ASP script with <% Response.ContentType %>, setting the content type header item to "application/xml" this way:
<% Response.ContentType = "application/xml" %> . . .
I also need to add the XML declaration for the resulting document as well as the document element, <document>:
<% Response.ContentType = "application/xml" %> <?xml version="1.0"?> <document> . . .
Now I need to fetch the names of the students from db.mdb. I'll do this using the Microsoft ADO protocol because ASP is targeted to run on Microsoft platforms such as IIS. I'll create an ADO connection to db.mdb and use an SQL statement to return a record set of all records:
<% Response.ContentType = "application/xml" %> <?xml version="1.0"?> <document> <% DIM adoConnect DIM adoRecordset Set adoConnect = Server.CreateObject("ADODB.Connection") adoConnect.open "Provider=Microsoft.Jet.OLEDB.4.0;" _ & "Data Source=C:\xml\db.mdb" Set adoRecordset = adoConnect.Execute("SELECT * FROM Students") . . . All that's left is to loop over each record and create the corresponding XML <student> element:
<% Response.ContentType = "application/xml" %> <?xml version="1.0"?> <document> <% DIM adoConnect DIM adoRecordset Set adoConnect = Server.CreateObject("ADODB.Connection") adoConnect.open "Provider=Microsoft.Jet.OLEDB.4.0;" _ & "Data Source=C:\xml\db.mdb" Set adoRecordset = adoConnect.Execute("SELECT * FROM Students") Do While Not adoRecordset.EOF Response.Write "<student>" + adoRecordset("Name") + "</student>" adoRecordset.MoveNext Loop adoRecordset.Close set adoRecordset = Nothing %> </document> That creates the XML we want. Figure 20.1 shows the results created by this ASP file.
Figure 20.1. Creating XML documents with ASP.
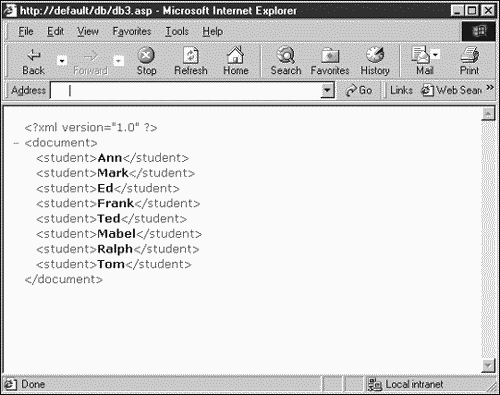
Note that the next few figures look a lot like this one; be sure to watch the title bars for differences.
XML and Java Servlets
Java servlets are supposed to be to Web servers what Java applets are to Web clients. You can use servlets to create Web documents on suitably enabled servers. To create servlets, you can download the Java Servlet Development Kit (JSDK) from java.sun.com (as of this writing, the main page for servlets is http://java.sun.com/products/servlet/index.html) and create servlets using the classes in servlet.jar and server.jar.
To read the names of the students from db.mdb, I'll use the Java Database Connectivity package (JBDC), interfacing to db.mdb after registering that database as an open database connectivity (ODBC) data source. After searching for all the students, I'll return their names in an XML document and send that document back to the client.
Again, the key here is to create an XML document, not the default HTML document. In servlets, you create an XML document with the ServletResponse class's setContentType method, setting the content type to "application/xml" like this:
import java.net.*; import java.sql.*; import java.awt.*; import java.awt.event.*; import java.io.*; import javax.servlet.*; public class xml extends GenericServlet { public void service(ServletRequest request, ServletResponse response) throws ServletException, IOException { response.setContentType("application/xml"); . . . Next, I send the XML declaration and document element back to the client:
import java.net.*; import java.sql.*; import java.awt.*; import java.awt.event.*; import java.io.*; import javax.servlet.*; public class xml extends GenericServlet { Connection connection; Statement statement; public void service(ServletRequest request, ServletResponse response) throws ServletException, IOException { response.setContentType("application/xml"); PrintWriter printwriter = response.getWriter(); printwriter.println("<?xml version=\"1.0\"?>"); printwriter.println("<document>"); . . . At this point, I can use JDBC to create a result set with all records from db.mdb, using an SQL statement:
import java.net.*; import java.sql.*; import java.awt.*; import java.awt.event.*; import java.io.*; import javax.servlet.*; public class xml extends GenericServlet { Connection connection; Statement statement; public void service(ServletRequest request, ServletResponse response) throws ServletException, IOException { response.setContentType("application/xml"); PrintWriter printwriter = response.getWriter(); printwriter.println("<?xml version=\"1.0\"?>"); printwriter.println("<document>"); try { Class.forName("sun.jdbc.odbc.JdbcOdbcDriver"); connection = DriverManager.getConnection( "jdbc:odbc:students", "Steve", "password"); statement = connection.createStatement(); String SQL = "SELECT Name FROM Students"; ResultSet resultset = statement.executeQuery(SQL); . . . All that's left is to loop over the result set with the next method, getting the student names and sending them back to the client in <student> elements like this:
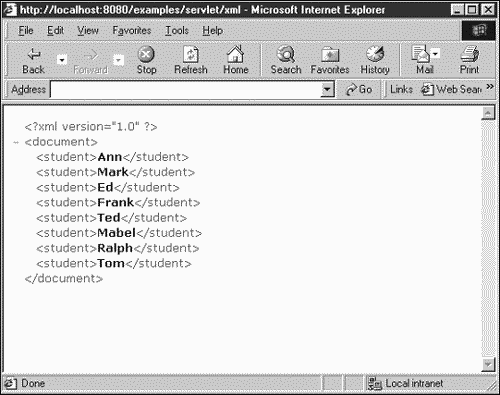
import java.net.*; import java.sql.*; import java.awt.*; import java.awt.event.*; import java.io.*; import javax.servlet.*; public class xml extends GenericServlet { Connection connection; Statement statement; public void service(ServletRequest request, ServletResponse response) throws ServletException, IOException { response.setContentType("application/xml"); PrintWriter printwriter = response.getWriter(); printwriter.println("<?xml version=\"1.0\"?>"); printwriter.println("<document>"); try { Class.forName("sun.jdbc.odbc.JdbcOdbcDriver"); connection = DriverManager.getConnection( "jdbc:odbc:students", "Steve", "password"); statement = connection.createStatement(); String SQL = "SELECT Name FROM Students"; ResultSet resultset = statement.executeQuery(SQL); while (resultset.next()) { printwriter.println("<student>" + resultset.getString(1) + "</student>"); } } catch(Exception e) {} printwriter.println("</document>"); printwriter.close(); } } And that's all it takes. This servlet is running in Figure 20.2, where the same XML document discussed in the preceding section is delivered to the client.
Figure 20.2. Creating XML documents with Java servlets.
Another Java technology that's becoming popular for serving XML documents is Java Server Pages, as discussed in the next section.
Java Server Pages
Java Server Pages (JSP) are Java's answer to Active Server Pages, and they enable you to create dynamic Web content in much the same way by running scripts on the server. You can read all about them at the main JSP page (as of this writing, http://java.sun.com/products/jsp/index.html). Using JSP is fairly close to using ASP.
In this example, I'll use the Apache Tomcat server, which is the official reference implementation for JSP (and Java servlets, for that matter). You can download Tomcat at the Tomcat main page, currently at http://jakarta.apache.org/tomcat/.
I'll create the same XML document as in the previous two examples by searching db.mdb for all students and returning them in an XML document. Because we're working in Java again here, I'll use JDBC to connect to db.mdb.
Again, a major point is to make sure that the content type of the document we send to the client is "application/xml", not the default HTML type. In JSP, you do that with the contentType attribute (this one took me a while to find out), like this:
<%@ page language="java" contentType="application/xml" import="java.sql.*" %> . . .
I also initialize the JDBC driver like this:
<%@ page language="java" contentType="application/xml" import="java.sql.*" %> <% Class.forName("sun.jdbc.odbc.JdbcOdbcDriver") ; %> . . . Then I send the XML declaration and the document element back to the client like this:
<%@ page language="java" contentType="application/xml" import="java.sql.*" %> <% Class.forName("sun.jdbc.odbc.JdbcOdbcDriver") ; %> <?xml version="1.0"?> <document> . . . Now I get a JDBC result set with all the students' records by using an SQL statement:
<%@ page language="java" contentType="application/xml" import="java.sql.*" %> <% Class.forName("sun.jdbc.odbc.JdbcOdbcDriver") ; %> <?xml version="1.0"?> <document> <% Connection connection = DriverManager.getConnection( "jdbc:odbc:students", "Steve", "password"); Statement statement = connection.createStatement() ; ResultSet resultset = statement.executeQuery("select * from Students") ; %> . . . All that's left is to loop over the students' records and send the matching <student> elements back to the client:
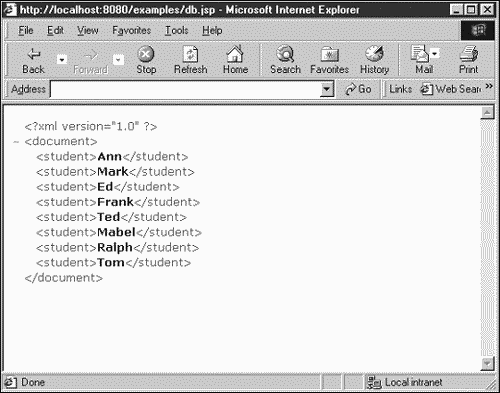
<%@ page language="java" contentType="application/xml" import="java.sql.*" %> <% Class.forName("sun.jdbc.odbc.JdbcOdbcDriver") ; %> <?xml version="1.0"?> <document> <% Connection connection = DriverManager.getConnection( "jdbc:odbc:students", "Steve", "password"); Statement statement = connection.createStatement() ; ResultSet resultset = statement.executeQuery("select * from Students") ; %> <% while(resultset.next()){ %> <student> <%= resultset.getString(1) %> </student> <% } %> </document> Figure 20.3 shows the results of this JSP script. As the figure shows, JSP works as well as ASP when serving XML documents. In fact, I know plenty of XML developers who prefer JSP over ASP for this purpose because working with XML using Java is so natural, as I've shown in Chapters 11, "Java and the XML DOM," and 12, "Java and SAX."
Figure 20.3. Creating XML documents with Java Server Pages.
XML and Perl
The Practical Extraction and Reporting Language (PERL) has long been a mainstay of server-side programming and a foundation of Common Gateway Interface (CGI) programming. Perl has been getting into XML in a big way, and one could easily write a book on the subject.
Perl modules are distributed at the Comprehensive Perl Archive Network (CPAN) site, at http://www.cpan.org, and plenty of them deal with XML (I counted 156). Table 20.2 provides a selection of Perl XML modules, along with their descriptions as given on the CPAN site.
| Module | Description |
|---|---|
| Apache::AxKit::XMLFinder | Detects XML files |
| Apache::MimeXML | mod_perl mime encoding sniffer for XML files |
| Boulder::XML | XML format input/output for Boulder streams |
| Bundle::XML | Bundle to install all XML-related modules |
| CGI::XMLForm | Extension of CGI.pm that reads/generates formatted XML |
| Data::DumpXML | Dumps arbitrary data structures as XML |
| DBIx::XML_RDB | Perl extension for creating XML from existing DBI data sources |
| GoXML::XQI | Perl extension for the XML Query Interface at xqi.goxml.com. |
| Mail::XML | Adds toXML()method to Mail::Internet. |
| MARC::XML | Subclass of MARC.pm to provide XML support |
| PApp::XML | pxml sections and more |
| XML::Catalog | Resolves public identifiers and remaps system identifiers |
| XML::CGI | Perl extension for converting CGI.pm variables to/from XML |
| XML::Checker | Perl module for validating XML |
| XML::Checker::Parser | XML::Parserthat validates at parse time |
| XML::DOM | Perl module for building DOM Level 1 compliant document structures |
| XML::DOM::NamedNodeMap | Hash table interface for XML::DOM |
| XML::DOM::NodeList | Node list as used by XML::DOM |
| XML::DOM::PerlSAX | Old name of XML::Handler::BuildDOM |
| XML::DOM::ValParser | XML::DOM::Parser that validates at parse time |
| XML::Driver::HTML | SAX driver for non well-formed HTML |
| XML::DT | Package for down translation of XML to strings |
| XML::Edifact | Perl module to handle XML::Edifact messages |
| XML::Encoding | Perl module for parsing XML encoding maps |
| XML::ESISParser | PerlSAX parser using nsgmls |
| XML::Filter::DetectWS | PerlSAX filter that detects ignorable whitespace |
| XML::Filter::Hekeln | SAX stream editor |
| XML::Filter::Reindent | Reformats whitespace for prettyprinting XML |
| XML::Filter::SAXT | Replicates SAX events to several SAX event handlers |
| XML::Generator | Perl extension for generating XML |
| XML::Grove | Perl-style XML objects |
| XML::Grove::AsCanonXML | Outputs XML objects in canonical XML |
| XML::Grove::AsString | Outputs content of XML objects as a string |
| XML::Grove::Builder | PerlSAX handler for building an XML::Grove |
| XML::Grove::Factory | Simplifies creation of XML::Grove objects |
| XML::Grove::Path | Returns the object at a path |
| XML::Grove::PerlSAX | PerlSAX event interface for XML objects |
| XML::Grove::Sub | Runs a filter sub over a grove |
| XML::Grove::Subst | Substitutes values into a template |
| XML::Handler::BuildDOM | PerlSAX handler that creates XML::DOM document structures |
| XML::Handler::CanonXMLWriter | Outputs XML in canonical XML format |
| XML::Handler::Composer | XML printer/writer/generator |
| XML::Handler::PrintEvents | Prints PerlSAX events (for debugging) |
| XML::Handler::PyxWriter | Converts PerlSAX events to ESIS of nsgmls |
| XML::Handler::Sample | Trivial PerlSAX handler |
| XML::Handler::Subs | PerlSAX handler base class for calling user-defined subs |
| XML::Handler::XMLWriter | PerlSAX handler for writing readable XML |
| XML::Handler::YAWriter | Yet another PerlSAX XML Writer 0.15 |
| XML::Node | Node-based XML parsing: a simplified interface to XML |
| XML::Parser | Perl module for parsing XML documents |
| XML::Parser::Expat | Low-level access to James Clark's expat XML parser |
| XML::Parser::PerlSAX | PerlSAX parser using XML::Parser |
| XML::Parser::PyxParser | Convert ESIS of nsgmls or Pyxie to PerlSAX |
| XML::PatAct::Amsterdam | Action module for simplistic style sheets |
| XML::PatAct::MatchName | Pattern module for matching element names |
| XML::PatAct::ToObjects | Action module for creating Perl objects |
| XML::PYX | XML to PYX generator |
| XML::QL | XML query language |
| XML::RegExp | Regular expressions for XML tokens |
| XML::Registry | Perl module for loading and saving an XML registry |
| XML::RSS | Creates and updates RSS files |
| XML::SAX2Perl | Translates PerlSAX methods to Java/CORBA-style methods |
| XML::Simple | Trivial API for reading and writing XML (esp. config files) |
| XML::Stream | Creates an XML Stream connection and parses return data |
| XML::Stream::Namespace | Object to make defining namespaces easier |
| XML::Template | Perl XML template instantiation |
| XML::Twig | Perl module for processing huge XML documents in tree mode |
| XML::UM | Converts UTF-8 strings to any encoding supported by XML::Encoding |
| XML::Writer | Perl extension for writing XML documents |
| XML::XPath | Set of modules for parsing and evaluating XPath |
| XML::XPath::Boolean | Boolean true/false values |
| XML::XPath::Builder | SAX handler for building an XPath tree |
| XML::XPath::Literal | Simple string values |
| XML::XPath::Node | Internal representation of a node |
| XML::XPath::NodeSet | List of XML document nodes |
| XML::XPath::Number | Simple numeric values |
| XML::XPath::PerlSAX | PerlSAX event generator |
| XML::XPath::XMLParser | Default XML parsing class that produces a node tree |
| XML::XQL | Perl module for querying XML tree structures with XQL |
| XML::XQL::Date | Adds an XQL::Node type for representing and comparing dates and times |
| XML::XQL::DOM | Adds XQL support to XML::DOM nodes |
| XML::XSLT | Perl module for processing XSLT |
| XMLNews::HTMLTemplate | Module for converting NITF to HTML |
| XMLNews::Meta | Module for reading and writing XMLNews metadata files |
Most of the Perl XML modules that appear in Table 20.2 must be downloaded and installed before you can use them. (The process is lengthy, if straightforward; download manager tools exist for Windows and UNIX that can manage the download and installation process and make things easier.) The Perl distribution comes with some XML support built in, such as the XML::Parser module.
Here's an example putting XML::Parser to work. In this case, I'll parse an XML document and print it out using Perl. The XML::Parser module can handle callbacks calling subroutines when the beginning of an element is encountered as well as the text content in an element and the end of an element. Here's how I set up such calls to the handler subroutines start_ handler, char_handler, and end_handler, respectively, creating a new parser object named $parser in Perl:
use XML::Parser; $parser = new XML::Parser(Handlers => {Start => \&start_handler, End => \&end_handler, Char => \&char_handler}); . . . Now I need an XML document to parse. I'll use a document we've seen before, meetings.xml (in Chapter 7, "Handling XML Documents with JavaScript"):
<?xml version="1.0"?> <MEETINGS> <MEETING TYPE="informal"> <MEETING_TITLE>XML</MEETING_TITLE> <MEETING_NUMBER>2079</MEETING_NUMBER> <SUBJECT>XML</SUBJECT> <DATE>6/1/2002</DATE> <PEOPLE> <PERSON ATTENDANCE="present"> <FIRST_NAME>Edward</FIRST_NAME> <LAST_NAME>Samson</LAST_NAME> </PERSON> <PERSON ATTENDANCE="absent"> <FIRST_NAME>Ernestine</FIRST_NAME> <LAST_NAME>Johnson</LAST_NAME> </PERSON> <PERSON ATTENDANCE="present"> <FIRST_NAME>Betty</FIRST_NAME> <LAST_NAME>Richardson</LAST_NAME> </PERSON> </PEOPLE> </MEETING> </MEETINGS>
I can parse that document using the $parser object's parsefile method:
use XML::Parser; $parser = new XML::Parser(Handlers => {Start => \&start_handler, End => \&end_handler, Char => \&char_handler}); $parser->parsefile('meetings.xml'); . . . All that remains is to create the subroutines start_handler, char_handler, and end_handler. I'll begin with start_handler, which is called when the start of an XML element is encountered. The name of the element is stored in item 1 of the standard Perl array @_, which holds the arguments passed to subroutines. I can display that element's opening tag like this:
use XML::Parser; $parser = new XML::Parser(Handlers => {Start => \&start_handler, End => \&end_handler, Char => \&char_handler}); $parser->parsefile('meetings.xml'); sub start_handler { print "<$_[1]>\n"; } . . . I'll also print out the closing tag in the end_handler subroutine:
use XML::Parser; $parser = new XML::Parser(Handlers => {Start => \&start_handler, End => \&end_handler, Char => \&char_handler}); $parser->parsefile('meetings.xml'); sub start_handler { print "<$_[1]>\n"; } sub end_handler { print "</$_[1]>\n"; } . . . I can print out the text content of the element in the char_handler subroutine, after removing discardable whitespace:
use XML::Parser; $parser = new XML::Parser(Handlers => {Start => \&start_handler, End => \&end_handler, Char => \&char_handler}); $parser->parsefile('meetings.xml'); sub start_handler { print "<$_[1]>\n"; } sub end_handler { print "</$_[1]>\n"; } sub char_handler { if(index($_[1], " ") < 0 &&index($_[1], "\n") < 0){ print "$_[1]\n"; } } That completes the code. Running this Perl script gives you the following result, showing that meetings.xml was indeed parsed successfully:
<MEETINGS> <MEETING> <MEETING_TITLE> XML </MEETING_TITLE> <MEETING_NUMBER> 2079 </MEETING_NUMBER> <SUBJECT> XML </SUBJECT> <DATE> 6/1/2002 </DATE> <PEOPLE> <PERSON> <FIRST_NAME> Edward </FIRST_NAME> <LAST_NAME> Samson </LAST_NAME> </PERSON> <PERSON> <FIRST_NAME> Ernestine </FIRST_NAME> <LAST_NAME> Johnson </LAST_NAME> </PERSON> <PERSON> <FIRST_NAME> Betty </FIRST_NAME> <LAST_NAME> Richardson </LAST_NAME> </PERSON> </PEOPLE> </MEETING> </MEETINGS>
Writing this script, parsing the document, and implementing callbacks like this in Perl may remind you quite closely of the Java SAX work in Chapter 12.
I'll take a look at serving XML documents from Perl scripts next. Unfortunately, Perl doesn't come with a built-in database protocol as powerful as JDBC and its ODBC handler, or ASP and its ADO support. The database support that comes built into Perl is based on DBM files, which are hash-based databases. (Now, of course, you can install many Perl modules to interface to other database protocols, from ODBC to Oracle.)
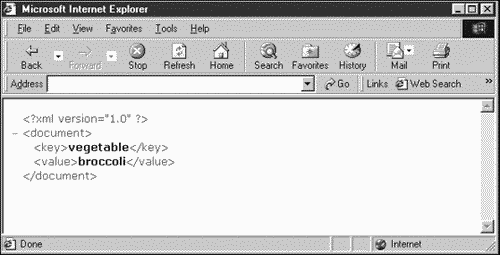
In this case, I'll write a Perl script that will let you enter a key (such as vegetable) and a value (such as broccoli) to store in a database built in the NDBM database format, which is a default format that Perl supports. This database will be stored on the server. When you enter a key into the page created by this script, the code checks the database for a match to that key; if found, it returns the key and its value. For example, when I enter the key vegetable and the value broccoli, that key/value pair is stored in the database. When I subsequently search for a match to the key vegetable, the script returns both that key and the matching value, broccoli, in an XML document using the tags <key> and <value>:
<?xml version="1.0" ?> <document> <key>vegetable</key> <value>broccoli</value> </document>
Figure 20.4 shows the results of the CGI script. To add an entry to the database, you enter a key into the text field marked Key To Add to the Database and a corresponding value in the text field marked Value to Add to the Database, and then click the Add to Database button. In Figure 20.4, I'm storing the value broccoli under the key vegetable.
Figure 20.4. A Perl CGI script database manager.
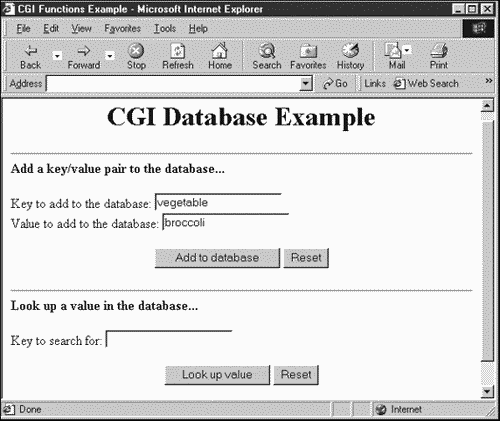
To retrieve a value from the database, you enter the value's key in the box marked Key to Search For, and click the Look Up Value button. The database is searched and an XML document with the results is sent to the client, as shown in Figure 20.5. In this case, I've searched for the key vegetable. Although this XML document is displayed in a browser, it's relatively easy to use Internet sockets in Perl code to let you read and handle such XML without a browser.
Figure 20.5. An XML document generated by a Perl script.
In this Perl script, I'll use CGI.pm, the official Perl CGI module that comes with the standard Perl distribution. I begin by creating the Web page shown earlier in Figure 20.4, including all the HTML controls we'll need:
#!/usr/local/bin/perl use Fcntl; use NDBM_File; use CGI; $co = new CGI; if(!$co->param()) { print $co->header, $co->start_html('CGI Functions Example'), $co->center($co->h1('CGI Database Example')), $co->hr, $co->b("Add a key/value pair to the database "), $co->start_form, "Key to add to the database: ", $co->textfield(-name=>'key',-default=>'', -override=>1), $co->br, "Value to add to the database: ", $co->textfield(-name=>'value',-default=>'', -override=>1), $co->br, $co->hidden(-name=>'type',-value=>'write', -override=>1), $co->br, $co->center( $co->submit('Add to database'), $co->reset ), $co->end_form, $co->hr, $co->b("Look up a value in the database "), $co->start_form, "Key to search for: ",$co->textfield(-name=>'key',-default=>'', -override=>1), $co->br, $co->hidden(-name=>'type',-value=>'read', -override=>1), $co->br, $co->center( $co->submit('Look up value'), $co->reset ), $co->end_form, $co->hr; print $co->end_html; } . . . This CGI creates two HTML forms one for use when you want to store key/value pairs, and one when you want to enter a key to search for. I didn't specify a target for these two HTML forms in this page to send their data, so the data will simply be sent back to the same script. I can check whether the script has been called with data to be processed by checking the return value of the CGI.pm param method; if it's true, data is waiting for us to work on.
The document this script returns is an XML document, not the default HTML so how do you set the content type in the HTTP header to indicate that? You do so by using the header method, setting the type named parameter to "application/xml". This code follows the previous code in the script:
if($co->param()) { print $co->header(-type=>"application/xml"); print "<?xml version = \"1.0\"?>"; print "<document>"; . . . I keep the two HTML forms separate with a hidden data variable named type. If that variable is set to "write", I enter the data that the user supplied into the database:
if($co->param()) { print $co->header(-type=>"application/xml"); print "<?xml version = \"1.0\"?>"; print "<document>"; if($co->param('type') eq 'write') { tie %dbhash, "NDBM_File", "dbdata", O_RDWR|O_CREAT, 0644; $key = $co->param('key'); $value = $co->param('value'); $dbhash{$key} = $value; untie %dbhash; if ($!) { print "There was an error: $!"; } else { print "$key=>$value stored in the database"; } } . . . Otherwise, I search the database for the key the user has specified, and return both the key and the corresponding value in an XML document:
if($co->param()) { print $co->header(-type=>"application/xml"); print "<?xml version = \"1.0\"?>"; print "<document>"; if($co->param('type') eq 'write') { tie %dbhash, "NDBM_File", "dbdata", O_RDWR|O_CREAT, 0644; $key = $co->param('key'); $value = $co->param('value'); $dbhash{$key} = $value; untie %dbhash; if ($!) { print "There was an error: $!"; } else { print "$key=>$value stored in the database"; } } else { tie %dbhash, "NDBM_File", "dbdata", O_RDWR|O_CREAT, 0644; $key = $co->param('key'); $value = $dbhash{$key}; print "<key>"; print $key; print "</key>"; print "<value>"; print $value; print "</value>"; if ($value) { if ($!) { print "There was an error: $!"; } } else { print "No match found for that key"; } untie %dbhash; } print "</document>"; } In this way, we've been able to store data in a database using Perl, and retrieve that data formatted as XML. Listing 20.1 provides the complete listing for this CGI script, dbxml.cgi. Of course, doing everything yourself like this is the hard way if you get into Perl XML development, you should take a close look at the dozens of Perl XML modules available at CPAN.
Listing 20.1 dbxml.cgi
#!/usr/local/bin/perl use Fcntl; use NDBM_File; use CGI; $co = new CGI; if(!$co->param()) { print $co->header, $co->start_html('CGI Functions Example'), $co->center($co->h1('CGI Database Example')), $co->hr, $co->b("Add a key/value pair to the database "), $co->start_form, "Key to add to the database: ", $co->textfield(-name=>'key',-default=>'', -override=>1), $co->br, "Value to add to the database: ", $co->textfield(-name=>'value',-default=>'', -override=>1), $co->br, $co->hidden(-name=>'type',-value=>'write', -override=>1), $co->br, $co->center( $co->submit('Add to database'), $co->reset ), $co->end_form, $co->hr, $co->b("Look up a value in the database "), $co->start_form, "Key to search for: ",$co->textfield(-name=>'key',-default=>'', -override=>1), $co->br, $co->hidden(-name=>'type',-value=>'read', -override=>1), $co->br, $co->center( $co->submit('Look up value'), $co->reset ), $co->end_form, $co->hr; print $co->end_html; } if($co->param()) { print $co->header(-type=>"application/xml"); print "<?xml version = \"1.0\"?>"; print "<document>"; if($co->param('type') eq 'write') { tie %dbhash, "NDBM_File", "dbdata", O_RDWR|O_CREAT, 0644; $key = $co->param('key'); $value = $co->param('value'); $dbhash{$key} = $value; untie %dbhash; if ($!) { print "There was an error: $!"; } else { print "$key=>$value stored in the database"; } } else { tie %dbhash, "NDBM_File", "dbdata", O_RDWR|O_CREAT, 0644; $key = $co->param('key'); $value = $dbhash{$key}; print "<key>"; print $key; print "</key>"; print "<value>"; print $value; print "</value>"; if ($value) { if ($!) { print "There was an error: $!"; } } else { print "No match found for that key"; } untie %dbhash; } print "</document>"; } Wireless Markup Language
One of the XML applications getting a lot of attention these days is Wireless Markup Language (WML). WML and its associated protocol, the Wireless Application Protocol (WAP), are targeted at handheld devices such as cellular phones, PDAs, and other devices with restricted hardware capabilities. WML represents a limited-syntax language that's relatively easy to implement for such devices, and the programs that use WML in those devices are often called microbrowsers.
The following list describes some WML resources:
-
http://www.wapforum.org. A great resource for all things WML. Acts as a clearinghouse for information.
-
http://wap.colorline.no/wap-faq/. An independent WAP FAQ, with lots of information, including a list of WAP service providers.
-
http://www.apachesoftware.com. All about Klondike, a popular WML browser.
-
http://hotfiles.zdnet.com/cgi-bin/texis/swlib/hotfiles/info.html?fcode=0018AV. Download site for Klondike.
-
http://www.apachesoftware.com/wml/wmldemo.wml. Klondike WML examples.
-
http://www.wap-uk.com/Developers/Tutorial.htm. A WML tutorial.
-
http://www.wapdesign.org.uk/tutorial.html. Another WML tutorial.
-
http://www.wapdesign.org.uk/server.html. Tutorial about serving WAP documents.
-
http://www.wapforum.org/DTD/wml_1.1.xml. The WML 1.1 (the current version) DTD. A great place to check to resolve syntax questions.
Table 20.3 lists all the WML elements and their attributes.
| Element | Does This | Attributes |
|---|---|---|
| a | Hyperlink | class, href, id, title, xml:lang |
| access | Access element | class, domain, id, path |
| anchor | Creates an anchor | class, id, title, xml:lang |
| b | Bold | class, id, xml:lang |
| big | Big text | class, id, xml:lang |
| br | Line break | class, id, xml:lang |
| card | Creates a card | class, do, id, label, name, newcontext, onenterbackward, onenterforward, ontimer, optional, ordered, title, type, xml:lang, xml:lang |
| em | Emphasized | class, id, xml:lang |
| fieldset | Field set | class, id, title, xml:lang |
| go | Navigates | accept-charset, class, href, id, method, sendreferer |
| head | Head section | class, id |
| i | Italic | class, id, xml:lang |
| img | Handles images | align, alt, class, height, hspace, id, localsrc, src, vspace, width, xml:lang |
| input | Text field | class, emptyok, format, id, maxlength, name, size, tabindex, title, type, value, xml:lang |
| meta | Holds metadata | class, content, forua, http-equiv, id, name, scheme |
| noop | No operation (placeholder) | class, id |
| onevent | Handles an event | class, id, type |
| optgroup | Creates an option group | class, id, title, xml:lang |
| option | Creates an option | class, id, onpick, title, value, xml:lang |
| p | Paragraph | align, mode, xml:lang, class, id |
| postfield | Posts field data | class, id, name, value |
| prev | Moves to previous card | (none) |
| refresh | Handles refreshes | class, id |
| select | Selects control | class, id, iname, ivalue, multiple, name, tabindex, title, value xml:lang |
| setvar | Sets a variable | class, id, name, value |
| small | Small text | class, id, xml:lang |
| strong | Strong | class, id, xml:lang |
| table | Creates a table | align, class, columns, id, title, xml:lang |
| td | Table cell data | class, id, xml:lang |
| template | Template | class, id, onenterbackward, onenterforward, ontimer |
| timer | Creates a timer | class, id, name, value |
| tr | Table row | class, id |
| u | Underlines | class, id, xml:lang |
In addition, WML supports these character entities:
-
& is an ampersand (&)
-
' is an apostrophe (')
-
> is the greater than symbol (>)
-
< is the less than symbol (<)
-
is a nonbreaking space (' ')
-
" is a quotation mark (")
-
­ is a soft hyphen (-).
In the following sections, I use the popular Apache Klondike WML browser, which you can download for free from links at http://www.apachesoftware.com. It's a well-designed browser; if you want to follow along, I encourage you to install it.
Getting Starting with WML
Microbrowsers don't have a lot of display area to spare, so WML documents are divided into cards, which are displayed one at a time. A WML document is called a deck of such cards. A deck begins and ends with the <wml> tag, and each card in a deck begins and ends with the <card> tag. When a microbrowser reads a WML document, it reads the whole deck, although you see only one card at a time.
You start WML documents with the XML declaration:
<?xml version="1.0"?> . . .
Like XHTML, WML uses a <!DOCTYPE> element with a formal public identifier, except that the authorization body is the WAP Forum, not W3C:
<?xml version="1.0"?> <!DOCTYPE wml PUBLIC "-//WAPFORUM//DTD WML 1.1//EN" "http://www.wapforum.org/DTD/wml_1.1.xml"> . . .
The document, or deck, element is <wml>:
<?xml version="1.0"?> <!DOCTYPE wml PUBLIC "-//WAPFORUM//DTD WML 1.1//EN" "http://www.wapforum.org/DTD/wml_1.1.xml"> <wml> . . . </wml>
You create a card in this deck with the <card> element. In this case, I'll give this card the ID Card1 and the title First WML Example (which will appear in Klondike's title bar):
<?xml version="1.0"?> <!DOCTYPE wml PUBLIC "-//WAPFORUM//DTD WML 1.1//EN" "http://www.wapforum.org/DTD/wml_1.1.xml"> <wml> <card id="Card1" title="First WML Example"> . . . </card> </wml>
You can use comments in WML just as you can in XML:
<?xml version="1.0"?> <!DOCTYPE wml PUBLIC "-//WAPFORUM//DTD WML 1.1//EN" "http://www.wapforum.org/DTD/wml_1.1.xml"> <wml> <card id="Card1" title="First WML Example"> <!-- This is a comment --> . . . </card> </wml>
Every card must have a <p> (paragraph) element, and I'll place some greeting text in that element:
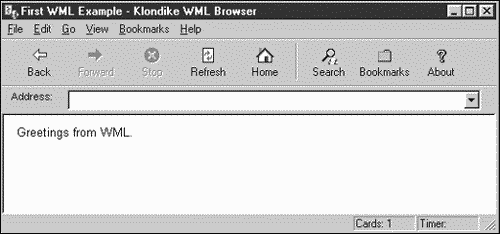
<?xml version="1.0"?> <!DOCTYPE wml PUBLIC "-//WAPFORUM//DTD WML 1.1//EN" "http://www.wapforum.org/DTD/wml_1.1.xml"> <wml> <card id="Card1" title="First WML Example"> <!-- This is a comment --> <p> Greetings from WML. </p> </card> </wml>
That's all it takes. Figure 20.6 shows this WML document displayed in Klondike.
Figure 20.6. A first WML document.
Setting Text Alignment
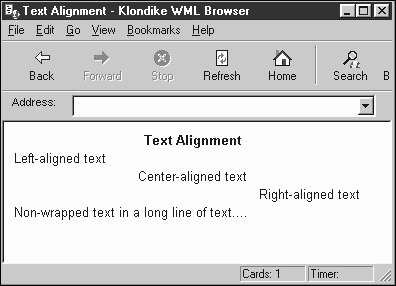
The <p> element has an align attribute, which is supported by Klondike and which is useful for aligning text. You can assign this attribute the value "left", "center", or "right". There's also a mode attribute that you can use to specify whether you want text wrapped by assigning values of "wrap" or "nowrap".
The following example demonstrates text alignment, using these attributes of the <p> element:
<?xml version="1.0"?> <!DOCTYPE wml PUBLIC "-//WAPFORUM//DTD WML 1.1//EN" "http://www.wapforum.org/DTD/wml_1.1.xml"> <wml> <card id="Card1" title="Text Alignment"> <p align="center"><b>Text Alignment</b></p> <p align="left">Left-aligned text</p> <p align="center">Center-aligned text</p> <p align="right">Right-aligned text</p> <p mode="nowrap">Non-wrapped text in a long line of text .</p> </card> </wml>
Figure 20.7 shows this WML document in Klondike.
Figure 20.7. Aligning text in a WML document.
Basic Text Styling
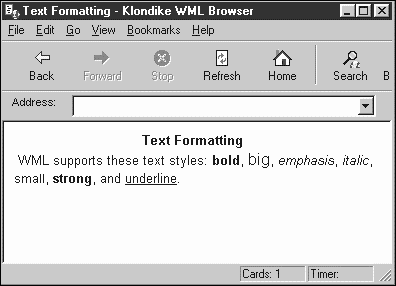
WML also supports several basic text-styling elements modeled after HTML, such as <b> for bold text, <i> for italic text, <u> for underlined text, and so on. Here's an example putting these basic text-styling elements to work (note that not all microbrowsers will support all these styling elements):
<?xml version="1.0"?> <!DOCTYPE wml PUBLIC "-//WAPFORUM//DTD WML 1.1//EN" "http://www.wapforum.org/DTD/wml_1.1.xml"> <wml> <card id="Card1" title="Text Formatting"> <p align="center"><b>Text Formatting</b></p> <p> WML supports these text styles: <b>bold</b>, <big>big</big>, <em>emphasis</em>, <i>italic</i>, <small>small</small>, <strong>strong</strong>, and <u>underline</u>. </p> </card> </wml>
Figure 20.8 shows the results displayed in the Klondike browser.
Figure 20.8. Text formatting in WML.
Buttons
You can create buttons in WML with the <do> element. For example, suppose that I want to let the user navigate to the WML document page at http://www.starpowder.com/planets.wml. In that case, I'd start with the <do> element, setting the type attribute to "accept" and adding a label with the label attribute to create the new button:
<?xml version="1.0"?> <!DOCTYPE wml PUBLIC "-//WAPFORUM//DTD WML 1.1//EN" "http://www.wapforum.org/DTD/wml_1.1.xml"> <wml> <card id="Card1" title="Buttons"> <p align="center"><b>Buttons</b></p> <do type="accept" label="Go to a new page "> . . . </do> </card> </wml>
You can navigate to the new document with the <go> element, specifying the target URI with the href element:
<?xml version="1.0"?> <!DOCTYPE wml PUBLIC "-//WAPFORUM//DTD WML 1.1//EN" "http://www.wapforum.org/DTD/wml_1.1.xml"> <wml> <card id="Card1" title="Buttons"> <p align="center"><b>Buttons</b></p> <do type="accept" label="Go to a new page "> <go href="http://www.starpowder.com/planets.wml"/> </do> </card> </wml>
Figure 20.9 shows the results of this WML document; the button appears in the browser. Clicking that button will make the browser navigate to http://www.starpowder.com/planets.wml.
Figure 20.9. Displaying a button in a WML document.
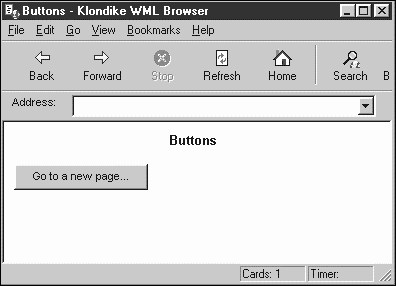
As mentioned earlier, you can have multiple cards in a deck, but you see only one at a time. So how do you get to the others? You do so with buttons. In this case, you assign the ID of the target card to the href attribute in the <go> element.
Here's an example with two cards and a button that lets the user navigate from the first card to the second one note that the href attribute of the button's <go> element points to the ID value of the target card:
<?xml version="1.0"?> <!DOCTYPE wml PUBLIC "-//WAPFORUM//DTD WML 1.1//EN" "http://www.wapforum.org/DTD/wml_1.1.xml"> <wml> <card id="Card1" title="Multiple Cards"> <p align="center"><b>Multiple Cards</b></p> <do type="accept" label="Go to Card 2"> <go href="#Card2"/> </do> </card> <card id="Card2" title="Card 2"> <p> This is card 2. </p> </card> </wml>
For the results of this WML, see Figure 20.10. When the user clicks the button, the browser navigates to card 2 in the deck. That's how you get from card to card in WML with browser navigation techniques.
Figure 20.10. Displaying a navigation button in a WML document.
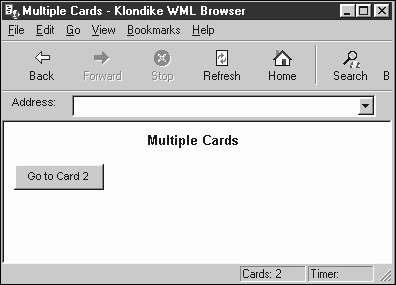
So, having navigated to card 2, how does the user get back to card 1? Take a look at the next topic.
The Back Button
WML supports a special button that you'll often see displayed the Back button. To add a Back button to card 2, I use the WML <prev> element like this:
<?xml version="1.0"?> <!DOCTYPE wml PUBLIC "-//WAPFORUM//DTD WML 1.1//EN" "http://www.wapforum.org/DTD/wml_1.1.xml"> <wml> <card id="Card1" title="Multiple Cards"> <p align="center"><b>Multiple Cards</b></p> <do type="accept" label="Go to Card 2"> <go href="#Card2"/> </do> </card> <card id="Card2" title="Card 2"> <p> This is card 2. </p> <do type="prev" label="Back"> <prev/> </do> </card> </wml>
That's all it takes. As Figure 20.11 shows, a Back button appears in card 2. When the user clicks this button, the browser navigates back to the previous card. Bear in mind that the user uses buttons to navigate from card to card in a deck, so it's a good idea to include a Back button on every card (microbrowsers typically won't have a built-in Back button, although Klondike does).
Figure 20.11. Displaying a Back button.
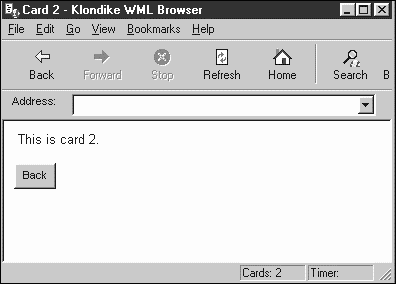
Hyperlinks
WML also supports an <a> element for hyperlinks. Like the HTML version of this element, you use the href attribute to specify the target URI to which you want to navigate. Here's an example that takes the user to the Apache WML example:
<?xml version="1.0"?> <!DOCTYPE wml PUBLIC "-//WAPFORUM//DTD WML 1.1//EN" "http://www.wapforum.org/DTD/wml_1.1.xml"> <wml> <card id="Card1" title="Hyperlinks"> <p align="center"><b>Hyperlinks</b></p> <p> Want to see some WML examples? Take a look at the <a href="http://www.apachesoftware.com/wml/wmldemo.wml"> Apache examples </a>. </p> </card> </card> </wml>
Figure 20.12 shows the results. When the user clicks the hyperlink, Klondike navigates to the target URI.
Figure 20.12. A WML hyperlink.
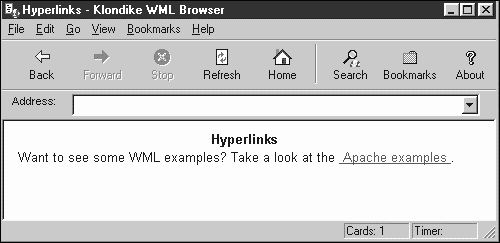
Tables
You can create tables in WML using markup that matches the HTML <table>, <tr> , and <td> elements (there are no <th>, <tbody>, <thead>, or <tfoot> elements). Notice how closely the following example resembles an HTML table:
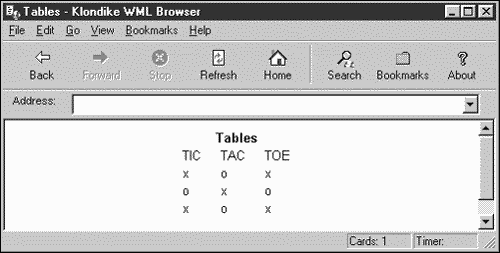
<?xml version="1.0"?> <!DOCTYPE wml PUBLIC "-//WAPFORUM//DTD WML 1.1//EN" "http://www.wapforum.org/DTD/wml_1.1.xml"> <wml> <card id="Card1" title="Tables"> <p align="center"><b>Tables</b></p> <p align="center"> <table columns="3"> <tr> <td>TIC</td> <td>TAC</td> <td>TOE</td> </tr> <tr> <td>x</td> <td>o</td> <td>x</td> </tr> <tr> <td>o</td> <td>x</td> <td>o</td> </tr> <tr> <td>x</td> <td>o</td> <td>x</td> </tr> </table> </p> </card> </wml>
Figure 20.13 shows the results of this WML.
Figure 20.13. WML tables.
Text Input
WML also supports an <input> element. If you set this element's type attribute to "text", you can display a text field, much like HTML text fields (not all microbrowsers support this element, however).
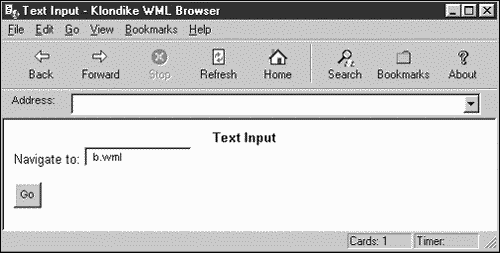
In this example, I'll let the user enter the URI of a local file in a text field. When the user clicks a button labeled Go, the browser navigates to that URI. I begin by creating the text field:
<?xml version="1.0"?> <!DOCTYPE wml PUBLIC "-//WAPFORUM//DTD WML 1.1//EN" "http://www.wapforum.org/DTD/wml_1.1.xml"> <wml> <card id="Card1" title="Text Input"> <p align="center"><b>Text Input</b></p> <p> Navigate to: <input type="text" name="uri"/> . . .
When the user clicks the Go button, I need some way to read what was entered in the text field. Here, I've given the text field the name uri. I can refer to the text in the text field as $(uri) this way in the Go button's <go> element:
<?xml version="1.0"?> <!DOCTYPE wml PUBLIC "-//WAPFORUM//DTD WML 1.1//EN" "http://www.wapforum.org/DTD/wml_1.1.xml"> <wml> <card id="Card1" title="Text Input"> <p align="center"><b>Text Input</b></p> <p> Navigate to: <input type="text" name="uri"/> <do type="accept" label="Go"> <go href="$(uri)"/> </do> </p> </card> </wml>
Figure 20.14 shows the results. When the user enters the URI of a local document in the text field I'm using b.wml in this figure and clicks the Go button, the browser reads the name of the document from the text field and opens that document.
Figure 20.14. Handling text input.
This topic has also introduced us to the concept of WML variables, such as $(uri). Being capable of handling variables directly like this gives WML an interesting mix of markup and scripting capabilities. There's also a <setvar> element that lets you set the value of variables like this:
<setvar name="uri" value="b.wml" />
I'll put variables to work in the next topic.
Select Elements
Like HTML, WML supports a <select> element to display a select control (which is like a drop-down list). As an example, I'll create a select control. After making a selection, the user can click a Read Selection button, which navigates to a new card that displays the selection.
I start by creating the select control and giving it the name "selection":
<?xml version="1.0"?> <!DOCTYPE wml PUBLIC "-//WAPFORUM//DTD WML 1.1//EN" "http://www.wapforum.org/DTD/wml_1.1.xml"> <wml> <card id="Card1" title="Select"> <p align="center"><b>Select</b></p> <select name="selection"> . . . </select>
As in HTML, you specify the items in the select control with <option> elements:
<?xml version="1.0"?> <!DOCTYPE wml PUBLIC "-//WAPFORUM//DTD WML 1.1//EN" "http://www.wapforum.org/DTD/wml_1.1.xml"> <wml> <card id="Card1" title="Select"> <p align="center"><b>Select</b></p> <select name="selection"> <option value="broccoli">Broccoli</option> <option value="green beans">Green Beans</option> <option value="spinach">Spinach</option> </select> . . .
Now I add the Read Selection button that will navigate to a new card, card 2:
<?xml version="1.0"?> <!DOCTYPE wml PUBLIC "-//WAPFORUM//DTD WML 1.1//EN" "http://www.wapforum.org/DTD/wml_1.1.xml"> <wml> <card id="Card1" title="Select"> <p align="center"><b>Select</b></p> <select name="selection"> <option value="broccoli">Broccoli</option> <option value="green beans">Green Beans</option> <option value="spinach">Spinach</option> </select> <do type="accept" label="Read selection"> <go href="#card2"/> </do> . . .
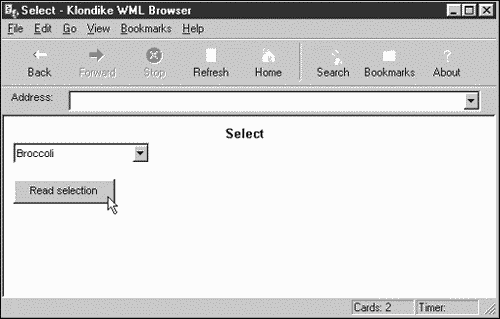
In card 2, I'll display the value in the select control, which I can refer to as $(selection). The value of a select control is the string in the value attribute of the currently selected item's <option> element. In card 2, here's the WML to display the current selection:
<?xml version="1.0"?> <!DOCTYPE wml PUBLIC "-//WAPFORUM//DTD WML 1.1//EN" "http://www.wapforum.org/DTD/wml_1.1.xml"> <wml> <card id="Card1" title="Select"> <p align="center"><b>Select</b></p> <select name="selection"> <option value="broccoli">Broccoli</option> <option value="green beans">Green Beans</option> <option value="spinach">Spinach</option> </select> <do type="accept" label="Read selection"> <go href="#card2"/> </do> </card> <card id="card2" title="Card 2"> <p> You selected $(selection). </p> </card> </wml>
Figure 20.15 shows how this works; I've selected the item Broccoli.
Figure 20.15. Making selections.
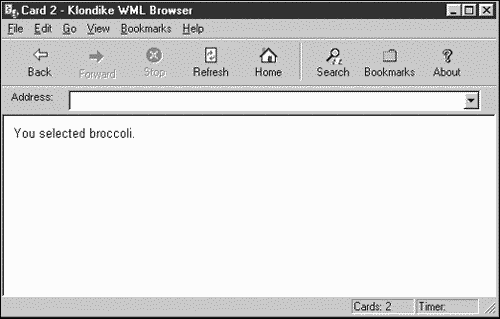
Clicking the Read Selection button goes to card 2, which reports the selection, as shown in Figure 20.16.
Figure 20.16. Reporting selections.
Another useful aspect of select controls is the onpick attribute of <option> elements, which enables you to navigate to new URIs as soon as the user chooses an item in a select control. Here's an example. All I have to do is to set the onpick attribute of a number of <option> elements to URIs; when the user chooses one, the browser navigates to the corresponding URI:
<?xml version="1.0"?> <!DOCTYPE wml PUBLIC "-//WAPFORUM//DTD WML 1.1//EN" "http://www.wapforum.org/DTD/wml_1.1.xml"> <wml> <card id="Card1" title="Select"> <p align="center"><b>Select</b></p> <select name="selection"> <option onpick="http://www.starpowder.com/mercury.wml"> Mercury </option> <option onpick="http://www.starpowder.com/venus.wml"> Venus </option> <option onpick="http://www.starpowder.com/earth.wml"> Earth </option> </select> </card> </wml>
Timers
In WML, you can use a timer to measure a time period, and the browser will undertake some action when that period has expired. For example, if I assign a card's ontimer attribute to the ID of another card, the browser navigates to that card when the timer finishes:
<?xml version="1.0"?> <!DOCTYPE wml PUBLIC "-//WAPFORUM//DTD WML 1.1//EN" "http://www.wapforum.org/DTD/wml_1.1.xml"> <wml> <card id="Card1" ontimer="#card2" title="Timers"> . . . </card> . . .
You create a timer with the <timer> element and give it a time period (measured in tenths of a second) with the value attribute. Here I'm giving this card's timer a period of 10 seconds:
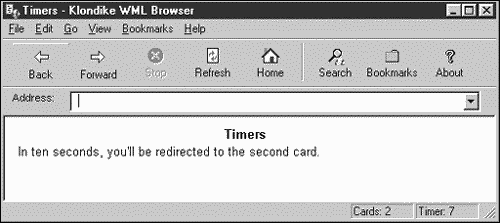
<?xml version="1.0"?> <!DOCTYPE wml PUBLIC "-//WAPFORUM//DTD WML 1.1//EN" "http://www.wapforum.org/DTD/wml_1.1.xml"> <wml> <card id="Card1" ontimer="#card2" title="Timers"> <p align="center"><b>Timers</b></p> <timer value="100"/> <p> In ten seconds, you'll be redirected to the second card. </p> </card> . . .
All that remains is to add the targeted card, card2:
<?xml version="1.0"?> <!DOCTYPE wml PUBLIC "-//WAPFORUM//DTD WML 1.1//EN" "http://www.wapforum.org/DTD/wml_1.1.xml"> <wml> <card id="Card1" ontimer="#card2" title="Timers"> <p align="center"><b>Timers</b></p> <timer value="100"/> <p> In ten seconds, you'll be redirected to the second card. </p> </card> <card id="card2" title="Welcome"> <p> Welcome to card 2. </p> </card> </wml>
When you open this deck, card 1 is displayed, as shown in Figure 20.17. After 10 seconds, the browser navigates to card 2. Klondike features a timer counter at lower right; in the figure, the timer indicates that 7 seconds are left in the timer.
Figure 20.17. Using a timer.
Connecting to the Server
You can also create forms in WML, which are much like HTML forms. The data in a WML form is encoded just as in HTML, so it can be uploaded to CGI scripts (not all microbrowsers support forms, however).
In the following example, I ask for user comments and send them back to a CGI script named comments.cgi. To start, I create a button with the label Upload Data, setting its method attribute to "post" and its href attribute to the URI to post to, "http://www.starpowder.com/comments.cgi", just as you might in an HTML form:
<?xml version="1.0"?> <!DOCTYPE wml PUBLIC "-//WAPFORUM//DTD WML 1.1//EN" "http://www.wapforum.org/DTD/wml_1.1.xml"> <wml> <card id="Card1" title="Uploading"> <p align="center"><b>Uploading</b></p> <do type="accept" label="Upload data"> <go method="post" href="http://www.starpowder.com/comments.cgi"> . . . </go> . . .
All that's left is to indicate the value of the data to upload and how to name that data. You do that with the <postfield> element's name and value attributes. In this case, I'll upload the text from a text field named "comments":
<?xml version="1.0"?> <!DOCTYPE wml PUBLIC "-//WAPFORUM//DTD WML 1.1//EN" "http://www.wapforum.org/DTD/wml_1.1.xml"> <wml> <card id="Card1" title="Uploading"> <p align="center"><b>Uploading</b></p> <do type="accept" label="Upload data"> <go method="post" href="www.starpowder.com/comments.cgi"> <postfield name="comments" value="$(comments)"/> </go> </do> <p> Please give us your comments: <input type="text" name="comments"/> </p> </card> </wml>
That's all it takes. The CGI script can now read the uploaded data as it would from any HTML document. Note that when you send back a response, you should format that response in WML, which means setting the Content Type HTTP header item to the WML MIME type, "text/vnd.wap.wml".
Images
You can also display images in WMF, but there's a catch. Images must be in a special WBMP format, and that format doesn't exactly permit the rich depth of colors to which you may be accustomed. In fact, WBMP format is black and white with no grayscale just 1 bit per pixel.
The following list describes some WBMP resources available online:
-
http://www.creationflux.com/laurent/wbmp.html. A shareware Adobe Photoshop plug-in for creating WBMP files.
-
http://www.gingco.de/wap/content/download.html. A downloadable image converter that converts images to WBMP format.
-
http://www.phnet.fi/public/jiikoo/ WAPDraw. A useful WBMP drawing program.
-
http://www.teraflops.com/wbmp Teraflops. An online converter that converts image files to WBMP files with a few simple clicks. Any HTML browser can download the resulting images unless the browser understands WBMP format, in which case the image will be displayed.
To display images, you probably won't be surprised to learn that WML has an <img> element. You set the alt, src, width, and height attributes of this element to display images, as in this example:
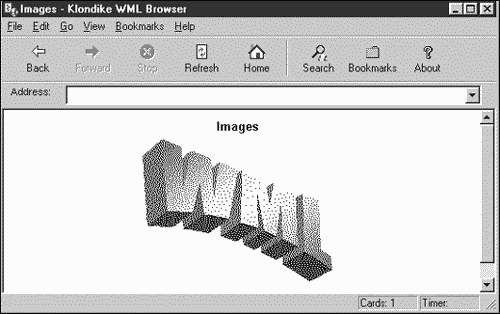
<?xml version="1.0"?> <!DOCTYPE wml PUBLIC "-//WAPFORUM//DTD WML 1.1//EN" "http://www.wapforum.org/DTD/wml_1.1.xml"> <wml> <card id="Card1" title="Images"> <p align="center"><b>Images</b></p> <p align="center"> <img alt="WML Image" src="image.wbmp" width="217" height="164"/> </p> </card> </wml>
Figure 20.18 shows this WML document, along with a WBMP image that I created for it to display.
Figure 20.18. Displaying an image.
And that's it for our exploration of WML and XML. We've come far in this book, from the very beginning up through valid and well-formed documents, DTDs, schemas, parsing XML with JavaScript, data binding, CSS, XML and Java, DOM and SAX parsers, XSL transformations, XSL formatting objects, XLinks, Xpointers, XHTML, RDF, CDF, and VML, and now WML and XML with JSP, ASP, Java servlets, and Perl. All that remains now is for you is to put all this incredible technology to work for yourself.
| CONTENTS |
EAN: 2147483647
Pages: 23