Creating Our First Script
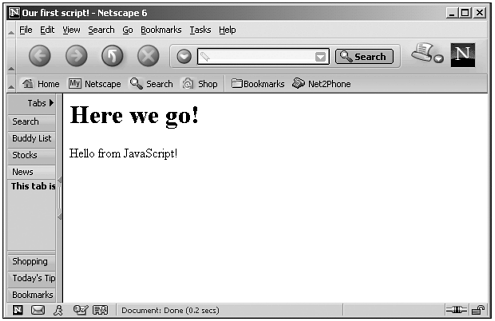
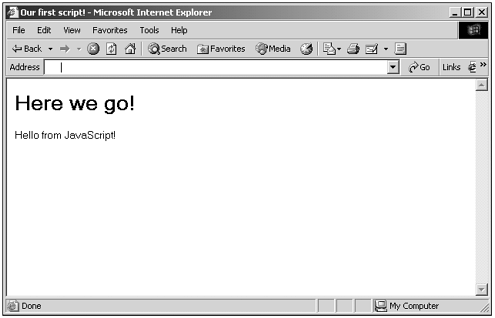
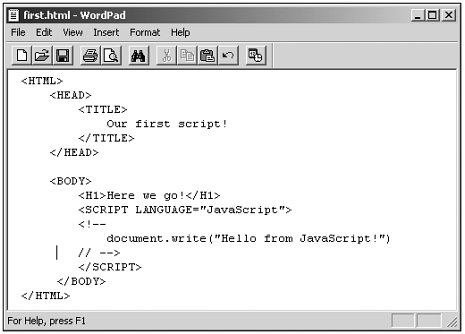
| This isn't one of those books that takes you through chapters of dry theory before getting started. This book is written from the scripter's point of view, which means that we want to put JavaScript to work. It's time to do that now. Some books wait until Chapter 3 or 4 before even getting to their first script, but not here. Here, we'll let JavaScript itself do the talking as we start our first script. Our first script will use JavaScript to write the text Hello from JavaScript! in a browser; you can see that text in Netscape Navigator 6.2 in Figure 1.1, and in Internet Explorer 6.0 in Figure 1.2. Figure 1.1. Our first example script in Netscape Navigator. Figure 1.2. Our first example script in Internet Explorer. So how do we get this result using JavaScript? The first step is to actually create the web page that will hold the JavaScript, and for that, we'll need a text editor. Choosing a Text EditorAny text editor you want to use to create web pages will be fine herein fact, the less fancy the better. Your web pages have to be readable by web browsers as plain text, which means you must save them as plain text. Fancy word processors, such as Microsoft Word, do not save documents as plain text by default. You can still use them, but you must be sure to save your web pages as plain text documents. (In Microsoft Word, for example, save them using the .txt option in the Save As dialog box.) A simpler text editor, such as WordPad in Windows or SimpleText in the Mac, is better. Make sure, however, that you're saving your documents in plain text format. (WordPad's default setting is rich text format, which won't work in browsersselect the Text Document format when you save your web pages using WordPad.) For example, you can see the first web page we'll create, first.html, in WordPad in Figure 1.3. Figure 1.3. Creating a web page in WordPad. Selecting a BrowserThe browser you use is up to you, of course. In this book, we'll cover the various versions available for both the Internet Explorer and the Netscape Navigator. Both are available for free online (Netscape Navigator at http://browsers.netscape.com/browsers/main.tmpl; Internet Explorer at www.microsoft.com/ie/default.asp). If you're programming for the general public, you should know that the Internet Explorer has the overwhelming market share at this point. However, the Netscape Navigator still has a lot to offer. Creating Your Programming EnvironmentIt's also worth giving a little thought to your programming environment. Although web pages generally available are stored on an Internet server, you can test your own web pages locally, on your own computer. There's no need to upload them to a server before looking at them in a browser. Knowing that can save you a great deal of time when you're developing your JavaScript-enabled pages and testing them. To open a web page on your computer, just use the File Open menu item in the Internet Explorer, or the File Open File menu item in the Netscape Navigator, and browse to the HTML file you want to open. That's all it takes. (Note that the Netscape Navigator can have some problems opening files on your computer if you're already connected to the Internet; if that happens to you, the best thing is to open Netscape Navigator before connecting to the Internet, which will make local files available.) Now testing and debugging your web pages with JavaScript scripts in them becomes a matter of editing the page in your text editor, saving it, and clicking the Reload button in your web browser to reload the newly edited version of your page. That's all you need for a basic programming environment. Note that if you're developing for a large audience, you also might want to have several versions of several browsers on your computer, loading your page into those browsers in turn to test for compatibility. This becomes more important the longer you program in JavaScript, and the longer your scripts become (unless you're programming for an audience that uses only one browser, of course, as on a corporate intranet). That establishes our programming environment; now let's get to the web page itself. Using HTMLWe're going to be using a lot of HTML in this book. Our JavaScript will be embedded in these pages. That means you should have a knowledge of HTML to be able to work profitably with what's coming up. You don't need a profound or in-depth knowledge, but you should have some. For example, take a look at this element: <A HREF="http://developer.netscape.com/docs/manuals/js/core/jsref15/contents.html"> The JavaScript 1.5 Reference Manual </A> You should know that this is an <A> element , a hyperlink in this case. This hyperlink is to the JavaScript 1.5 Reference Manual at developer.netscape.com. This element starts with an <A> opening tag and ends with the </A> closing tag . This element has one HTML attribute , HREF . HTML attributes are used to specify something about an element; in this case, the HREF attribute specifies the target of the hyperlink. If you are not comfortable with the level of HTML we'll be using here, take some time out and come up to speed on HTML. It won't take long, and will be well worth it for our work here. Some of what you see in our first web page in Figures 1.1 and 1.2 come from the straight HTML in our web page, not from JavaScript. For example, for the title, Our first script! , you see in the browser's title bar comes from a <TITLE> element in the web page's head section, and the text Here we go! comes from an <H1> header element in the web page's body section. Here, then, is how we start our first web page, first.html, making sure that the page's title and the heading text appear as it should: <HTML> <HEAD> <TITLE>Our first script!</TITLE> </HEAD> <BODY> <H1>Here we go!</H1> </BODY> </HTML> Enter this HTML into your text editor now and save it as first.html. That's the HTML in our web pagebut this book is all about JavaScript, and now it's time to embed JavaScript in this page. Adding Some JavaScriptJavaScript scripts are downloaded with web pages; the scripts themselves don't actually have to be embedded in the pagethey can be stored in separate script files as we'll see in this chapterbut they usually are. Here's the JavaScript we will embed in our first example, first.html: (Listing 01-01.html on the web site)<HTML> <HEAD> <TITLE>Our first script!</TITLE> </HEAD> <BODY> <H1>Here we go!</H1> <SCRIPT LANGUAGE="JavaScript"> <!-- document.write("Hello from JavaScript!") // --> </SCRIPT> </BODY> </HTML> Add this JavaScript to first.html now, save this document, and open it in a web browser. You should see the same kind of result that you see in Figures 1.1 and 1.2. The JavaScript part of the page writes the message Hello from JavaScript! , as you see in those figures. Congratulations, you're a JavaScript programmer! You've gotten your first JavaScript-enabled web page working. Now let's take a look at what we've done. |