| Eclipse also makes it easy to develop Javadoc documentation, the standard Java documentation that accompanies Java programs. You'll notice that in the code it generates, Eclipse inserts some text for Javadoc, as you see in Ch02_05.java : package org.eclipsebook.ch02; /** * @author Steven Holzner * * To change the template for this generated type comment go to * Window>Preferences>Java>Code Generation>Code and Comments */ . . . If you want to enter your own Javadoc, code assist helps you here, too; for example, if you enter @param and invoke code assist with Ctrl+Space, code assist will list the parameters a method takes. Typing @exception and using code assist will list the exceptions a method throws, and so on. Typing @ in a comment and pausing will make code assist display the Javadoc possibilities, like @author , @deprecated , and so on. To generate Javadoc from your code, select the Project  Generate Javadoc item, opening the Generate Javadoc dialog, which lets you select the project for which you want to create Javadocs. To browse a project's Javadocs, select the Navigate Open External Javadoc menu item. For example, you can see the generated Javadoc for the Ch02_05 project in Figure 2-19. Generate Javadoc item, opening the Generate Javadoc dialog, which lets you select the project for which you want to create Javadocs. To browse a project's Javadocs, select the Navigate Open External Javadoc menu item. For example, you can see the generated Javadoc for the Ch02_05 project in Figure 2-19. Figure 2-19. Browsing Javadoc 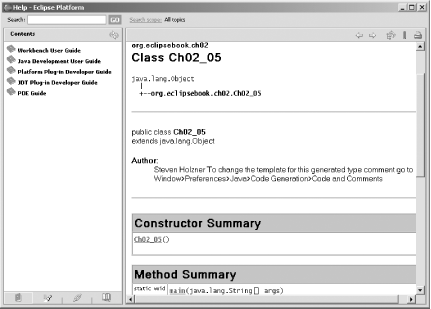 |