| Sometimes, you cannot know at design time exactly how your Data Adapter will be configured. The configuration might depend on user input or data in another table. You may want to use dynamic SQL where you build your statements at runtime instead of using replaceable parameters. This is especially useful in a query generator search screen where you do not know in advance what the user wants to search for. Create a Windows Forms project called ADOBook06-02. (Or get it from the web site.) If you want to work along, use the starter project, otherwise you can just follow along. We'll be using the same interface as the last project, so you can make a copy of it and delete the DataAdapter and Connection object. So far, we have not run any of these projects; we're using them only to demonstrate the DataAdapter configuration. We will run the project before the end of the chapter. The secret to configuring a DataAdapter is in knowing how to create the four Command objects that it contains. As we have seen, the Command object contains the SQL statements or stored procedure call syntax, and also contains a Connection object and the Parameter collection for passing values into and out of stored procedures or replaceable parameters in an SQL statement. Declaring the DataAdapter There are two ways to declare the DataAdapter. We've already used one of the ways, which is to just drag one from the toolbox and drop it onto your form. You can then cancel out of the wizard to have an unconfigured DataAdapter in your project. If your host object uses the Component model (forms do), you can use this method. You will then have access to the properties in the Property window and the events will appear in the event drop down in the code window. This is halfway between using the wizard and manually configuring the DataAdapter. You can still use the Property window to set SQL statements or stored procedures, and the DataAdapter will generate the Parameter collection for you. However, this is not what we want to demonstrate, is it? We will use the real programmer's way of creating a DataAdapter, by declaring it in code. We will declare our DataAdapter as a module-level variable. That way we have access to it throughout our form. We also need a Connection object, so let's declare them now. Private mCN As New SqlClient.SqlConnection() Private mDA As New SqlClient.SqlDataAdapter() I like to keep my variable names simple for these demos, and I'm sure you'll thank me for that. If this were a production application I would have named the objects a little more descriptively. In order to make the application work, we need one more object. We need to declare a DataSet object as well so we can display data in the grid. Private mDS As New DataSet() Initializing the DataAdapter The next question is: Where do we initialize the objects? In VB 6 there would be no issue here. We would do it in the Form_Load event. In VB .NET, we also have a Load event. We could initialize the objects there. But the Load event is really there for backward compatibility. In a true object-oriented language, we would use the class constructor. To find the default constructor, expand the region titled Windows Form Designer generated code. Right at the beginning you will find Sub New(). This is the default constructor. Place the initialization code in the constructor, after the call to InitializeComponent(). When you are finished, the constructor should look like this: (Our code is in bold.) Public Sub New() MyBase.New() 'This call is required by the Windows Form Designer. InitializeComponent() 'Add any initialization after the InitializeComponent() call Dim cmdSel As New SqlClient.SqlCommand() Try mCN.ConnectionString = "Server=em_server\vsdotnet;Database=Northwind;Integrated Security=SSPI" cmdSel.Connection = mCN cmdSel.CommandType = CommandType.Text cmdSel.CommandText = "select * from Customers" mDA.SelectCommand = cmdSel Catch errobj As Exception MsgBox(errobj.Message) End Try End Sub Let's go through it line by line. The first line of code assigns the Connection String to the SqlConnection object. Note that the Connection String will vary depending on the name of your server or machine. We discussed the ConnectionString property values at length in the last chapter. The next line assigns the Connection object to the Connection property of the SqlCommand object. We must create this object ourselves . It is declared at the beginning of our code block. We will describe all of the properties of the Command object later on in the chapter. Next we assign the CommandType property of the Command object. There are three possible values for this property: CommandType.Text, CommandType.StoredProcedure, and CommandType.TableDirect. Since we will be using a SQL statement we are going to use CommandType.Text. This property helps the Command object parse the value in the CommandText property. Next we assign the SQL statement to the CommandText property. Finally, we assign the Command object to the DataAdapter's SelectCommand property. That's it for a simple configuration. We have not yet created commands for updating the database. We will do this in the next phase of the demonstration. As we shall see, there are two ways to do this. Of course we can create then manually as we did with the SelectCommand. There is also a way to have the DataAdapter create them automatically using a helper class. That's it as far as initialization goes at this stage. We'll look into some more complex scenarios later on. Making it Work To get the program working, we need to do one more thing. We need to program the click event for the Refresh button to load and display the data. To do this, place this code in the click event: Private Sub btnRefresh_Click(ByVal sender As System.Object, ByVal e As System.EventArgs) Handles btnRefresh.Click Try mDA.Fill(mDS) DataGrid1.DataSource = mDS.Tables(0) Catch errobj As Exception MsgBox(errobj.Message) End Try End Sub In this code snippet the DataAdapter fills the DataSet with the output of the Select statement. Then the data grid's Data Source property is set to the first member of the DataSet's Tables collection. Now let's run the project. If all was done correctly, you should see the screen in Figure 6.19 when you click the Refresh button. Figure 6.19. Data Adapter Demo with data loaded. 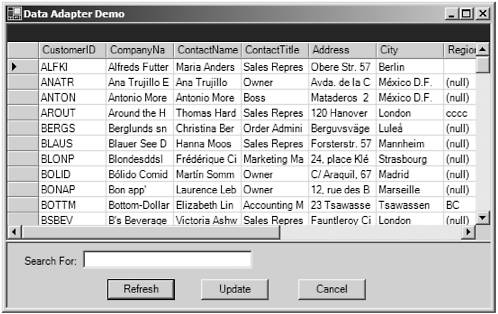 Updating the Database Up to now we have only loaded data into the grid. The next step is to add code that will enable us to update the data back to the database. As we said before there are two ways to do this: by typing an SQL statement into the Command object or by using the CommandBuilder class to generate the SQL statements. The latter will also generate the Parameter collections for those SQL statements. Unless you really need to generate your own SQL statements the preferred method would be use the CommandBuilder object. This way all the parameters required for optimistic concurrency will be generated for you. Creating the SQL statements manually requires that you be aware of whether the parameters to create are current values or original values. When you use the CommandBuilder, the object automatically determines this for you. Displaying the Generated SQL Now let's modify our user interface to display the generated SQL statements for us. To do this we will add another panel and four text boxes. When we are done our interface will look like the example in Figure 6.20. Figure 6.20. Modified Data Adapter Demo with SQL display.  The four text boxes should be named TextBox1, TextBox2, TextBox3, and TextBox4. The check box labeled AutoGen should be named CheckBox1. This check box, if checked, will cause the DataAdapter to generate the Insert, Update, and Delete statements. If it is left unchecked, the DataAdapter will not generate the statements automatically but we may type them into the text boxes. We will now modify the code to cause the DataAdapter to generate the SQL statements. Adding the CommandBuilder The first thing we must do is add an SQL CommandBuilder object to the form. We will do this at the same place we declared the DataAdapter and DataSet object. We must also remove the SQL statement we assigned to the SQL command object of the DataAdapter in the initialization code. First let's get the declaration for the SQL CommandBuilder. Find the point in the code where the DataAdapter and DataSet are declared. Add the following line immediately after those declarations: Private mDB As New SqlClient.SqlCommandBuilder() This will declare our CommandBuilder object. Next expand the hidden region of Windows generated code and remove the assignment of the SQL statement to the Select Command's CommandText property. When you were finished the constructor should look like this: Public Sub New() MyBase.New() 'This call is required by the Windows Form Designer. InitializeComponent() 'Add any initialization after the InitializeComponent() call Dim cmdSel As New SqlClient.SqlCommand() Try mCN.ConnectionString = "Server=em_server\vsdotnet;Database=Northwind;Integrated Security=SSPI" cmdSel.Connection = mCN cmdSel.CommandType = CommandType.Text mDA.SelectCommand = cmdSel Catch errobj As Exception MsgBox(errobj.Message) End Try End Sub Generating the SQL Next we will modify the Refresh button's click event procedure to generate the SQL statements programmatically. The way the CommandBuilder works is that you assign it the DataAdapter as a property and then you retrieve the three Update command objects (Insert, Update, Delete) via three methods called GetInsertCommand, GetUpdateCommand, and GetDeleteCommand. I believe it creates the update SQL statements at the moment you assign the Data Adapter to the CommandBuilder object. This assumes of course that you have already assigned the Select command a valid Select statement. Now let's take a look at the modified click event of the Refresh button: Private Sub btnRefresh_Click(ByVal sender As System.Object, _ ByVal e As System.EventArgs) Handles btnRefresh.Click Try If TextBox1.Text = "" Then Exit Sub If mDS.Tables.Count > 0 Then mDS.Clear() End If mDA.SelectCommand.CommandText = TextBox1.Text If CheckBox1.Checked Then mDB.DataAdapter = mDA mDA.UpdateCommand = mDB.GetUpdateCommand() mDA.InsertCommand = mDB.GetInsertCommand() mDA.DeleteCommand = mDB.GetDeleteCommand() TextBox1.Text = mDA.SelectCommand.CommandText TextBox2.Text = mDA.UpdateCommand.CommandText TextBox3.Text = mDA.InsertCommand.CommandText TextBox4.Text = mDA.DeleteCommand.CommandText End If mDA.Fill(mDS) DataGrid1.DataSource = mDS.Tables(0) Catch errobj As Exception MsgBox(errobj.Message) End Try End Sub As you can see the code got considerably more complicated. However, even though it is more complicated than before it is still quite a bit simpler than creating the commands manually by parsing the Select statement. Essentially the CommandBuilder creates the commands and we just have to retrieve them into the appropriate places in the DataAdapter. We included the four text boxes so we can see the kinds of commands it creates. Otherwise we would have to break the code and examine the commands in the immediate window. This makes it a little easier for us. When we run the project we'll see the SQL statements appear in the four text boxes. This will happen when we click the Refresh button. Let's run it now. If you did everything correctly your screen should look like Figure 6.21 after clicking the Refresh button. If it doesn't work, remember to check your ConnectionString property of the SqlConnection object. Make sure you have the correct user name and password and you are pointing to the correct server. Figure 6.21. The modified screen after the refresh button is clicked.  To see the complete SQL command scroll down using the scroll bars. Notice that the parameters have generic names P1, P2, and so forth. One would think it could derive the parameter names from the field names but it doesn't. If we make a change in the grid, say to the Contact title, and then click the Update button we will see that the data gets changed in the database. Using this method the programmer does not have to concern himself with the details of creating the SQL statements. Also he does not have to worry about assigning parameters values during updates. The Data Adapter will handle this for you. If you choose to create your Update statements manually, you will have to manually assign each parameter to its value, since the Data Adapter has no way of associating the parameter values with the field values. However, if you set up your parameter lists properly you can control the association so that the Data Adapter knows which parameters belong to which columns .  | 