Using Advanced Web Server Controls
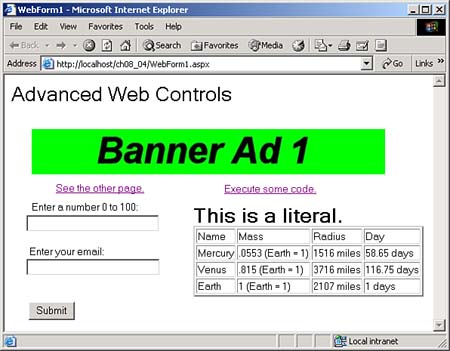
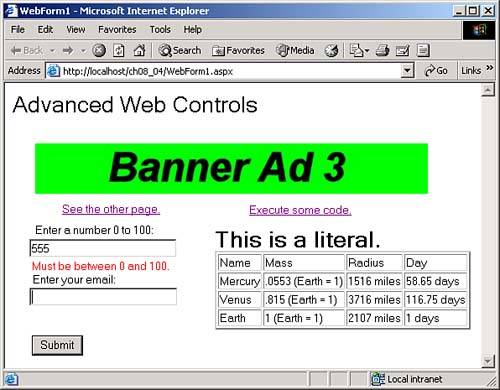
| The basic Web server controls we've seen mirror the same controls in Windows applicationstext boxes, buttons, list boxes, and so forth. However, more advanced Web server controls aren't similar to Windows controls, and we'll take a look at a set of these more advanced controls in the ch08_04 example. You can see this example at work in Figure 8.18. This example introduces ad rotators, hyperlinks , link buttons , literals, XML controls, and validators. Figure 8.18. The ch08_04 example. Ad RotatorsAd rotators display banner ads of the kind you've seen on the Internet; these ads can be of any type a browser can display, including animated GIF files. Ad rotators "rotate" through a set of banner ads by selecting which one to display randomly ; you can also weight ads to appear more frequently than others. In fact, you can write your own code to cycle through the ad banners. You can see an ad rotator at work in Figure 8.18. If you reload this example, the page reloads and displays another randomly selected ad banner. When you click the ad banner, the browser will navigate to a URL you've associated with that banner. Putting an ad rotator to work is not very difficultyou just add this control to a Web form and set up the banners you want to show. You can set up your ads in the AdCreated event, or, more commonly, with an XML file; we'll use an XML file here. Even though this file is written in XML, you won't need any special knowledge to adapt it for yourself. The XML file in this example is called rotation.xml. For each ad, this file gives the URL of the banner ad image, the URL to navigate to if the user clicks the ad, the alternative text to display if the ad banner isn't available, a numeric value holding the relative probability of how often the ad should be shown (which lets you weight ad banner appearances as you like), and a keyword to use in selecting ads (you can use the ad rotator's KeyWordFilter property to filter ads for target audiences). You can see rotation.xml in Listing 8.1. Listing 8.1 rotation.xml (ch08_04 Project)<Advertisements> <Ad> <ImageUrl>banner1.jpg</ImageUrl> <NavigateUrl>http://www.bigwhopperstore.com/product1.html</NavigateUrl> <AlternateText>Product 1 is the best! </AlternateText> <Impressions>90</Impressions> <Keyword>Food</Keyword> </Ad> <Ad> <ImageUrl>banner2.jpg</ImageUrl> <NavigateUrl>http://www.bigwhopperstore.com/product2.html</NavigateUrl> <AlternateText>Millions of Product 2 sold already!</AlternateText> <Impressions>90</Impressions> <Keyword>Electrical</Keyword> </Ad> <Ad> <ImageUrl>banner3.jpg</ImageUrl> <NavigateUrl>http://www.bigwhopperstore.com/product3.html</NavigateUrl> <AlternateText>Product 3 wins every time!</AlternateText> <Impressions>90</Impressions> <Keyword>Toys</Keyword> </Ad> </Advertisements> We'll put rotation.xml in the main IIS folder for this application, wwwroot \ch08_04 . You assign the location of this XML document to the AdvertisementFile property of the ad rotator control, and the control reads it and uses the data in that document. We'll also store the banner ads, which will be named banner1.jpg, banner2.jpg, and banner3.jpg here, in the main folder for the ch08_04 application. In this case, each banner ad is a JPG image, and by default banner ads are 468x60 pixels (although you can set their sizes in the ad rotator control's Height and Width properties). As you'd expect, the HTML sent to the browser for this ad rotator appears as <a> hyperlink elements surrounding an <img> image element: <a id="AdRotator1" href="http://www.starpowder.com/product1.html" target="_top" style="Z-INDEX: 104; LEFT: 36px; POSITION: absolute; TOP: 72px"> <img src="/ch08_04/banner1.jpg" alt="You can't get any better than Product 1!" border="0" style="height:60px;width:468px;" /></a>
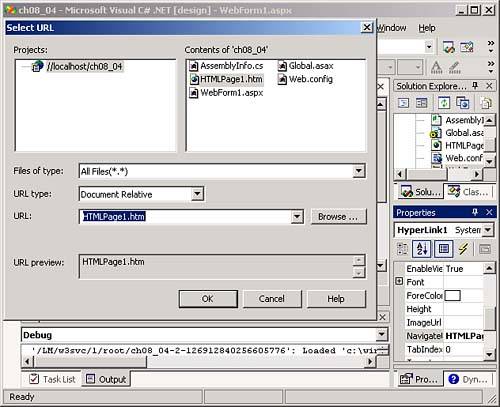
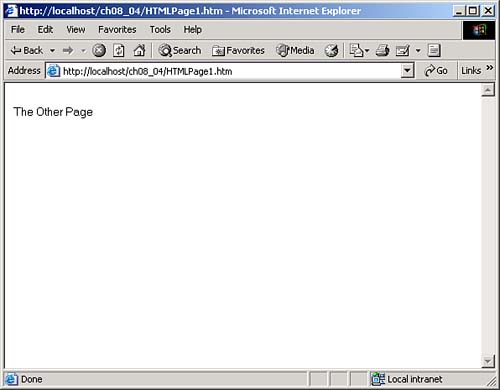
HyperlinksWeb pages can contain hyperlinks, and in C# .NET Web applications, you use the HyperLink control to create hyperlinks. You can see a hyperlink with the text "See the other page" in ch08_04, Figure 8.18. When the user clicks that hyperlink, we want to show a new page, so at design time, select the Project, Add Web Form menu item to open the Add New Item dialog box. This dialog box lets you add Web forms and HTML pages to an application just by selecting the appropriate file-type icon and clicking Open . In this case, we add a new HTML page (not a new Web form) to our Web application. This new HTML page is just a standard HTML page, and is named HTMLPage1.htm by default. Because this is an HTML page, the C# IDE will only allow you to add HTML client controls to it; in this case, we'll add an HTML label with the text "The Other Page" . To place that text in the HTML label, edit the text directly in the label (because HTML client controls support no true C# properties, you'll find very few entries for them in the properties window). To connect a hyperlink control in WebForm1 to this new HTML page, add a hyperlink control to WebForm1 and set its Text property to "See the other page" as you see in Figure 8.18. To set the hyperlink's URL target, select the its NavigateUrl property and click the ellipsis button that appears to open the Select URL dialog box that you see in Figure 8.19. Browse to the target of this hyperlink, HTMLPage1.htm, and click OK. Figure 8.19. The Select URL dialog box. When the user clicks this hyperlink at runtime, the browser will navigate to HTMLPage1.htm, as you see in Figure 8.20. Figure 8.20. Navigating to a new URL.
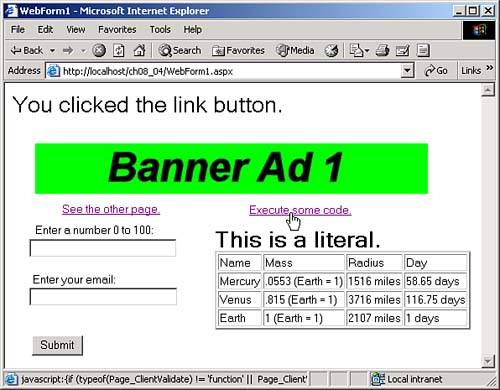
Link ButtonsYou have little control over what happens when the user clicks a hyperlink, because the browser takes over. But what if you need to set a hyperlink's target on the fly when it's clicked, or execute some C# code when a link is clicked? For that, you use link buttons. Link buttons look just like hyperlinks, but act just like buttons, with both Click and Command events. When the corresponding hyperlink is clicked, you can take some action in code, not just let the browser automatically navigate to a new page. For example, in the ch08_04 example, Figure 8.18, there's a link button with the text "Execute some code." . When the user clicks this link button, we execute this code to set the text in the application's label control to "You clicked the link button." : private void LinkButton1_Click(object sender, System.EventArgs e) { Label1.Text = "You clicked the link button."; } You can see how this works in Figure 8.21; when the user clicks the link button, the application executes code instead of just navigating to a new URL. Figure 8.21. Clicking a link button. As with hyperlink controls, link buttons are translated into HTML <a> elements, but the HTML for link buttons is really a JavaScript URL whose JavaScript calls __doPostBack to send the page back to the server for processing. Here's what the HTML for the link button you see in Figure 8.18 looks like: <a id="LinkButton1" href="javascript:{if (typeof(Page_ClientValidate) != 'function' Page_ClientValidate()) __doPostBack('LinkButton1','')} " style="Z-INDEX: 103; LEFT: 291px; POSITION: absolute; TOP: 143px"> Execute some code.</a> ValidatorsValidator controls are some of the few Web server controls that execute in the client (using JavaScript), not the server. Validator controls let you check user-entered data before sending it back to the server, as is standard in many pages on the Internet. If there's a problem with that data, the validator will display an error message and block attempts to send the page back to the server. Each validator is like a label control (they're based on the System.Web.UI.WebControls.Label class) that's invisible until there's been an error, when they display their error message, as set with the ErrorMessage property. If the user corrects the error, the error message disappears. You can find the validation controls, and what they do, in Table 8.2. Table 8.2. Validation Controls
We'll take a look at a few of the validator controls hererequired field validators, range validators, and regular expression validators. Required Field ValidatorsRequired field validators make sure that the user has entered data into a specific control. If users haven't done so, the validators display an error message when the users try to send the page back to the server. These validators have a property called InitialValue (which holds an empty string, "" , by default). If the data in the control has not changed from the value in InitialValue when the user tries to send the page back to the server, the required field validator will display its error message. To use a required field validator, add one to a Web page, set the ControlToValidate property to the control whose data you want to validate, the InitialValue property to the initial value of that data, and the ErrorMessage property to the error message you want to display if there's a problem. By default, validators display their messages in red; to change to another color , set their ForeColor property. If the data in the control to validate is unchanged from the InitialValue value when the user tries to send the page back to the server, this validator will display its error message.
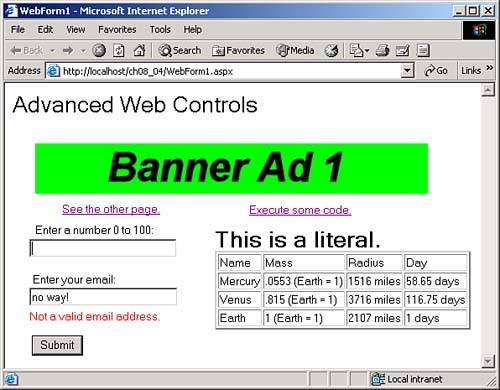
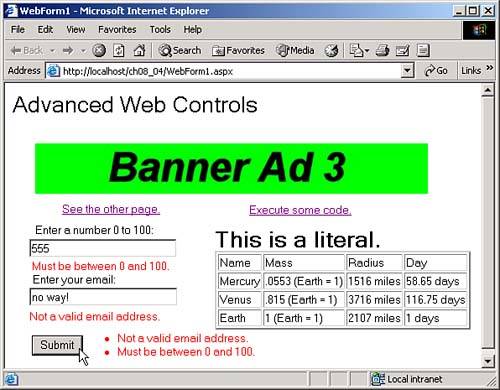
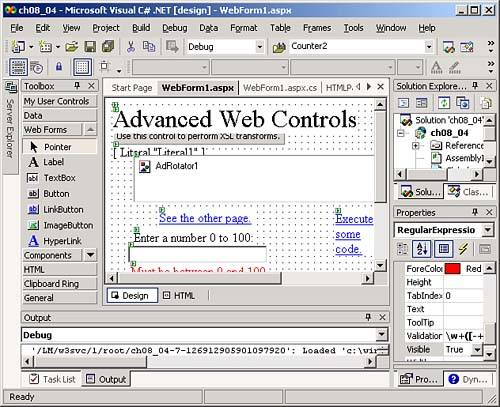
Range ValidatorsRange validators let you determine whether the data in a control is inside a specific range. This validator checks the data in a control when that control loses the focus (unlike required field validators, which check their data only just before the page is sent back to the server). The range validator properties you set are the ControlToValidate property, and the MinimumValue and MaximumValue properties to hold the minimum and maximum values of the range of data you want to accept. You should also set the Type property to the data type of the values to compare (the default value is String ). If the value in the control, which the validator validates is out of range, the validator will display its error message. You can see this at work in Figure 8.22, where we've asked the user to enter a value between 0 and 100, but received a value of 555. This causes the range validator in this example to display its error message, "Must be between 0 and 100." . Figure 8.22. Using a range validator. Regular Expression ValidatorsRegular expression validators let you check the text in a control against a regular expression of the kind we've seen in Chapter 2, "Basic C# Programming." As with range validators, these validators check their data when the control they're validating loses the focus. If you don't want to create your own regular expressions, the Regular Expression Editor lets you select from a number of pre-written regular expressions. To display that editor, select the validator's ValidationExpression property and click the ellipsis button that appears. For example, here's the regular expression C# uses to determine whether text matches a valid email address: \w+([-+.]\w+)*@\w+([-.]\w+)*\.\w+([-.]\w+)* You can see a regular expression at work in Figure 8.23, where it's checking the email address entered in a text box, as set with the ControlToValidate property. In this case, it's reporting that the text "no way!" is not a valid email address. Figure 8.23. Using a regular expression validator. Validation SummariesThe validator controls we've seen are tied to individual controls whose data they validate, but you can also use a validation summary to display all the errors in a page. Validation summaries display their error messages (in a list) only when the user tries to send the page back to the server, as when they click a Submit button. You can see a validation summary at work in Figure 8.24. You just position this control where you want the list of errors to appear, and when the user tries to send the page back to the server, the validation summary control displays that list of errors (which it gets from the other validation controls in the page). Figure 8.24. Using a validation summary. The error list can be displayed as a simple list, as a bulleted list, or as a single paragraph. You select between these options with the DisplayMode property, which you can set to ValidationSummaryDisplayMode.List , ValidationSummaryDisplayMode.BulletList , or ValidationSummaryDisplayMode.SingleParagraph . You can also specify whether the summary should be displayed in the Web page itself or in a message box with the ShowSummary and ShowMessageBox properties, respectively. LiteralsSo far, Web server controls have shielded us from the actual HTML in a Web page, but there are controls designed to be used directly with that HTML literal controls . A literal control holds HTML that will go directly into your Web form, and you can assign that HTML to the literal's Text property. When you add a literal control to a Web page at design time, it appears at upper left, as you can see in Figure 8.25 (where it's hiding behind the ad rotator). There's no special position for a literal, and you can't position it on a Web page at design timeif you want the HTML you place in a literal to display an HTML element at a specific location, you can use CSS positioning as we'll do here. Figure 8.25. Creating a literal control. For example, if you wanted to position an <H1> HTML header with the text "This is a literal." in it, you could use this code in the Page_Load event (or you could assign this text to a literal control at design time): private void Page_Load(object sender, System.EventArgs e) { Literal1.Text = "<div align='left' " + "style='POSITION: absolute; TOP: 170px; LEFT: 250px'>" + "<h1>This is a literal.</h1></div>"; } You can see the results of this code in Figure 8.18, where you see the text "This is a literal." at middle right. XML ControlsThe final Web server control we'll take a look at is the XML control. You can use this control to display XML in a Web page, and you can also format that XML document as you like. To format XML documents with this control, you use an XSLT (Extensible Stylesheet Language Transformations) stylesheet. XSLT can transform the data in an XML document into an XML document of another type, or into an HTML document, or plain text, or any other text-based format, including rich text, RTF, format. Like literal controls, XML controls don't have any specific location in a Web page; they appear at upper left at design time, as you can see in Figure 8.25. You assign an XML control's DocumentSource property the name of a XML document, and assign the TransformSource property the name of a XSLT stylesheet (you can browse to these documents at design time).
For example, in the ch08_04 example, the XML control formats the XML in a document named planets.xml (included in the downloadable code for this book), which holds data on several of the planets. This example uses the XSLT stylesheet planets.xsl (also included in the code for this book), which formats the planetary data into an HTML table and positions that table using CSS styles in the Web page, as you see in Figure 8.18. And that's itnow you're transforming XML into HTML using XSLT and the XML control. |
EAN: 2147483647
Pages: 181