Creating Dynamic Tables
Some Ajax applications display data in HTML tables. One way of updating an HTML table is to rewrite its HTML entirely, but that will make it flicker on screen. Instead, a set of methods enable you to update a table in browsers such as Internet Explorer, Mozilla, Netscape, and Firefox. Here are the built-in methods for the <table> element:
-
object.rows(index): Returns a collection (array) of the rows in the table.
-
object.insertRow(index): Inserts a new row. Returns the inserted <tr> element (which will be empty), or null for failure. If index isn’t supplied, the <tr> element will be inserted at the end of the table.
-
object.deleteRow(index): Deletes a row. The index value indicates the row index of the row to delete.
And here are the methods for <tr> elements:
-
object.cells(index): Returns a collection (array) of the cells in the row.
-
object.rowIndex: Returns the row index of the row. Useful for inserting and deleting rows.
-
object.insertCell(index): Inserts a new cell and returns the inserted <td> element (which will be empty), or null for failure. If index isn’t supplied, the <td> element will be inserted at the end of the row.
-
object.deleteCell(index): Deletes a cell. The index value indicates the position in the cell collection to delete.
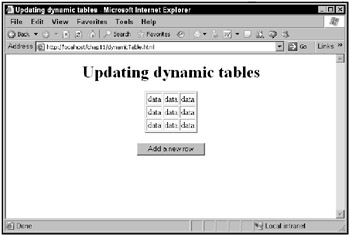
Here’s an example showing how to create a dynamic table. This example inserts a new row in a table using the insertRow method, inserts three cells into the new row with the insertCell method, and sets the contents of the cell with the innerText property. You can see this example, dynamicTable.html, in Figure 11.25.

Figure 11.25: The dynamicTable.html application
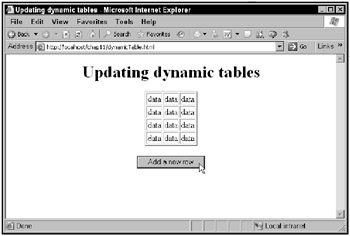
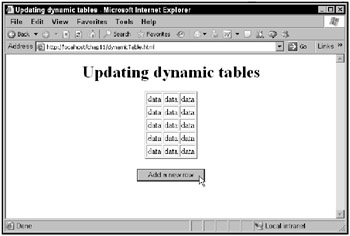
When you click the button, a new table row appears, as shown in Figure 11.26. When you click the button again, another new table row is created, as shown in Figure 11.27.

Figure 11.26: Creating a new table row in the dynamicTable.html application

Figure 11.27: Creating another new table row in the dynamicTable.html application
This example starts by creating the HTML table shown in Figure 11.25:
<body> <center> <h1> Updating dynamic tables </h1> <table border="2"> <tr> <td>data</td> <td>data</td> <td>data</td> </tr> <tr> <td>data</td> <td>data</td> <td>data</td> </tr> <tr> <td>data</td> <td>data</td> <td>data</td> </tr> </table> . . . </center> </body>
There’s also a button, tied to a JavaScript function named addRow:
<body> <center> <h1> Updating dynamic tables </h1> <table border="2"> <tr> <td>data</td> <td>data</td> <td>data</td> </tr> <tr> <td>data</td> <td>data</td> <td>data</td> </tr> <tr> <td>data</td> <td>data</td> <td>data</td> </tr> </table> <br> <input type="button" value="Add a new row" onclick="addRow()"> </center> </body>
In the addRow function, you start by getting an object corresponding to the table:
<script language="javascript"> function addRow() { var table1 = document.getElementById("table1"); . . . } </script> then you insert a new row at the end of the table with the table’s insertRow method, passing that method a value of 3 to indicate you want to add a row after the current last row (which is row 2):
<script language="javascript"> function addRow() { var table1 = document.getElementById("table1"); var newRow = table1.insertRow(3); . . . } </script> Next you have to create the cells in the new row, which you can do with the row’s insertCell method. Here’s how you create the first cell:
<script language="javascript"> function addRow() { var table1 = document.getElementById("table1"); var newRow = table1.insertRow(3); var newCell = newRow.insertCell(0); . . . } </script> You can write your data to the new cell using its innerHTML property:
<script language="javascript"> function addRow() { var table1 = document.getElementById("table1"); var newRow = table1.insertRow(3); var newCell = newRow.insertCell(0); newCell.innerHTML = "data"; . . . } </script> You can also create the other two cells and insert them into the row like this:
<script language="javascript"> function addRow() { var table1 = document.getElementById("table1"); var newRow = table1.insertRow(3); var newCell = newRow.insertCell(0); newCell.innerHTML = "data"; newCell = newRow.insertCell(1); newCell.innerHTML = "data"; newCell = newRow.insertCell(2); newCell.innerHTML = "data"; } </script> And that completes this example. As you can see, it’s easy enough to create, delete (using deleteRow and deleteCell), and edit (using the innerHTML property of cells) data in a table.