Handling HTML Controls
This is the section where your PHP-based Web pages start becoming interactive. This is where you start being able to take credit card numbers, user names, feedback, and more. You’re going to see HTML controls like text fields, checkboxes, radio buttons, list boxes, and so on.
To read data from HTML controls, you need to put those controls in HTML forms, using the <form> element. Here are the important attributes of that element:
-
action: This attribute gives the URL that will handle the form data. Note that you can omit this attribute, in which case its default is the URL of the current document.
-
method: Specifies the method or protocol for sending data to the target action URL. If you set it to GET (the default) this method sends all form name/value pair information in a URL that looks like:
URL?name=value&name=value&name=value
If you use the POST method, the contents of the form are encoded as with the GET method, but are sent in hidden header variables.
-
target: Indicates a named frame for the browser to display the form results in.
For example, say that you wanted to read data that the user entered into the controls in a Web page using a PHP script named reader.php in the same directory as reader.html. To handle that, you could set the form’s action attribute to reader.php as shown here:
<html> <head> <title> Using HTML forms </title> </head> <body> <h1> Using HTML forms </h1> <form method="post" action="reader.php"> . . . </form> </body> </html>
| Note | If reader.php were not in the same directory, you’d have to give its URL, either relative to the current page, or absolute such as http://the_isp.com/php/reader.php. |
Now you can place controls in your form, such as text fields and list boxes. You’ll also need a Submit button that will send all the data in the form back to reader.php on the server when clicked; here’s what that Submit button might look like:
<html> <head> <title> Using HTML forms </title> </head> <body> <h1> Using HTML forms </h1> <form method="post" action="reader.php"> . . . <input type="submit" value="Submit"> </form> </body> </html>
In addition to Submit buttons, you can also display a Reset button, which resets the data in the form’s controls to their default values (which usually means blank). Here’s what a Reset button would look like in this case:
<html> <head> <title> Using HTML forms </title> </head> <body> <h1> Using HTML forms </h1> <form method="post" action="reader.php"> . . . <input type="submit" value="Submit"> <input type="reset" value="Reset"> </form> </body> </html>
On the PHP side of things, how do you get the data the user entered? As you’re going to see, you can use an array named $_POST if you’ve used the POST method, and an array named $_GET if you’ve used the GET method. You can also use the $_REQUEST array, which holds the data in both the $_GET and $_POST arrays.
It’s time to see some HTML controls at work, starting with text fields.
Working with text fields
To create an HTML text field, you use the <input type="text"> element enclosed in an HTML <form> element. This example centers around two Web documents: an HTML page that contains the text field, and a PHP page that reads the data the user enters into that text field.
In the HTML page, you start with the HTML form, indicating that the data in the form should be sent to text.php:
<html> <head> <title> Using Text Fields </title> </head> <body> <center> <h1> Using Text Fields </h1> <form method="post" action="text.php"> . . . </form> </center> </body> </html>
then you add the text field and a prompt asking for the user’s name, as well as a Submit button:
<html> <head> <title> Using Text Fields </title> </head> <body> <center> <h1> Using Text Fields </h1> <form method="post" action="text.php"> Please enter your name: <input name="name" type="text"> <br> <br> <input type="submit" value="Submit"> </form> </center> </body> </html>
How can you retrieve the data from the text field? That’s the job of text.php, which starts this way:
<html> <head> <title> Reading data from text fields </title> </head> <body> <center> <h1> Reading data from text fields </h1> Your name is . . . </center> </body> </html>
To actually retrieve the text from the text field, you just need to use the name of the text field, which is name, as an index into the $_POST or $_REQUEST array. Here’s what that looks like in text.php:
<html> <head> <title> Reading data from text fields </title> </head> <body> <center> <h1> Reading data from text fields </h1> Your name is <? echo $_REQUEST["name"]; ?> </center> </body> </html>
The text.html Web page is shown in Figure 13.6. After the user enters a name and clicks the Submit button, that name is displayed by text.php, as shown in Figure 13.7.
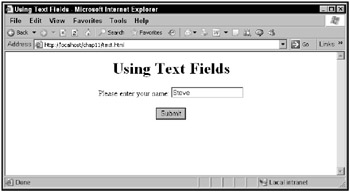
Figure 13.6: The text.html Web page
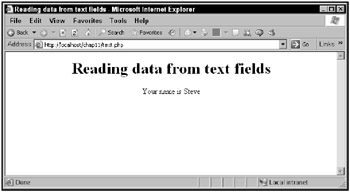
Figure 13.7: The text.php application at work
Working with checkboxes
Checkboxes are another fundamental HTML control that you should know how to use with PHP. In this example, checkboxes.html sends its data to the page checkboxes.php:
<html> <head> <title>Using Checkboxes</title> </head> <body> <center> <h1>Using Checkboxes</h1> <form method=post action="checkboxes.php"> . . . <input type="submit" value="Submit"> </form> </center> </body> </html>
You might ask the user “Do you want fries with that?”, and add two checkboxes, check1 and check2, to the page:
<html> <head> <title>Using Checkboxes</title> </head> <body> <center> <h1>Using Checkboxes</h1> <form method=post action="checkboxes.php"> Do you want fries with that? <input name="check1" type="checkbox" value="Yes"> Yes <input name="check2" Type="checkbox" value="No"> No <br> <br> <input type="submit" value="Submit"> </form> </center> </body> </html>
What about the PHP page checkboxes.php, that will read the checkbox data? Here’s the key: you can’t just use an expression like $_REQUEST["check1"], because if the check1 checkbox was not selected, trying to access $_REQUEST["check1"] would give you an error. So you have to first test whether check1 was selected with the expression isset($_REQUEST["check1"]), which returns true if check1 was selected:
<html> <head> <title> Reading data from checkboxes </title> </head> <body> <center> <h1>Reading data from checkboxes</h1> You checked <? if (isset($_REQUEST["check1"])) . . . ?> </center> </body> </html>
If check1 was checked, you can report the text associated with that checkbox (which is “Yes”):
<html> <head> <title> Reading data from checkboxes </title> </head> <body> <center> <h1>Reading data from checkboxes</h1> You checked <? if (isset($_REQUEST["check1"])) echo $_REQUEST["check1"], "<br>"; . . . ?> </center> </body> </html>
and you do the same with the second checkbox, check2:
<html> <head> <title> Reading data from checkboxes </title> </head> <body> <center> <h1>Reading data from checkboxes</h1> You checked <? if (isset($_REQUEST["check1"])) echo $_REQUEST["check1"], "<br>"; if (isset($_REQUEST["check2"])) echo $_REQUEST["check2"], "<br>"; ?> </center> </body> </html>
The two checkboxes are shown in Figure 13.8. After the user selects a checkbox and clicks the Submit button, the results appear, as shown in Figure 13.9.
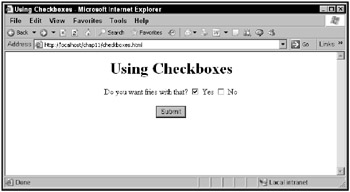
Figure 13.8: The checkboxes.html Web page
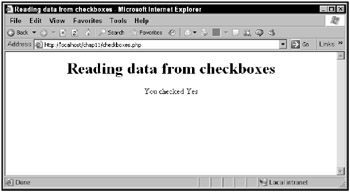
Figure 13.9: The checkboxes.php application at work
| Note | This example presents two mutually exclusive options: either the user wants fries or he doesn’t. Although checkboxes work here, it’d be a better idea to use radio buttons, which are designed for mutually exclusive options and are discussed in the next section. |
Working with radio buttons
You can easily convert the previous example to work with radio buttons instead of checkboxes. You start with the same basic HTML page as before, naming it radios.html:
<html> <head> <title>Using radio buttons</title> </head> <body> <center> <h1>Using radio buttons</h1> <form method=post action="radios.php"> Do you want fries with that? . . . <input type="submit" value="Submit"> </form> </center> </body> </html>
then you add the two radio buttons this way:
<html> <head> <title>Using radio buttons</title> </head> <body> <center> <h1>Using radio buttons</h1> <form method=post action="radios.php"> Do you want fries with that? <input name="radio1" type="radio" value="Yes"> Yes <input name="radio1" Type="radio" value="No"> No <br> <br> <input type="submit" value="Submit"> </form> </center> </body> </html>
| Note | This example gives the radio buttons the same name, radio1, which makes them operate together so that only one can be selected at a time. |
To read which radio button was selected, you must first check whether either of the radio buttons were selected in radios.php:
<html> <head> <title> Reading data from radio buttons </title> </head> <body> <center> <h1>Reading data from radio buttons</h1> You selected <? if (isset($_REQUEST["radio1"])) . . . ?> </center> </body> </html>
and if one of the radio buttons was indeed selected, you can display it like this:
<html> <head> <title> Reading data from radio buttons </title> </head> <body> <center> <h1>Reading data from radio buttons</h1> You selected <? if (isset($_REQUEST["radio1"])) echo $_REQUEST["radio1"], "<br>"; ?> </center> </body> </html>
You can see the two radio buttons in Figure 13.10.
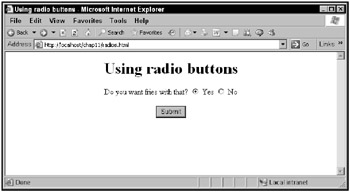
Figure 13.10: The radios.html Web page
When the user selects a radio button and clicks the Submit button, you can see the results, as shown in Figure 13.11.
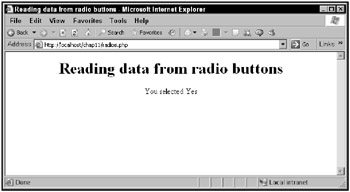
Figure 13.11: The radios.php application at work
That’s the basic HTML controls: text fields, checkboxes, and radio buttons. It’s time to go to the next level of complexity, list boxes.
Working with list boxes
The HTML controls you’ve already seen-text fields, checkboxes, and radio buttons-can handle only single selections, but list boxes can handle multiple selections. How do you deal with multiple selections in PHP?
Here’s an example, lists.html, which lets users select their favorite sandwich types. You start lists.html like this:
<html> <head> <title>Using Lists</title> </head> <body> <center> <h1> Using Lists </h1> <form method="get" action="lists.php"> Select your favorite sandwiches(s): . . . <br> <br> <input type="submit" value="Submit"> </form> </center> </body> </html>
Then add the list box, which is an HTML <select> control, using the stand-alone attribute mul tiple to let the user make multiple selections in this control. Note the name of the <select> control, sandwiches[], which tells PHP that this control can have multiple selections. Also note that this example uses the multiple attribute to allow the user to make multiple selections in the <select> control in the browser:
<html> <head> <title>Using Lists</title> </head> <body> <center> <h1> Using Lists </h1> <form method="get" action="lists.php"> Select your favorite sandwiches(s): <br> <br> <select name="sandwiches[]" multiple> . . . </select> <br> <br> <input type="submit" value="Submit"> </form> </center> </body> </html>
Then you can add the various items in the <select> control, using <option> elements:
<html> <head> <title>Using Lists</title> </head> <body> <center> <h1> Using Lists </h1> <form method="get" action="lists.php"> Select your favorite sandwiches(s): <br> <br> <select name="sandwiches[]" multiple> <option>Ham</option> <option>Turkey</option> <option>Salami</option> <option>Chicken</option> </select> <br> <br> <input type="submit" value="Submit"> </form> </center> </body> </html>
And that completes the HTML for lists.html. The next step is to create the PHP that reads the selections in the list control.
Here’s how you deal with a multiple-select control in PHP. You’ve named the control sand wiches[], so you can’t just recover selections like this: $_REQUEST["sandwiches"]. This expression actually returns an array of selected items, and you can recover the first selected item like this: $_REQUEST["sandwiches"][0]; the second like this: $_REQUEST["sand-wiches"][1]; and so on. To get all the selections, you can use a for or foreach loop.
Here’s how the lists.php application, which reads the selections the user made, starts:
<html> <head> <title>Using Lists</title> </head> <body> <center> <h1>Retrieving Data From Lists</h1> You selected: <br> <? . . . ?> </center> </body> </html>
To display the user’s selections, you can use a foreach loop like this, which places the name of the current sandwich type in a variable named $sandwich:
<html> <head> <title>Using Lists</title> </head> <body> <center> <h1>Retrieving Data From Lists</h1> You selected: <br> <? foreach($_REQUEST["sandwiches"] as $sandwich){ . . . } ?> </center> </body> </html> and you can display the current sandwich type this way:
<html> <head> <title>Using Lists</title> </head> <body> <center> <h1>Retrieving Data From Lists</h1> You selected: <br> <? foreach($_REQUEST["sandwiches"] as $sandwich){ echo $sandwich, "<br>"; } ?> </center> </body> </html> The lists.html Web page is shown in Figure 13.12, in which the user has made two selections.
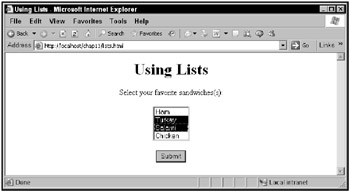
Figure 13.12: The lists.htmlWebpage
After users click the Submit button, the selections they’ve made are echoed in the list.php page, as shown in Figure 13.13.
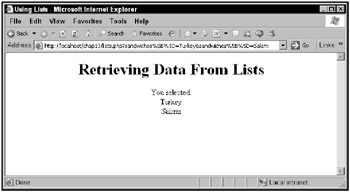
Figure 13.13: The lists.php application at work
Working with password controls
Another common control in Web pages that work with PHP is the password control. This control lets the user enter a password, which you can check in PHP. The user sees only asterisks (*) in the password control, but you can read the text in a password control in PHP easily.
Here’s an example, password.html, which lets the user enter a password in a password control:
<html> <head> <title> Using Password Controls </title> </head> <body> <center> <h1> Using Password Controls </h1> <form method="post" action="password.php"> Enter the password: <input name="password" type="password"> <br> <br> <input type="submit" value="Submit"> </form> </center> </body> </html>
All you have to do is read the text from the password control in password.php:
<html> <head> <title> Reading data from password controls </title> </head> <body> <center> <h1> Reading data from password controls </h1> You entered: <? echo $_REQUEST["password"]; ?> </center> </body> </html>
The password.html Web page is shown in Figure 13.14, in which the user has entered a password.
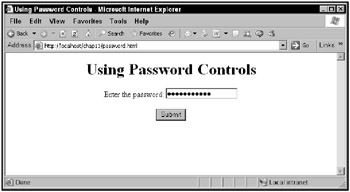
Figure 13.14: The password.html Web page
Password.php reads the password and displays it on-screen, which is shown in Figure 13.15.
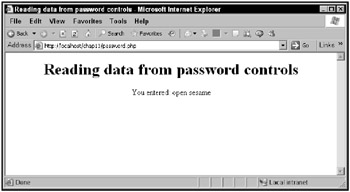
Figure 13.15: The password.php application at work