| Using a technique called colorization, you can add a single color tint to your images, simulating the look of a hand-applied color wash or the warm, antique glow of an old sepia-toned photograph. You can apply the effect to any image, even if it was originally saved as grayscale, as long as you first convert it to RGB. In addition to colorizing an entire image, you can use layers and layer modes to tint specific areas or objects. Because the shades of color you apply are determined by the image's original tonal values, photographs with good brightness and contrast levels make the best candidates for colorizing. (For information on tonal values and levels, see "About Tonal Correction" in Chapter 3.) To colorize a large area of an image 1. | Using any of the selection or marquee tools, select the area of your image you want to colorize.
If you want to colorize an entire image, it's not necessary to make a selection.
| 2. | From the Enhance menu, choose Adjust Color > Adjust Hue/Saturation, or press Ctrl+U to open the Hue/ Saturation dialog box (Figure 6.66).
Figure 6.66. Open the Hue/Saturation dialog box to access the Colorize option. 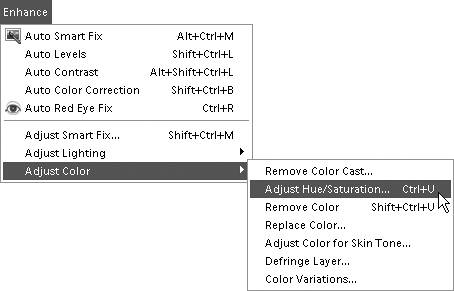
| 3. | See that the Preview check box is selected, and then click the Colorize check box (Figure 6.67).
Figure 6.67. Click the Colorize check box to add a colored tint to any image. 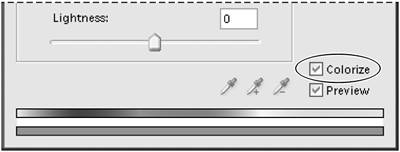
Clicking the Colorize check box converts all the color in the image to a single hue.
| 4. | Drag the Hue slider right or left until you arrive at the color you like (Figure 6.68).
Figure 6.68. The position of the Hue slider determines the color your tinted image will be. 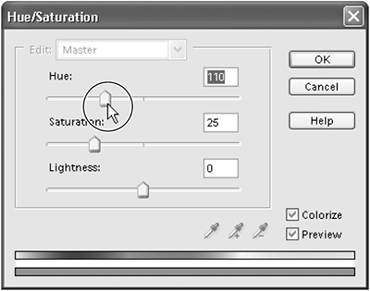
| 5. | Drag the Saturation slider to adjust its values.
Dragging the slider to the left moves the color's saturation value closer to gray, whereas dragging it to the right moves its value closer to a pure, fully saturated color.
| 6. | Drag the Lightness slider to adjust the color's brightness values.
Dragging to the left dims the color's brightness value, shifting it closer to black, whereas dragging to the right brightens its value, shifting it closer to white.
| 7. | Click OK to close the Hue/Saturation dialog box.
Your image is now composed of different values of the single color hue you selected.
|
To colorize a specific area of an image 1. | From the Enhance menu, choose Adjust Color > Remove Color, or press Shift+Ctrl+U.
Remember that although the Remove Color command removes all color from the image, it's still an RGB file, so color can be introduced back into it.
| 2. | On the Layers palette, click the New Layer button to create a new layer above your gray-toned base layer (Figure 6.69).
Figure 6.69. Create a new layer on which you'll apply your color tint effect. 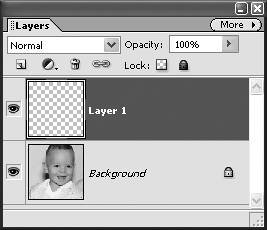
| 3. | From the Blending Mode drop-down menu on the Layers palette, select Color.
| 4. | Select the Brush tool from the toolbox; then on the options bar, use the brush Size slider to size your brush (Figure 6.70).
Figure 6.70. Select a brush size that will allow you to easily paint each object in your image. 
You'll want to select a brush size that will allow you to comfortably paint within the object you've chosen to colorize.
For more information on using the Brush tool and its options, see Chapter 8, "Painting and Drawing."
| 5. | At the bottom of the toolbox, click the Foreground color swatch to open the Color Picker, then select the color you want to use to paint onto your image (Figure 6.71).
Figure 6.71. Use the Color Picker to select the colors you want to apply. 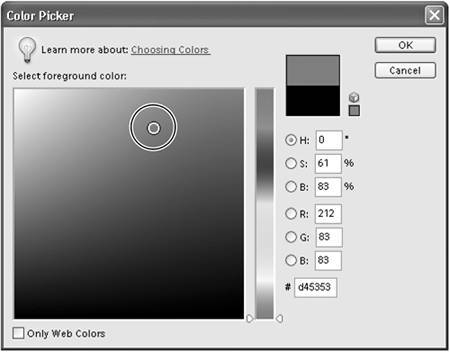
Click OK to close the Color Picker.
| 6. | Check that the new layer you created is the active layer in the Layers palette; then in the image window, paint onto the area you want to colorize (Figure 6.72).
Figure 6.72. Paint directly on the new layer you created to apply a color tint above the base image layer. 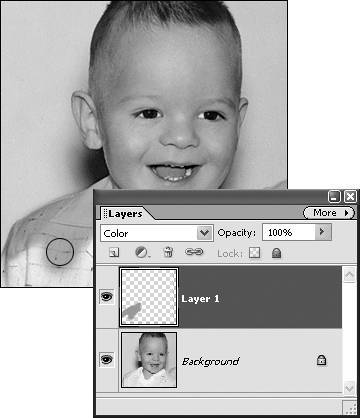
Because you're painting on a layer with the Color blending mode applied, all of the tonal (grayscale) levels of the base image layer will show through the color.
| 7. | If you want to add a second color, repeat steps 2 through 5 to create a new layer, select a brush size, and choose a color; then paint onto the next area (on the new layer) just as you did before.
|
 Tip Tip
You can apply multiple colors to the same layer and achieve the same effect as when you apply colors to different layers. I prefer to assign just one color per layer because it gives me more control. I can change the opacity level of each color separately, toggle the visibility of individual color layers on and off, try applying different colors to the same object, and even experiment with some of the other blending modes. The Overlay mode, in particular, can yield some very pleasing results.
|