| Little maladies, such as torn edges, water stains, scratches, even specks of dust left on a scanner's glass, are the bane of the photo-retouch artist, and are problems all too common when you set to the task of digitizing and restoring old photographs. To the rescue come three similar but distinctly different repair and retouch tools. The Clone Stamp tool will quickly become one of your favorite tools, not just for cleaning up and restoring photographs, but for any number of special effects and enhancements. It works on the simple principle as copying and duplicating (cloning) image pixels from one part of an image to another. Although it is ideal for repairing tears or holes in photographs, it can also be used to add or duplicate objects in a photograph. For example, you can create a hedgerow from one small bush or add clouds to a cloudless sky. The Spot Healing Brush tool is the perfect tool for removing small imperfections like dust or tiny scratches. With just a single click, the Spot Healing brush samples (copies) pixels from around the area of a trouble spot and creates a small patch that covers up the flaw and blends in smoothly with its surrounding area. The Healing Brush tool operates like a combination of the Clone Stamp and Spot Healing Brush tools. As with the Clone Stamp tool, it first samples pixels from one area of your image to another. Then, like the Spot Healing Brush tool, it blends those pixels seamlessly together with the area you want to repair (Figure 6.18). Figure 6.18. With just a little patience and Photoshop Elements' Clone Stamp and Healing Brush tools, dust specks, water spots, and even torn edges can be easily removed from old photos. 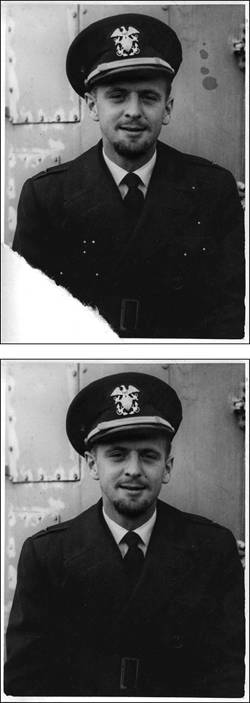
To retouch an image with the Clone Stamp tool 1. | Select the Clone Stamp tool from the toolbox, or press S (Figure 6.19).
Figure 6.19. The Clone Stamp tool. 
| 2. | On the options bar, select a brush size using the brush Size slider (Figure 6.20).
Figure 6.20. Choose any of Photoshop Elements' resizable brushes to apply your cloned repairs. 
The brush size you choose will vary depending on the area you have available to clone from and the area that you're trying to repair. Larger brush sizes work well for larger open areas like skies or simple, even-toned backdrops, whereas smaller brushes work well for textured surfaces or areas with a lot of detail.
| 3. | Move the pointer over the area of your image that you want to clone (the pointer becomes a circle, representing the brush size you've specified), and then hold down the Alt key.
The pointer becomes a target (Figure 6.21).
Figure 6.21. Once you've found an area of your image that you want to clone, simply hold down the Alt key and click to select it. Your pointer turns into a bull's-eye target. 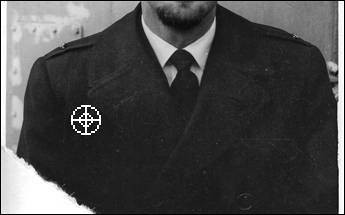
| 4. | Click once to select the area you want to sample; then release the Alt key and move the pointer to the area to which you want the clone applied (Figure 6.22).
Figure 6.22. Drag the Clone Stamp tool over the portion of the image you want to replace (left). As you drag the Clone Stamp tool, crosshairs appear, providing a constant reference point as you paint over the image (right). 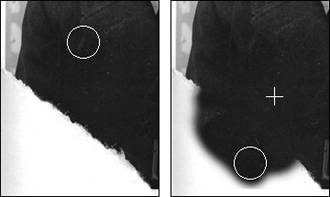
| 5. | Hold down the mouse button, and drag to "paint" the cloned portion over the new area.
The original image is replaced with a clone of the sampled image.
|
To copy images from one picture to another with the Clone Stamp tool 1. | Select the Clone Stamp tool from the toolbox and then select a brush size from the options bar.
| 2. | Still on the options bar, check that the Aligned option is selected (Figure 6.23).
Figure 6.23. The Aligned option gives you control over where the Clone Stamp tool samples image pixels. 
With the Aligned option selected, the Clone Stamp tool will always copy pixels relative to the initial sampling point, even if you release the mouse button and press it again to continue. With the Aligned option deselected, each time you release the mouse button and press to resume cloning, you will copy pixels starting from the initial sampling point (Figure 6.24).
Figure 6.24. Using the image on the left as a source, the image in the middle was cloned with the Aligned option selected. Although the mouse button was released and depressed several times, the image was still copied relative to the initial sampling point. The image on the right was cloned with the Aligned option deselected. Notice that each time the mouse button was released and depressed, the clone again started from the initial reference point. 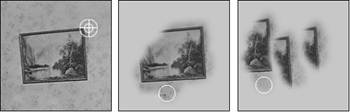
| 3. | Holding down the Alt key, click in the first picture to select the area you want to sample.
| 4. | Click the second picture's image window to make it active, and then drag to paint a clone of the sampled image.
| 5. | The original image in the second picture is replaced with a clone of the sampled image from the first (Figure 6.25).
Figure 6.25. The Clone tool provides a controlled method for combining parts of one image with another. Here, with a little cloning from the image on the top left, this woman receives not only a newly papered wall, but a painting to hang on it as well. 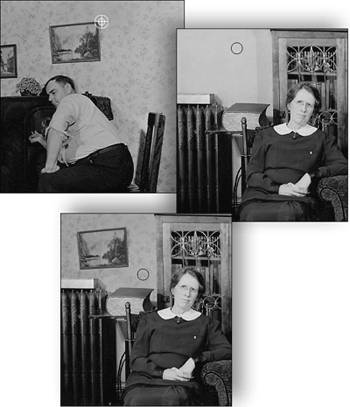
|
 Tip Tip
Before experimenting with the Clone tool, it's good practice to first create a new, blank image layer. Creating a separate layer not only protects your original image by leaving it unchanged, but it gives you more creative flexibility. You can apply different cloned areas to different layers and then compare the effect of each by turning the layer visibility settings off and on. And if you apply different cloned areas on separate layers, you can experiment further by applying different blending mode and opacity settings to each clone.
To clean up small areas with the Spot Healing Brush tool 1. | Select the Spot Healing Brush tool from the toolbox, or press J (Figure 6.26).
Figure 6.26. The Spot Healing Brush tool. 
| 2. | On the options bar, select a healing method from the two radio buttons (Figure 6.27).
Figure 6.27. The Spot Healing Brush tool offers you a choice of two healing types. 
- Proximity Match samples pixels from around the edge of your brush shape to create the patch over the area you want to repair.
- Create Texture uses the pixels directly beneath the brush shape to create a soft, mottled texture.
| 3. | On the options bar, select a brush size using the brush Size slider.
Try to size your brush to fit snugly around the flaw you're covering.
| 4. | Click and release the mouse button to apply the patch (Figure 6.28).
Figure 6.28. With a single mouse click, each dust speck is removed. 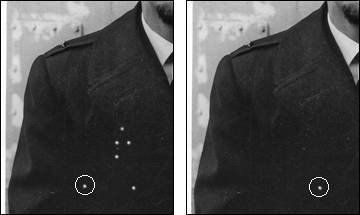
|
Tip
To remove flaws with the Healing Brush tool 1. | In the toolbox, select the Healing Brush tool from beneath the Spot Healing Brush tool (Figure 6.29).
Figure 6.29. The Healing Brush tool. 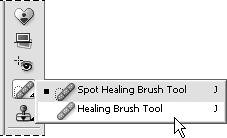
| 2. | From the Mode drop-down menu on the options bar, check that Normal is selected (Figure 6.30).
Figure 6.30. Although several healing modes are available, most times the Healing Brush tool works best with the default mode as Normal. 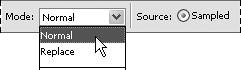
Normal mode will blend sampled pixels with the area you're repairing to create a smooth transition with the area surrounding the repair. Replace mode does little more than duplicate the behavior of the Clone Stamp tool. For information on the other effect modes available from the drop-down menu, see "About Opacity and Blending Modes" in Chapter 5, "Working with Layers."
| 3. | On the options bar, select a brush size using the brush Size slider.
The brush size you choose will vary depending on the area you have available to sample from and the area that you're trying to repair.
| 4. | Move the pointer over the area of your image that you want to sample (the pointer becomes a circle, representing the brush size you've specified), and then hold down the Alt key.
The pointer becomes a target (Figure 6.31).
Figure 6.31. Once you've found an area of your image that you want to use as a patch, hold down the Alt key and click to select it. Your pointer turns into a bull's-eye target. 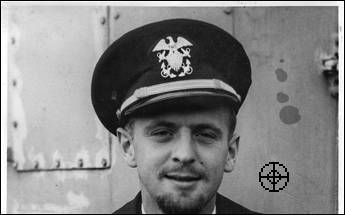
| 5. | Click once to select the area you want to sample; then release the Alt key and move the pointer to the area you want to repair.
| 6. | Hold down the mouse button, and drag to "paint" the sampled image over the new area (Figure 6.32).
Figure 6.32. As you drag the Healing Brush tool, crosshairs appear, providing a constant reference point as you paint over the area of the image you want to correct. 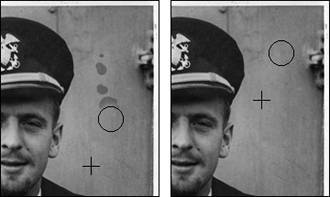
The sampled image blends with the repair area to cover any flaws and imperfections.
|
|