| You now know that you can create a new layer using the Layer > New command; in addition, Photoshop Elements creates layers in all sorts of sneaky ways. For example, whenever you copy and paste a selection into an image, it's automatically added to your image on a brand-new layer. When you start editing an image, you'll often find it convenient to create a selection and convert it to a layer to keep it isolated and editable within your photo. It's also quite easy to duplicate a layer, which is useful when you want to copy an existing layer as is, or use it as a starting point and then make additional changes. The background layer is unique and by default can't be moved, but sometimes you will need to move it, change its opacity, or apply a blending mode. To do any of those things, you'll need to convert it to a regular layer. And sometimes you'll want to convert an existing layer to the background. Although these conversions are not necessary for most simple photo projects, they are quite common when you combine or make composite images. To convert a selection to a layer 1. | Make a selection using any of the selection tools (Figure 5.28).
Figure 5.28. Any selected area can be converted to its own layer. 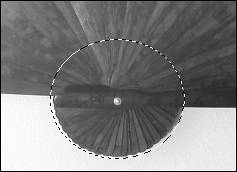
| 2. | From the Layer menu, choose New; then choose one of the following commands:
- To copy the selection, choose Layer via Copy (Ctrl+J) (Figure 5.29).
Figure 5.29. Choose Layer > New > Layer via Copy to copy the selection to a new layer. 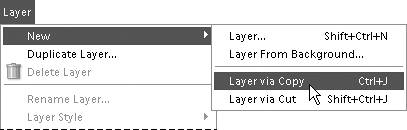
The selection is copied to a new layer, leaving the original selection unchanged (Figure 5.30).
Figure 5.30. Copying a selection to a new layer leaves the original selection unchanged. 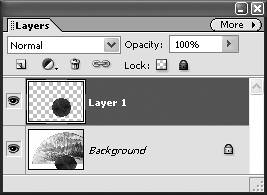
- To cut the selection, choose Layer via Cut (Shift+Ctrl+J).
The selection is cut to a new layer, leaving a gaping hole in the original layer, with the current background color showing through (Figure 5.31).
Figure 5.31. The Layer via Cut command cuts the selection to a new layer. 
|
Removing a Halo from an Image Layer Often when you create a new image layer from a selection, you'll find that you've inadvertently selected pixels that you didn't want to be included. This is a particularly common problem when you're trying to remove an image from its background using the Magic Wand or Magic Selection Brush tools. On close inspection you may find that what you thought was a clean selection, actually includes a halo of colored background pixels. New to Photoshop Elements 4.0 is a simple little function that can help to eliminate those troublesome halos. Once you've pasted your selection into its new layer, choose Adjust Color from the Enhance menu, and then choose Defringe Layer from the Adjust Color submenu. In the Defringe dialog box, enter a the pixel width to control how much of the border of your image you want to affectfor high resolution images, I usually start with around 5. Then, just click OK to see the results in the image window (Figure 5.32). If you're not happy with the results, undo the operation by pressing Ctrl+Z, then repeat the steps, entering a new pixel width in the Defringe dialog box. Figure 5.32. When zoomed in, it's apparent that the old, weathered baseball I've cut and pasted carried with it a halo of the background it was resting on (left). After applying Defringe, the colored halo has disappeared (right). 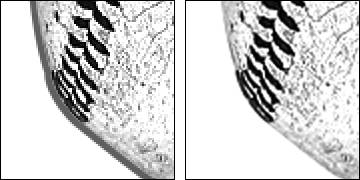
|
To duplicate a layer 1. | Select the layer on the Layers palette.
| 2. | Duplicate the layer using one of the following methods:
- If you want to create a new name for the layer, choose Layer > Duplicate Layer.
The Duplicate Layer dialog box appears, where you can rename the layer (Figure 5.33). Note that you can also get to this dialog box from the Layers palette menu.
Figure 5.33. Use the Duplicate Layer dialog box to rename your new duplicate layer. 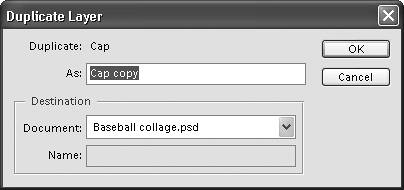
- If you're not concerned with renaming the layer right now, just drag the selected layer to the New Layer icon on the Layers palette (Figure 5.34).
Figure 5.34. You can also duplicate a layer by dragging any existing layer to the New Layer icon on the Layers palette. 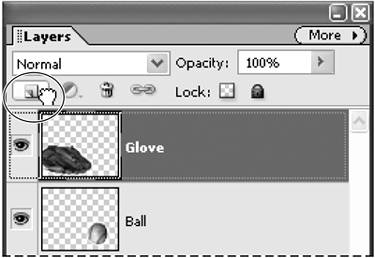
The new layer appears right above the original layer with a "copy" designation added to the layer name (Figure 5.35).
Figure 5.35. The new layer appears right above the original layer on the Layers palette. 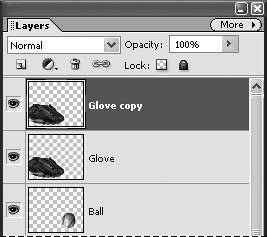
|
To convert a background to a layer 1. | From the Layer menu, choose New > Layer from Background.
| 2. | If desired, type a new name for the layer and click OK (Figure 5.36).
Figure 5.36. You can convert the background to a layer and rename it during the conversion. 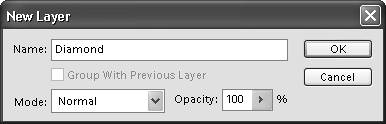
|
 Tip Tip
To convert a layer to a background 1. | Select a layer on the Layers palette.
| 2. | From the Layer menu, choose New > Background From Layer (Figure 5.37).
Figure 5.37. You can convert a layer to a background by choosing Layer > New > Background From Layer. 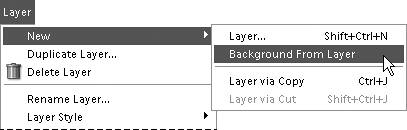
| 3. | The new background appears at the bottom of the Layers palette (Figure 5.38).
Figure 5.38. New background layers always appear at the bottom of the Layers palette. 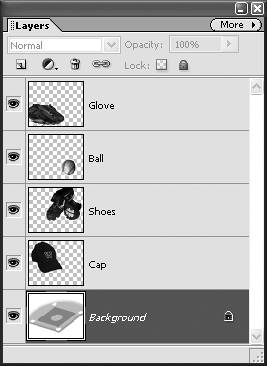
|
Tips The Type and Shape tools also each automatically generate a new layer when you use them, keeping those elements isolated on their own unique layers. The Background From Layer command won't work if you already have an existing background layer in your Layers palette. Why? Because no image can have two background layers at the same time. To get around this, create a duplicate of the current background layer (you can rename it later). You can then safely delete the background layer, then follow steps 12 to convert a regular layer into a background.
|