Section 1.1. Drawing Your First Box
1.1. Drawing Your First BoxDrawing a box is easy, so in this proect you'll also look at a few ways to enhance your drawing with color and stroke properties. If you're new to Flash, fear notyou'll feel comfortable in no time. When you launch Flash for the first time, the Start screen appears, as shown in Figure 1-1. This is merely a handy launch utility, and if you find it intrusive, you can disable it in the lower-left corner of the panel. One of the reasons you may want to use the panel is that it keeps track of the last 10 documents you opened (although you can also access this list via the File Figure 1-1. The Start screen knows what you've been doing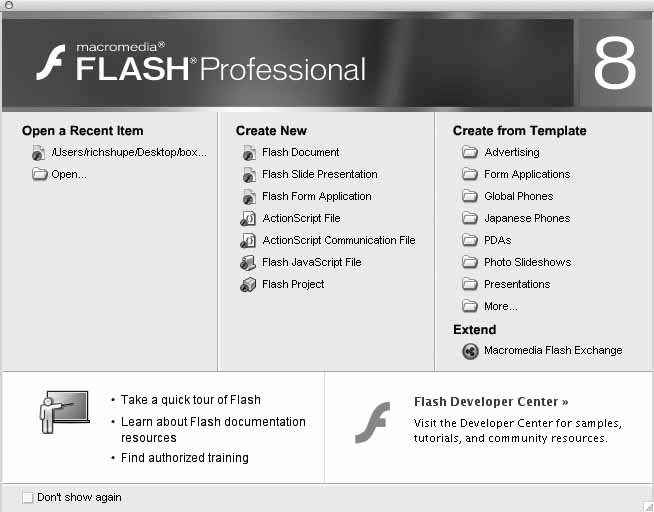
The second column of the Start screen allows you to create a new Flash document. Figure 1-1 shows the Start screen from Flash 8 Professional, which includes additional file types. You'll learn a little more about some of these files later in this book. In Chapter 13, you'll also learn how to use templates. For now, though, you'll focus on your first steps. Note: The bottom portion the Start screen provides quick links to Internet resources to help you learn Flash. This area may reflect automatic online updates provided by Macromedia, so your screen may vary slightly. 1.1.1. Setting Up the FileBefore you can start designing, you need to create a new Flash file:
Note: Throughout this book, exercises will frequently build upon previous exercises. Usually, you'll be told when you no longer need a file, or when to start another file for a new topic or for experimentation. So, as a new series of steps begins, assume you're continuing your work, unless otherwise stated. You will also occasionally be prompted to compare your work to the sample files at major milestones. Feel free also to check your progress against interim steps at any time. Now, take a moment to look around the world of Flash. Notice the Tools panel, shown in Figure 1-2. (If your Tools panel isn't visible, open it using the Window Figure 1-2. The Flash interface, showing the Tools panel, Stage, and Properties panel 1.1.2. Drawing a RectangleBegin by drawing a rectangle as a starting point for a new design:
1.1.3. Using Undo and the History PanelYou are probably familiar with the Undo command from your experience with other programs. When you use the Edit Take a moment now to undo your rectangle creation. If you followed the steps described previously, you should now have an empty Stage. If not, continue to use the Undo command until your Stage is empty. By default, Flash will store the 100 most recent undoable changes you have made to your open documents. Several hundred levels of undo can be stored, but they require memory. With each additional step you store, more system memory is consumed. Refer to Appendix A for information on how to change this setting. You can see the undo list in action by opening the History panel, shown in Figure 1-3, using the Window Flash 8 now offers both Document Undo and Object Undo modes. Document-level undo maintains a single list of all undoable actions for the entire Flash document. Object-level undo maintains separate lists of your actions for each major object (such as buttons and similar items) in your document. Object-level undo is more flexible, because you can undo an action in one object without having to also undo more recent actions in other objects. Figure 1-3. The History panel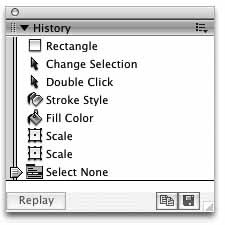 However, it can sometimes be advantageous to use document-level undo, and you should bear in mind that switching between the two modes will clear your current history. (Your document will not be affected, but your history list will be emptied.) So, experiment to see which you prefer, and be cautious when switching undo modes. 1.1.4. Drawing a Perfect SquareDrawing a perfect square is simpler than it sounds. All you need to do is hold down the Shift key while drawing the square. This technique, common to many graphics applications, is called "constraining." This is because the Shift key constrains the shape into a square while it's being drawn, even if you accidentally describe a rectangle with your mouse movement. This is a great way to ensure that your squares are actually square. The same rule applies to the Oval tool for drawing perfect circles and the Line tool for drawing straight lines. What if you want to create a box that is exactly 300 x 300 pixels? In this case, you can use numeric input to get the exact shape you want. Here's how:
Note: Don't worry if you can't get an exact number when entering property values. Flash does its best to give you the value you request, but it isn't always easy to achieve exact sizing or positioning at the sub-pixel level. If you get values like 299.9 or 300.1, the difference will usually be unnoticeable. Figure 1-4. The Properties panel, as it appears when a shape is selected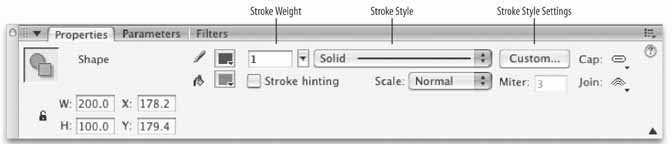 1.1.5. Adjusting Caps and JoinsYou may have noticed, during your experimenting, that you haven't been getting nice sharp corners. Flash's default behavior uses rounded stroke corners and end caps, but Flash 8 finally introduced the ability to customize the cap and join settings of your strokes. The Cap setting dictates the appearance of the ends of the lines, while the Join setting defines the appearance of corners. As you can see in Figure 1-4, both settings can be found in the far right of the Properties panel when a shape with strokes is the active selection. Caps can be set to None (the line ends precisely at the end point), Round (a round cap is placed on each end of the line), or Square (a square cap is placed on each end of the line). Joins can be set to Miter (sharp corner), Round, (rounded corner), or Bevel (two-point corner). Figure 1-5 shows the results of each setting. All the line widths are the same, and all shape end points terminate at the dotted lines. From top to bottom, the features used are: 1) Cap: None, Join: Miter; 2) Cap: Round, Join: Round; and 3) Cap: Square, Join: Bevel. Figure 1-5. Cap and join differences Note: Cap settings add to the apparent length of a line. Notice in Figure 1-5 that although all the lines end at the same horizontal or vertical positions, those with caps appear longer. |
 Open Recent menu command).
 New
New EAN: 2147483647
Pages: 117