Section 2.1. Designing Your Own Panel Layout
2.1. Designing Your Own Panel LayoutOne of the first things you'll notice when exploring the Flash interface is that a lot of features require a lot of interface elements to manipulate them. Flash has dozens of panels that provide access to design, scripting, and administration settings. Navigating all of these panels can be a challenge, particularly on laptops or smaller or low-resolution monitors. Creating your own panel layout can help un-clutter your screen, making it easier to focus. 2.1.1. Basic Interface LayoutThe interface layout you are likely to use on a daily basis consists of the main document window, the Tools panel, and the Properties panel. As shown in Figure 2-1, the main document window typically anchors these elements, with the Tools panel on the left and the Properties panel below. Figure 2-1. The basic Flash interface layout: Tools panel, document window, and Properties panel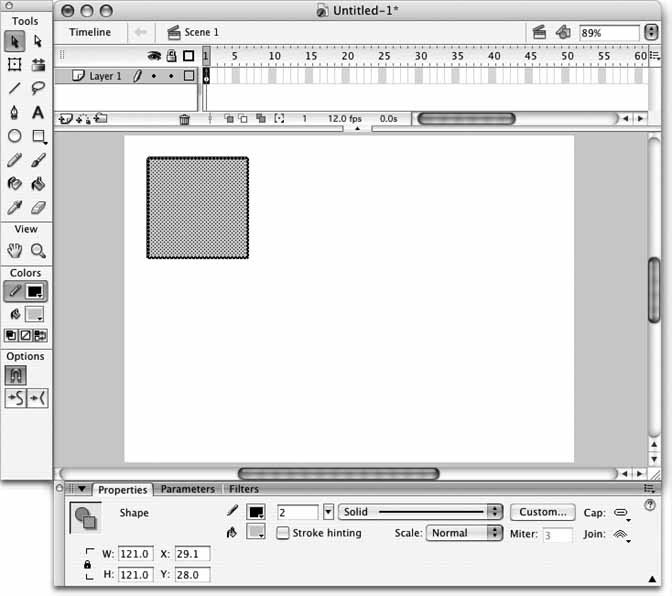 This layout is entirely optional, however, so you can reorganize at will. For example, if you have a small monitor, you may wish to fill your screen with the main document window and open the Properties panel only when needed. Note: Note that you can "undock" the timeline by dragging it away from the main window using the standard vertical "grab lines" (seen in every panel) in the upper-left corner. You can then ***"re-dock" the timeline where it was, to show fewer layers and lots of frames, or in a vertical position along the left side of the window, which is helpful when you have many layers and fewer frames. The timeline can also be hidden and restored using the "Timeline" button in the upper-left corner of the main document window. 2.1.2. A Plethora of PanelsYou can add a variety of additional helper panels to this basic layout. You have experience with some of these panels from your work in Chapter 1, including the Color Mixer, Color Swatches, and Library panels. You'll work with more of them soon, including the Align panel in this chapter and a few ActionScript-related panels in future chapters. To see a list of available panels, browse the Window menu. By default, each panel resides in its own palette. (Palettes are the mini-windows that float above the main document window at all times.) This can be a great benefit, because you don't have to juggle many windows to get to the panel you need. The trick is making effective use of these panels without being overwhelmed. This is especially important for users with laptops and small monitors. Fortunately, Flash provides a few ways of organizing the panel utilities you use the most. First, each palette will conveniently snap to the nearest edge of another palette or to the edges of your screen. This makes it easy to arrange your panels into an ordered grid, to keep things tidy. Even if you're not the compulsive type, you may find yourself enjoying this nicety if you frequently use many panels. Second, panels can be freely stacked within a single palette. When each individual panel is collapsed or expanded, using the familiar arrow in the panel's title bar, the palette adjusts its size. Combining panels is easy. In the far left of the panel's title bar is a pair of vertical dotted lines that mimic the appearance of a no-slip palette handle. You can use your mouse to drag the panel by this area and drop it into another panel to stack them. A dark horizontal bar will indicate whether you are dropping the new panel above or below the target. You can reorder the stacking of the panels the same way, by dragging a panel up or down in the palette. Figure 2-2 shows the merging process. On the left, the Transform panel is being dragged to the bottom of the Info panel. On the right, the two panels appear together. The Transform panel has been collapsed using the arrow button in the panel title bar. Figure 2-2. Merging panels into one palette window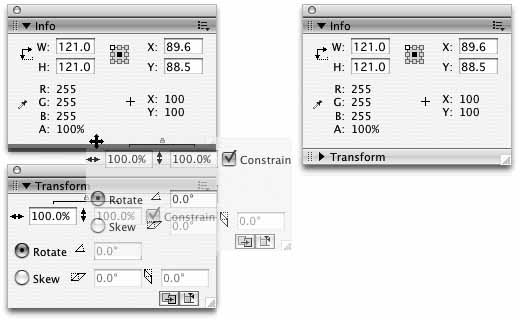 Finally, new to Flash 8 is the ability to combine panels into a tabbed set within a single palette window. This makes it even easier to find whatyou need, because you can group panels with related purposes, or the panels that you use most often. To group panels, you need to access a panel's menu using the icon in the far right of its title bar. You can group a panel with any other panel(s), and even rename the new panel set. Figure 2-3 illustrates grouping panels. On top, using its panel menu, the Transform panel is being grouped with the Info panel. In the bottom of this figure, both panels appear as tabs in one palette window. Figure 2-3. Grouping panels into one tab set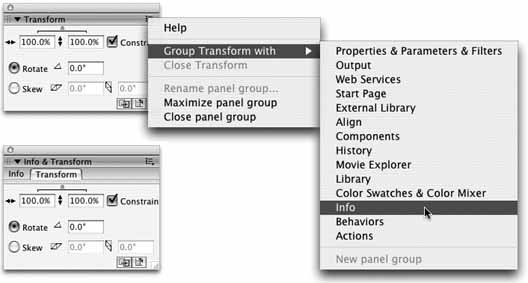 2.1.3. Saving Your SetupOnce you've configured your setup the way you like it, you won't have to do it again until you want to change it. When you're happy with the merging, grouping, positioning, and overall state of all your panels, save your layout using Window A couple of sample layouts, such as the one seen in Figure 2-4, have been included on the accompanying CD-ROM in the 02 directory. The setup file has been conveniently packaged as a Macromedia Extension. With a simple double-click, the Macromedia Extension Managera simple but powerful utility that will install extensions for many Macromedia products for youshould take care of everything. If you do not have the Macromedia Extension Manager installed, you can download this free utility from http://www.macromedia.com/exchange/em_download/. You'll read more about Flash Extensions in Chapter 15. Figure 2-4. An economical, accessible sample workspace layout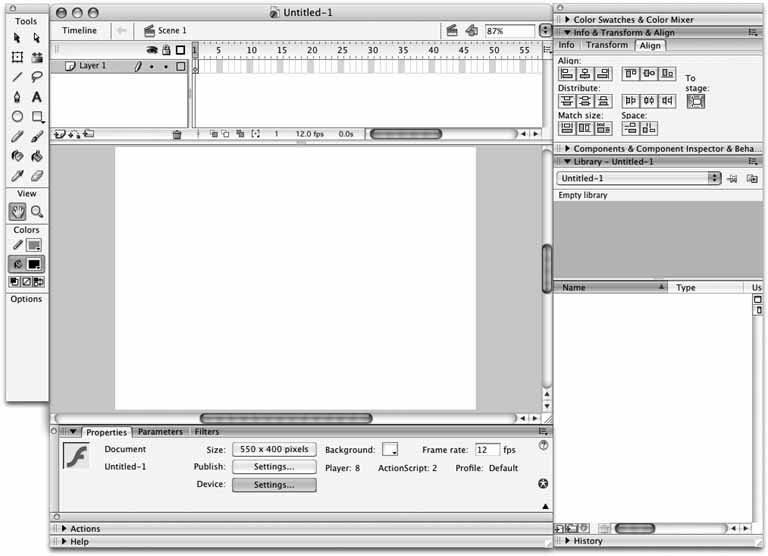
|
 Workspace Layout
 EAN: 2147483647
Pages: 117