Eliminate Implementation Models
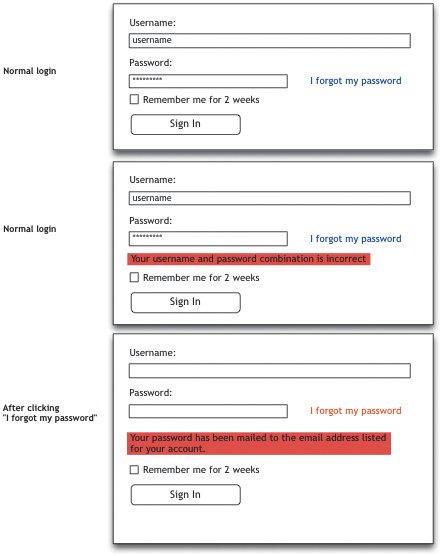
| The rest of this chapter is about how to find implementation-model designs in your application plans and eliminate them before they get built. Most of these solutions, such as creating wireframes and running usability tests, are also great as general design methods, but we'll focus on them here as a way to ensure our applications support users' mental models. Create Wireframes to Nail Things DownWhen an architect goes to work on a new building, the first major design step is a blueprint. Likewise, when a Web application designer begins a new application, wireframes are often the best place to start. A wireframe is the interface equivalent of a blueprint. Wireframes come in many shapes and sizes, but they all aim to illustrate the initial design ideas for an end product. Generally, they're not much more than stick-figure versions of future interface designs. They illustrate layout and spatial relationships, allude to the content that will eventually be added to the interface, and in some cases, show how contrast is to be used to set certain interface elements apart from others. Various tools can be used to create wireframes, the most popular of which are Microsoft Visio, Adobe Illustrator, and Axure, which I'll talk more about later in this chapter. Each of these tools has its own benefits and shortcomings, but each is a viable option nonetheless. A wireframe of a simple log-in screen has in-line validation to catch user-name and password errors. The principle benefit of wireframes is that they help us design understanding. An entire interface can be designed in just a few minutes and changed just as easily. And you can very quickly end up with a document that shows you exactly which design elements will impede a user's ability to understand the application's purpose. You can start with no idea at all about how the interface should look, simply tossing various UI elements onto the screen because you know they'll need to be there, then gradually refine the layout, organization, and interaction of each element until you have a design that makes sense. And you can keep going over it until you think the interaction works for users instead of working only to satisfy the system. (You can ask yourself, for example: Does the user actually need to know when this background operation fails, or is there a way the application can stay on track without warning the user? Does this screen need to appear here or somewhere else? Can we get rid of it entirely? Would getting rid of it make the application easier to understand?) The Three RsWhen creating wireframes, pay close attention to the following three focal points, which I call the Three Rs. Requirements. It may seem obvious that you need to pay attention to the requirements of the project, but this R is here as a constant reminder, because it's very easy to let someone else's pet feature (or even your own) make its way into your work. Far better to stick to what's absolutely necessary for the project, to support the activity that the product is meant to support and meet users' goals. Do notI repeatdo not let things that end with "that would be nice to have" get into your product in the first round. As discussed in Chapter 3, put the nice-to-haves on a separate list and see what's still important later on. For now, when you're staring at your screen and drawing out all the little boxes and widgets that make up your interface, stick to your guns. Stick to what's required. The items that are required are the most important, and are the only ones that should get any attention. The less there is to know about an application, the easier it is to understand. Reduction. This is my favorite R. Along with sticking to the requirements for the project, be sure to reduce interfaces to their core as much as possible. Reduce clutter, reduce redundancy, reduce the possibility of user error, reduce verbiage until it's only as long as it absolutely needs to bereduce, reduce, reduce. Then reduce some more. If you can find a way to make a single interface element serve three purposes while maintaining an obvious usage model, do it. If you can turn seven words into two, do it. If you can get rid of an entire interaction because the information it's intended to acquire can be obtained another way, do it, do it, do it. All of this reduction will result in a significantly more clear and understandable interface. Remember Einstein's rule:
We'll talk about reduction in greater detail in Chapter 8. Regularity. Regularity is really about making it look like you did things intentionally. It's about using the same font and font size for all form labels, lining up input fields so they create a consistent design, using the same spacing in all blocks of text, the same colors for similar or related interface elements, and so on. Regularity means that if one text field is 20 pixels in from the left edge, and the next one is part of the same form, it should sit 20 pixels in from the left edge as well. Regularity is the notion of organizing, aligning, synchronizing, and optimizing interface elements so that they provide a clear, clean, aesthetically pleasing interface. Chapter 7 has more on the subject of uniformity, and discusses how to leverage irregularity to create meaning and importance in a design. The Three Rs are your support system. They keep you in check when your mind starts wandering and you start imagining how cool it would be to add a talking paper clip to your interface that answers help questions. Microsoft has already done this. It wasn't cool. Stick to the Three Rs. The ultimate goal is to identify places the application can avoid reflecting how the system works. Find ways to avoid asking users questions that satisfy the system's needs instead of theirs. Present the options most likely to be chosen instead of forcing users to choose them manuallydefault options help illuminate the application's purpose and support the user's purpose. Provide a good starting point instead of forcing users through complicated setup screens, which often ask users tough questions without letting them know they can change their minds later on. Let the application explain itself instead of making the user explain how the system should work. Wireframes can bring to light a lot of issues you simply can't see otherwise. So create your wireframes, look for the implementation models, and replace them with things that make sense for users. Kaizen, Applied to WireframesBefore you even start creating wireframes, you can grab the nearest notepad and sketch out your ideas there. Firewheel Design did this with Blinksale, and when I asked about the approach, Josh Williams said:
The first step I usually take is to sketch several design possibilities on a white-board (a dry-erase board). I sometimes do this in collaboration with other people involved with a particular project, but often it's just me and a marker. I simply swing my chair around from my desk and start frantically drawing something out on the large whiteboard conveniently (and intentionally) located on the wall two feet behind me. Some people stop there. If you're designing and building the application yourself, you can certainly go straight from a sketch to the real thing, even if you're only coding the HTML end of things. The problem with this is that few people, if any, can consistently design the best possible interaction on the first try by simply sketching it out on a piece of paper once and going straight to code. The people who can do this understand complicated systems and have a far deeper knowledge of computer interactions than the average computer user. Use cases and wireframes help designers see problems with an interface early on in the process and help them think through it. Designers are forced to think about each and every screen, how they relate to each other, how they flow, and how users might grasp them. As a result, creativity is given a bigger seat at the table. Ideas emerge when designers give themselves the space they need to come up with them. If you only give yourself one shot to sketch something out before you start coding, you'll rarely see the other possibilities. But if your goal is to lay out an entire application and hand it off to a team of developers, then the entire process may begin and end with wireframes. For example, I sketch ideas on the whiteboard, then move to Axure or PowerPoint, or whatever tool might be best that day, and create a fairly detailed wireframe there. Then I go into kaizen mode. Kaizen, again, translates to "improvement." In Web terms, it's the equivalent of practicing iterative design (discussed in Chapters 2 and 8). Before I hand the wireframes off for review and approval, I go over them several times, just as I do with use cases, each time trying to find ways to improve task flows, make UI widgets more clear, and error-proof the screens (we'll talk about this more in Chapter 6). Recently, while revamping the editing features in a Web page-builder application to improve usability, I immediately saw many ways that menus and tool-bar options could be consolidated to clean up the interface. So I created a text document and started making notes about all the things that could be grouped together, options that could be removed from the main toolbar, and pop-up windows that could be eliminated. I also took out my sketchpad and sketched out what the interface would look like if all these things were done. Yes, it was much simpler than before, but it just wasn't enough. There were still two different modes for editing a newly created Web page, and neither of them kept users in contextthey both either took users away from the main interface or changed the view of the interface substantially enough that it was difficult to understand how edits would affect the page when they were completed. So I started looking for ways to combine the two editing modes and keep them in the main interface so that users would only have to learn that what you see is what you get. Plus, if a user could edit the page directly instead of moving into another mode, she would be able to work with the tool with a much simpler mental model. In doing this, I saw a way to create a main toolbar that offered up a few common features and a couple of menus, and show it every time a user clicked into an editable text block. But after creating a first draft of a wireframe, this still seemed a bit awkward, as it meant this toolbar would appear in a different place every time the user edited a different area of a page. Because users tend to rely on spatial memorythat is, they memorize where something is located on a page and continue to go back to the same spot for the functionality they found there last timemoving the toolbar around all the time wouldn't be an effective solution. After a little toying around with the wireframe, I moved the toolbar into a permanent spot within the main interface, and then added tabs to it. Each tab contained the editing tools for different page elements. One contained text-formatting tools. Another contained form widgets so users could add a form to their page and edit the properties of each form element. Another tab contained image-editing tools. Each tab provided a way to add elements to a Web page a user would create himself, and the toolbar as a whole was contextual, so that when the user clicked inside a text block, he would see the text-formatting tab, and when he selected an image, he would see the image-editing tab, and so on. This solution was by far the best of the possibilities, as it eliminated several implementation-model designs (such as the pop-up window used for one of the editing modes, which took users away from the page being edited), provided the right tools at the right time, and allowed me to get rid of many points of duplicate functionality. By doing these things, the new design made the tool easier to understand. I never would have seen this possibility if I had drawn up one sketch and gone straight to code. The moral of the story is that even if you do decide to go straight from sketch to code, don't rely on the first sketch. Go through a few and give yourself room to see the possibilities in a design before committing to anything. Once I'm comfortable with a design, I hand it off to another interface designer to get a second opinion. When that's done, it goes to that application's product manager so we can hash out any other issues. (Eventually, the wire-frames are approved, sent to graphic designers to be turned into final artwork, and then handed to developers to be built.) All in all, the wireframes are probably changed ten times before they go to the development team. (Doing the same thing with code could take hours. In more extreme cases, two hours spent on wireframe revisions can eliminate weeks of coding. Unlike code, wireframes are extremely simple and inexpensive to change.) Each iteration is an incremental improvement over the previous version, and each one is a step closer to an obvious design that reflects a user's model instead of one that reflects only what the underlying system needs to perform its routines. |

EAN: 2147483647
Pages: 81
- Chapter V Consumer Complaint Behavior in the Online Environment
- Chapter VII Objective and Perceived Complexity and Their Impacts on Internet Communication
- Chapter IX Extrinsic Plus Intrinsic Human Factors Influencing the Web Usage
- Chapter XIV Product Catalog and Shopping Cart Effective Design
- Chapter XV Customer Trust in Online Commerce