Pool Ball
Let's start out re-creating that blue pool ball you've heard so much about. Open Flash MX and let's get cracking:
-
Open a new Flash movie (CTRL/CMD+N). The size of the stage and the frame rate are not important, so the default values will work fine: 550x400 for the stage size and 12 fps for the frame rate.
-
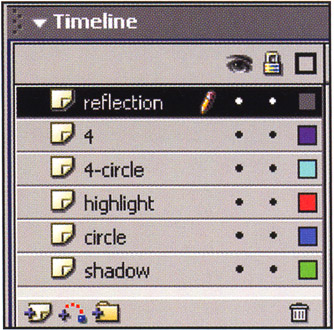
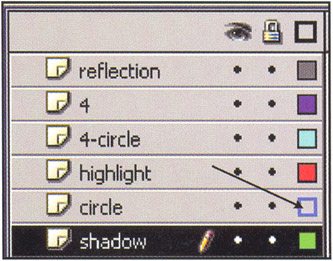
Create six layers and name them as shown opposite .
Naming layers makes referencing them later much easier. And, of course, it makes explaining procedures much easier in this book!
-
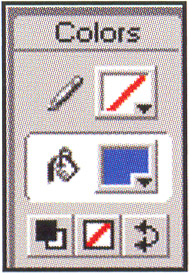
Let's start with the circle layer. Click the Oval Tool (O) and make sure the stroke color around the circle is turned off. I've chosen a shade of blue ( #3265C9 ) for the fill color.
-
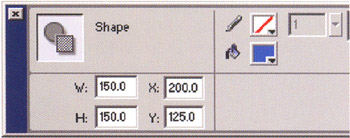
Create a circle using the Oval Tool, holding down the shift key to constrain it to a perfect circle. With the circle selected, you can set its diameter to 150 by changing its W and H dimensions in the Property Inspector.
For good measure, center the circle in the middle of the stage. You can use the Align panel (CTRL/CMD+K) to center it.
-
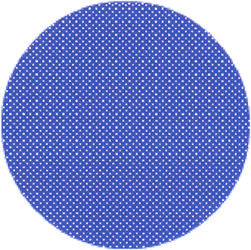
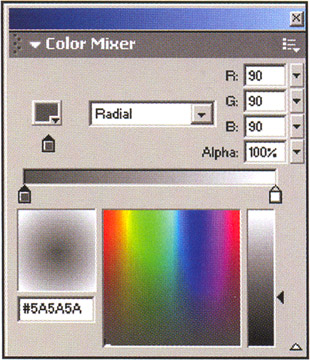
Let's go ahead and add the gradient. Select your blue filled circle and refer to the Color Mixer panel ( Window > Color Mixer or SHIFT+F9). After you choose a Radial gradient, add a couple of gradient markers (the little house-shaped icons) and make sure your gradient matches the palette (see the image at right).
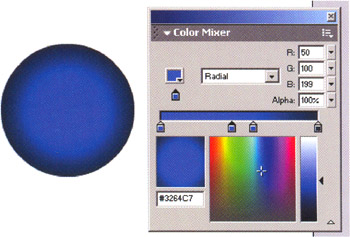
The gradient color changes, from left to right, are as follows : #3366CC, #3264C7, #2F5FB8, and #132D46. It's important to know that this gradient color was not thought up out of thin air ”there was a great deal of tweaking to get the right color pattern. You should expect to have to experiment and tweak the colors of your gradient when creating it from scratch.
-
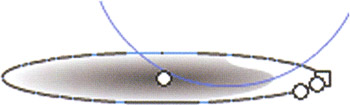
Now you need to move the gradient in the right position on the circle. Choose the Fill Transform Tool (F). With this tool you can position the shadow such that it has a curve. Again, the curve is important because it denotes that the circle might have a z-axis, or third dimension:
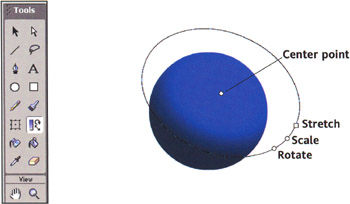
A good point of reference is to place the white center dot of the Fill Transform Tool over the spot where the highlight will approximately be, as shown above. You can use the four edit handles to move, stretch, scale, and rotate the gradient. It's worth spending a moment playing around with these powerful controls, if you're not already familiar with them.
-
While we are talking about where the highlight will be, let's go ahead and add it. Choose the Oval Tool (O) again and drag out an oval with no stroke anywhere on the stage in the highlight layer of your Flash movie. As before, be sure to select Radial for the gradient type.
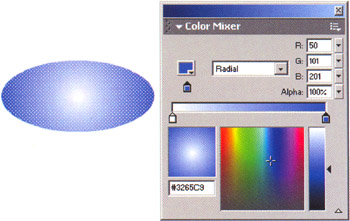
The important thing about the color for the highlight is that the blue must match the blue that the highlight is going to be sitting on. In this case, #3265C9 is the hex code for the blue on the outer edge. The other color in the middle is simply white.
-
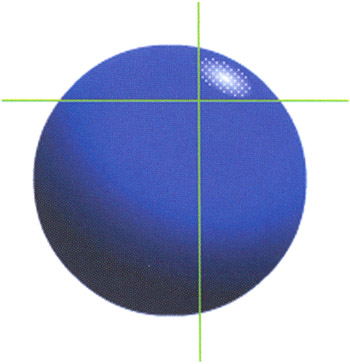
Next you need to set the size of the highlight so you can set the gradient correctly. Make the oval 32x23 pixels. Using the rotate and scale modifiers of the Free Transform Tool (Q) (or the Transform panel-CTRL/CMD+T) and the Arrow Tool (V), set the highlight to match the position and angle of the ball as shown on right (the rotation on the highlight should be about 30 degrees, where the long side of the shadow is parallel to the side of the ball).
-
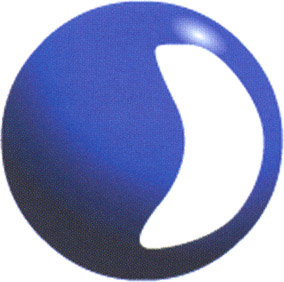
You'll add the reflection next. This is basically a distorted circle that has been tweaked to form the shape shown at right. With the Oval Tool (0), create a white oval on the reflection layer. Again, you'll need to distort the oval to get it about the shape shown at right. To distort the shape, simply use the Arrow Tool and place the cursor near the edge of the unselected oval. Once the arrow turns into an arrow with a curve, you can start to distort the oval (alternatively, you can use the Free Transform Tool again, but this time with distort and envelope modifiers).
-
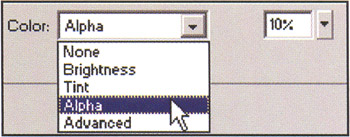
After you get your reflection just right, turn the distorted shape into a movie clip (select it and choose Insert > Convert to Symbol ..., or press F8). With the reflection now in the form of a movie clip, you can easily adjust the alpha channel so it is just a subtle reflection against the blue ball. With the movie clip selected, examine the Property Inspector and adjust the alpha to 10%.
-
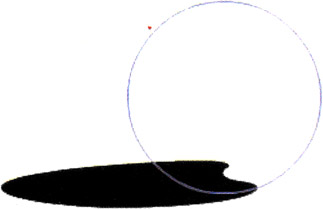
OK, let's move on and create the surface shadow. With the Oval Tool selected, on the shadow layer create a black oval shape approximately the same size as the one shown below. You may find that you need to distort your shadow, as you did with the reflection, to make it just right. To see the surface shadow easily, select the Show Layer As Outline icon in the timeline:
-
With the shadow selected, create the gradient shown at right.
-
Now with the Fill Transform Tool (Q), make the gradient centered on the shadow and shaped like the oval of the shadow.
-
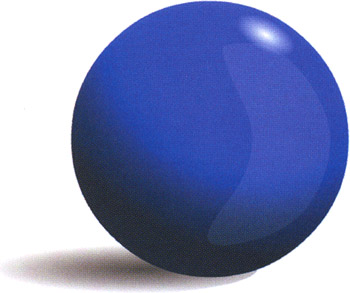
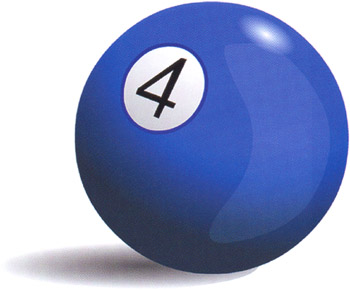
At this point, you should have a rather convincing shiny blue ball.
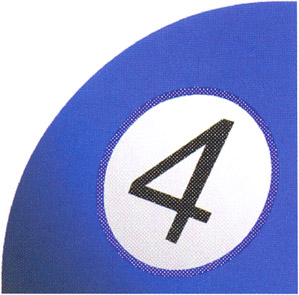
Let's go ahead and add the finishing touch: the small circle with the number 4. This 4 is important because it further illustrates that the ball is indeed supposed to be 3D. This is because the 4 is distorted and off to the side of the ball, giving the illusion of depth.
With the Oval Tool, create a light gray circle with a black stroke in the 4-circle layer. Again, slight tweaking of the circle will be in order here to achieve better 3D-looking results. With the circle finished, select the Text Tool (T) and type in a number 4 using a simple font in the layer named 4 .
Now you need to break apart your 4 so you can distort it. Select Modify > Break Apart (or just press CTRL/CMD+B) to break the text apart into a simple vector graphic. Now you can select the 4 and then choose Modify > Transform > Distort from the menu (similarly, you could use the Free Transform Tool (Q) with the distort modifier). Tilt the top part of the 4 slightly to the right. Now rotate the 4 slightly and center it inside the gray circle.
Once again, you'll probably need to make slight adjustments here and there to get the 4 and circle looking just right. When everything is done, you should have a very convincing number 4 pool ball.
Open up ball.fla in Flash to see the finished design. This file is available for download from www.friendsofed.com , along with all the other sample files featured in this book.
Now that you're familiar with using some of the basic concepts of light and shadow to produce 3D effects in Flash, let's look at a slightly more complex example.