JSP Variables
|
The JSP Hello World
To get a clear understanding of building a JSP page and hosting in Resin, let's build the classic Hello World as both an HTML page and a JSP page. First, let's build the HTML page. Using a text editor, create a file called hello.html and place it in a directory called hello under the /doc directory of the Resin installation. The contents within the hello.html file are as follows:
<HTML> <BODY> Hello, World! </BODY> <HTML>
Now using a browser, browse to the HTML page just created using a URL like this:
-
http://localhost:8080/hello/hello.html
This URL assumes you are executing Resin on your local machine. If you are running Resin on another machine, replace the localhost with an IP address. Once you browse to this above URL, you'll see the words Hello, World! displayed on your screen.
Now let's change the file to a JSP page by changing the .html extension to .jsp. Browse to the page again but replace hello.html with hello.jsp. Did you see any differences in the output? How about the response time? Instead of the Hello, World! text being instantaneously returned to the browser, there was a slight delay. This delay was the application server converting the JSP file to a servlet and compiling it. If you browse to the JSP page again, it should display the text without delay.
Now, building a JSP page without any Java in it isn't very useful, so let's add some. Change your hello.jsp file to read like this:
<HTML> <BODY> Hello World! <BR> The time is now <%= new java.util.Date() %> </BODY> <HTML>
Save the file and browse to hello.jsp again. As you'd expect, there is a slight delay as the new JSP page is converted and compiled. Notice how the Resin server doesn't need to be shut down and restarted or otherwise told to reload the hello.jsp file. Resin senses the file has changed and automatically reconverts and compiles it. The result of this code is shown in Figure 3.2.
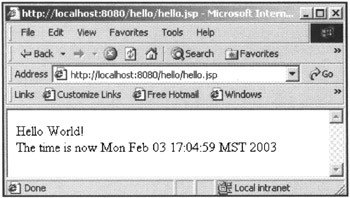
Figure 3.2: The output from the Hello World (with date) JSP.
Let's take a moment and discuss the code we just created and executed. The JSP page consists of both HTML template text and JSP code. The HTML template text consists of HTML tags and normal text. This information is passed from the server to the client browser without any changes to it. In order to differentiate the HTML from the JSP, special tags are used: <% and %>. The information contained within these tags is converted to Java code and placed within the servlet produced by the server. There are quite a few formats for the <% %> tags that cause the server to process the tagged information differently. Table 3.1 shows the four primary JSP tag combinations.
| TAG | DESCRIPTION |
|---|---|
| <%@ ... %> | Directive |
| <%= ... %> | Java expression |
| <% ... %> | Java function |
| <%! ... %> | Java declaration |
Of course, it's fairly hard to build a meaningful application just by pulling data information from the system. JSP allows you to use the special tags to enclose more than just expressions. Consider the following example:
<HTML> <BODY> <% java.util.Date localTime = java.util.Date(); System.out.println("Pulled the correct date"); %> Hello World! <BR> The time is <%= date %> </BODY> <HTML> In this new JSP page, we have added a scriptlet using the <% %> tags. A script-let is just a snippet of Java code that performs a specific function. In our case, we define a local script variable and assign it the current date/time. We also take advantage of the fact that we can use the System.out variable to output debug information to the console window where the Resin server was initially launched. Figure 3.2 shows the output to the Resin launch window created by the JSP page.
You might be curious about the difference between the System.out statement—which prints to the console window—and the HTML text and JSP expression tags <%= %>—which return output to the browser. Remember that all HTML tags and text are converted by the Resin application server into appropriate code within a servlet. The resulting code takes advantage of a system variable called out, which is a writer to the browser. So the HTML expression Hello World! <BR> will be converted to code like this:
out.println("Hello World!<BR>"); Our code can also take advantage of this variable to output specific text to the browser. For example:
<HTML> <BODY> <% java.util.Date localTime = java.util.Date(); System.out.println("Pulled the correct date"); %> Hello World! <BR> The time is <% out.println(date.toString()); %> </BODY> <HTML> In this example, we replaced the expression tags with function tags and included Java code to output the date string to the browser. The out variable is an object instantiated from the class javax.servlet.jsp.JspWriter.
Combining Java and HTML
In all of the examples to this point, the Java code and HTML have been separated for the most part. There will be times when you need to mix the Java and HTML xed to provide accurate output. For example:
<HTML> <BODY> <% java.util.Date localTime[10]; for (int i=o;i<10;i++) localTime[i] = new java.util.Date(); %> Time Array<BR> <table> <% for (int i = 0; i<10;i + + ) { %> <TRxTD><%= localTime[i] %></TD></TR> <% ) %> </table> </BODY> <HTML> In this example, our scriptlet creates an array of Date objects and displays those objects in an HTML table. While the code could have been written with 10 JSP expression tags, the code would look terrible and thus need a second loop.
The display loop encloses the necessary table HTML tags along with a single JSP expression tag to pull the individual date values. The output is a table containing all of the date values. Mixing the JSP and HTML tags can get confusing at times, but by using proper formatting of the code, you reduce the confusion.
|
EAN: 2147483647
Pages: 180