Section 5.7. Styling the Slideshows
5.7. Styling the SlideshowsNow that you've implemented a complex relationship, it's time to spice things up a bit. Let's take stock of where we are with the Photo Share application:
We haven't yet done anything with the slideshows, which are still using the generated scaffolding. The page that displays a list of all slideshows is the focal point that links to all the things you can do with slideshows: create them, edit them, delete them, and play them. Fixing up this page will have the tremendous visual impact, so this is a good place to start. Currently, the list slideshows page looks like Figure 5-9. This is definitely ugly! Figure 5-9. Current (ugly) slideshow listing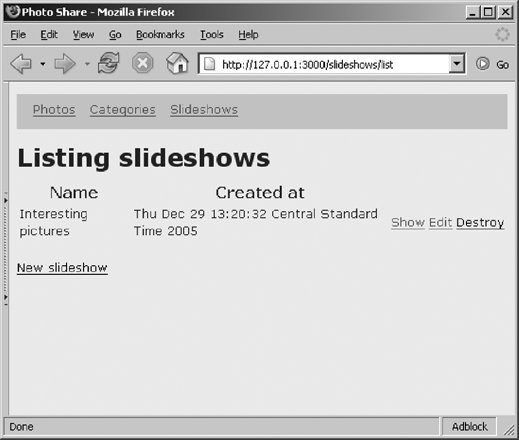 In the process of getting to this goal, you will learn about many new features. At the moment we've defined only one slideshow, but later on you can create more slideshows. The slideshow controller's list action already gets the needed information from the database, so you don't need to modify app/controllers/slideshows_controller.rb . The list method looks like this: def list @slideshow_pages, @slideshows = paginate :slideshows, :per_page => 10 end You'll want to use the @slideshows instance variable in your view template because it contains a list of Slideshow objects to display. You've seen this code before; it is used (in this case) to break up long lists of slideshows into bite- sized chunks . Edit the view template ( app/views/slideshows/list. rhtml ) to make it look like this: <div id="rubyrails-summaries"> <% for slideshow in @slideshows %> <div id="rubyrails-summary"> <div id='slideshow-caption'> <%= slideshow.name %> <small>(<%= slideshow.slides.size %> slides)</small> </div> <div id="rubyrails-thumbnails"> <%= thumbnail_tag slideshow.slides[0] %> <%= thumbnail_tag slideshow.slides[1] %> <%= thumbnail_tag slideshow.slides[2] %> <strong>. . .</strong> </div> <div id="rubyrails-controls"> <small> <%= link_to 'Play', :action => 'show', :id => slideshow %> <%= link_to 'Edit', :action => 'edit', :id => slideshow %> <%= link_to 'Delete', :action => 'destroy', :id => slideshow %> </small> </div> </div> <br/> <% end %> <%= link_to 'Previous page', { :page => @slideshow_pages.current.previous } if @slideshow_pages.current.previous %> <%= link_to 'Next page', { :page => @slideshow_pages.current.next } if @slideshow_pages.current.next %> </div> Figure 5-10 shows how it should look when we're done. Figure 5-10. Better-looking slideshow listing This first thing you should notice is that we are using nested <div> tags instead of tables to format the contents. Using <div> tags gives you a lot more flexibility and power when specifying the styling options in the CSS stylesheet. Each display element is contained within its own <div> section with a unique id attribute. You'll use these same div names in the stylesheet to determine how each element is displayed. We'll create the stylesheet shortly, but first let's go through the code in this template: <% for slideshow in @slideshows %> You saw this line before in the photos list template. It loops through each database row contained in @slideshows (which was set by the controller), assigning each, in turn , to slideshow : <div id='slideshow-caption'> <%= slideshow.name %> <small>(<%= slideshow.slides.size %> slides)</small> </div> This div is simply a caption block that displays the name of the slideshow along with the number of photos it contains: <div id="rubyrails-thumbnails"> <%= thumbnail_tag slideshow.slides[0] %> <%= thumbnail_tag slideshow.slides[1] %> <%= thumbnail_tag slideshow.slides[2] %> <strong>. . .</strong> </div> This div shows a little preview of the slideshow by displaying the thumbnails of the first three photos in the slideshow: <div id="rubyrails-controls"> <small> <%= link_to 'Play', :action => 'show', :id => slideshow %> <%= link_to 'Edit', :action => 'edit', :id => slideshow %> <%= link_to 'Delete', :action => 'destroy', :id => slideshow %> </small> </div> Once again, this div should be self-explanatory. It displays a block of links for operating on this particular slideshow. It includes links to play, edit, and delete the slideshow. When you try to list slideshows, this code breaks. Rails does not have a helper function to display thumbnails, but we'll remedy that next. 5.7.1. Creating Your Own Helper FunctionsRails has many built-in helper functions to assist in creating the HTML that is sent back to the browser, and we have used many of them in our Photo Share application. You can also create your own helper functions. You can create two kinds of helper functions. Helper functions that you want to be accessible from any controller or view template are application-level helper functions; they go in the file app/helpers/application_helper.rb . Helper functions that are specific to a particular controller go in app/helpers/ <controller-name> _helper.rb . We need to implement the thumbnail_tag helper that we used earlier. Because it's specific to the slideshows_controller , we'll add it to app/helpers/slideshows_helper.rb . All views rendered by the slideshows_controller will be able to use this helper. Edit app/helpers/slideshows_helper.rb , and add the following code inside the module definition: def thumbnail_tag(slide) image_tag "photos/#{slide.photo.thumbnail}" if slide end The meat of the method calls the built-in helper function image_tag , passing the path to the slide's thumbnail, thus creating the proper image tag. You may have noticed that the view code assumes that there are at least three slides in a slideshow. Because some slideshows may be shorter, you need to allow for nil , so add the if slide modifier at the end. Because nil evaluates to false , execute this line of code only if you're given a slide. 5.7.2. Creating the StylesheetRemember that we set up our view template with id= attributes: for example, "slideshow-summary" and "slideshow-thumbnails" . This organization lets you create matching entries in your stylesheet to specify their display attributes. First, let's see what the Slideshows Listing page looks like before you create the stylesheet. Then you'll really appreciate how easily a stylesheet can improve the look of your page. Make sure the server is started and browse to http://127.0.0.1:3000/slideshows/list; you should see something like Figure 5-11. Figure 5-11. Before stylesheet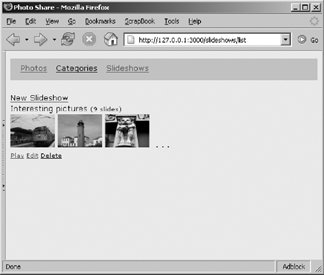 This page is definitely nicer than the earlier version but not as nice as it could be. Now let's create the stylesheet. Create the file public/stylesheets/slideshows.css with the following contents: #slideshow-summaries { padding: 0.5em; float: left; background: #ccc; margin-left: auto; margin-right: auto; border-left: thin solid #777; border-bottom: thin solid #777; border-top: thin solid #aaa; border-right: thin solid #aaa; } #slideshow-summary { padding: 0.5em; margin: 0.5em; width: 25em; float: left; background: #ddd; border-left: thin solid #777; border-bottom: thin solid #777; border-top: thin solid #aaa; border-right: thin solid #aaa; } #slideshow-thumbnails { padding: 0.50em; background: #eee; border-left: thin solid #aaa; border-bottom: thin solid #aaa; border-top: thin solid #777; border-right: thin solid #777; } #slideshow-caption { background: #edd; border-left: thin solid #aaa; border-bottom: thin solid #aaa; border-top: thin solid #777; border-right: thin solid #777; font-size: 1.0em; } #slideshow-controls { margin-top: 0.50em; padding: 0.25em; border-left: thin solid #777; border-bottom: thin solid #777; border-top: thin solid #aaa; border-right: thin solid #aaa; } For the most part, these style definitions just set borders and background shading. For Rails to be able to find the stylesheet, you must include a reference to this stylesheet in your HTML pages. Edit app/views/layouts/standard.rhtml , and insert: <%= stylesheet_link_tag 'slideshows' %> immediately after the other stylesheet references. Now, if you refresh your browser, you should see something like Figure 5-12. Figure 5-12. After stylesheet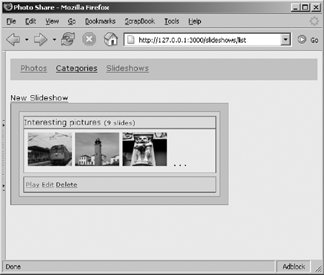 That's much better. We still need to implement the ability to create, edit, and play a slideshow. We'll tackle these in the next chapter because we're going to use Rails's built-in Ajax facilities to create an intuitive Ajax user interface. In the next chapter, we'll focus on using Ajax to make this user interface more interactive, dynamic, and exciting. |