Prepare the Server
|
|
Now we’ll prepare the server for the web site. This involves the following:
-
Checking server hardening
-
Setting up the directory for the web site
-
Securing the NT File System (NTFS) permissions for the site
Checking Server Hardening
When your server is exposed to the Internet, it’s important that it is secured. Chapter 6 details how to develop a security methodology. For this server, we’ll use a basic security checklist. Use this list as a template for a basic security checklist:
-
Are all the appropriate operating system and application patches installed, especially security patches?
-
Is auditing enabled on this server in the local security policy?
-
Do all the accounts on this server have difficult passwords?
-
Did you enable only the options you needed in IIS?
-
Are you using NTFS, and are the permissions secure?
-
Are you using elevated privileges for any components?
-
Is there a process in place to evaluate and update the security on this server continually?
Setting Up the Directory for the Web Site
By default, IIS is installed to the C:\Inetpub directory. You will probably want to separate the operating system files from the application files installed on your machine. When you create a web site, you can put it on another drive, such as D:, or you can create a Web Site folder on the E: drive, and place the web site files there. That way, you can secure that folder and the permissions will propagate. Additionally, any upgrades, formatting, or loss of the C: drive won’t affect the data stored on the D: or E: drive.
Securing the NTFS Permissions for the Site
When you create and format a new drive with an NTFS, it has the following permissions:
| Security Principal | Permissions |
|---|---|
| Local Administrators Group | Full control |
| SYSTEM | Full control |
| CREATOR OWNER | Full control |
| Users | Read & execute, create folders / append data, create files / write data |
| Everyone | Read & execute |
These permissions may be more than you want to allow for your web site. In addition, the Internet Guest Account doesn’t have any easily controllable rights to this folder (just what it gets from Everyone and Users). While it’s not the best practice to assign resources directly to a specific account, you do want to have more control over what the anonymous account sees than what permissions for the Everyone and Users groups can offer. The answer is to create a local group, assign the NTFS rights to that group, and put the anonymous user into that group. That way, if you want to grant permissions to another user account, you can just add it to this group.
Here’s how to set up a folder with permissions:
-
Open the Computer Management MMC by choosing Start | Administrative Tools | Computer Management.
-
Expand Local Users and Groups.
-
Click the Groups container.
-
Create a new group by choosing Action | New Group. The New Group window will appear.
-
Call the Group Name Anonymous Access for BeerBrewers Site. That is acceptable for the description as well, as shown in Figure 19-3.
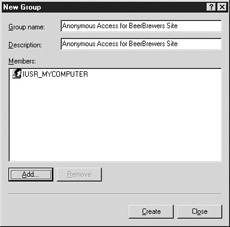
Figure 19-3: Anonymous Access for BeerBrewers Site group -
Add the Internet Guest Account to that site by clicking the Add button and typing in the name of the Internet Guest Account in the Select Users window. As we learned in Chapter 2, this account is created when IIS is installed and is named IUSR_computername. In this example, the account is called IUSR_MYCOMPUTER.
-
Click OK to add the account to the Members of the group.
-
Click Create to finish creating the group and then click Close to close the New Group window.
Once you’ve created the group, you can add that group to the security permissions of the folder in which the web site will reside. Since this is a brand-new site, first we need to create the folder.
-
Create the appropriate folder on the E: drive using Windows Explorer. Let’s name it BeerBrewers Site.
-
Open the Properties window for that folder by right-clicking the folder and choosing Properties.
-
Go to the security tab for that folder, as shown in Figure 19-4. The first thing we need to do is remove the permissions inheritance, which is done by clicking the Advanced button and removing the check mark from the Allow Inheritable Permisions From The Parent To Propagate To This Object And All Child Objects box.
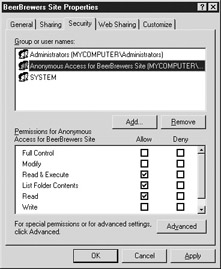
Figure 19-4: The Security tab of the Site Properties window -
When you uncheck the box, a Security dialog box will open, asking you to copy or remove the permissions. Click the Copy button to copy the permissions.
-
Click OK to get out of the Advanced Security Settings window.
-
Remove Creator Owner and Users objects from the Group Or User Names list by clicking the name, and then clicking the Remove button.
-
Our Anonymous group will have Read & Execute, List Folder Contents, and Read permissions by default, as shown in Figure 19-4. That is acceptable for our site.
We have created a folder that Administrators and the Operating System have rights to manage, but anyone else has read and execute rights. Repeat the second section (steps 1-7) to make a development area for the development web site called “BeerBrewers Test Site.” You can use the same group for permissions—in fact, it’s better that way.
|
|
EAN: 2147483647
Pages: 193