| If you're like me, you're desperate to recapture the past: you want to create digital audio files from audio cassettes and vinyl albums. Bridging the gap between the analog and digital worlds requires some software and hardware. The process involves connecting your Mac to an audio source, such as a cassette deck or stereo system, and then using recording software to save the audio on your hard drive as it plays back. You can encode the resulting files into AAC or MP3 format and add them to your iTunes music library. Most current Mac models contain audio-input jacks to that you can connect to a sound source, such as a cassette deck or stereo system. If your Mac doesn't have an audio-input jack, you'll need an adapter such as Griffin Technology's iMic (below), which is inexpensive and includes Final Vinyl, a cutely named recording program. Griffin, M-Audio, and other companies also sell more sophisticated (and better-sounding) audio hardware that you might prefer if you're an audiophile or you plan to record acoustic instruments using GarageBand. 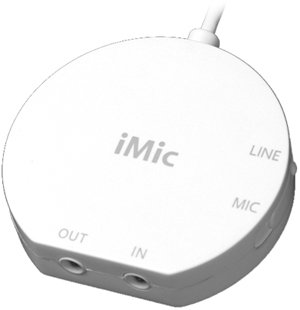 Step 1. | Make the Connections
Recording analog sources is easiest when you connect the Mac to the audio output of a stereo system. This will enable you to record anything your stereo can play, from vinyl albums to cassettes to FM radio.
Most stereo receivers have auxiliary output jacks on their back panels. To make the connection, use a cable with two RCA phono plugs on one end and a 1/8-inch stereo miniplug on the other. Connect the phono plugs to the receiver's output jacks, and the miniplug to the input jack on your Mac or audio adapter.
 | | | Step 2. | Prepare to Record
Before you record, set your audio levels properly: you want the audio signal to be as loud as possible without distorting the sound.
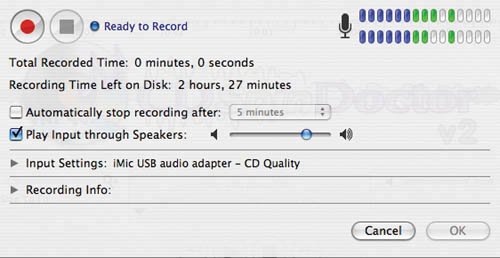 Fire up your audio recording software (Roxio's CD Spin Doctor is shown here), and adjust its recording levels so that the loudest passages of music fully illuminate the volume meters.
 | Learn more about recording old tapes and CDs. www.macilife.com/itunes |
| Step 3. | Record
First, do a test recording. Activate your software's Record mode and begin playing back the original audio, preferably a loud passage. After a minute or two, stop and play back the recorded audio to verify that the recording levels you set are correct. Listen for distortion in loud passages; if you hear any, decrease the levels slightly.
Once you've arrived at the correct setting for recording levels, record the original audio in its entirety.
| Step 4. | Encode and Edit Song Information
Your completed recording will almost certainly be stored in uncompressed AIFF formatthe format used by Mac recording programs.
To save disk space, you'll probably want to encode the recording into AAC or MP3 format. Naturally, you can use iTunes to do this.
Before encoding your recordings, use the Preferences command to choose your preferred encoding settings as described on page 22. Next, hold down the Option key and check out the Advanced menuyou'll see a command that reads Convert to AAC. (If you specified the MP3 encoder in the Preferences dialog box, the command reads Convert to MP3.)
Choose the Convert to AAC (or Convert to MP3) command, and then locate and double-click on the recording you just made. iTunes will encode the track and store the resulting digital audio file in your iTunes library.
iTunes can also encode multiple recordings in one operation. After choosing Convert to AAC (or Convert to MP3), simply  -click on each file you want to import. -click on each file you want to import.
After you've encoded your recordings, edit their song information as described on pages 28 and 29. By adding song, artist, album, and genre information, you'll be able to conveniently browse your converted recordings on an iPod and include them in smart playlists.
|
Choosing a Recording Program The spectrum of audio-recording software ranges from free (Audacity) to inexpensive (SoundStudio and Amadeus II) to pricey (Bias Peak) and beyond. One of my favorites is CD Spin Doctor, included with Roxio's Toast Titanium CD burning software. CD Spin Doctor creates AIFF files, which you can encode into AAC or MP3 format using iTunes, as described above. A few features make CD Spin Doctor ideal for converting analog recordings into digital form. One is the Auto-Define Tracks command: choose it, and CD Spin Doctor scans a recording, detects the silence between each song, and then divides the recording into multiple tracks. This makes it easy to record one side of an album and then divvy it up into separate tracks. CD Spin Doctor also has noise and pop filters that can clean up abused records, as well as an "exciter" filter that enhances old recordings by beefing up bass and improving the sense of stereo separation. (Bias' SoundSoap provides even more noise-cleanup features.) For detailed audio editing, try Amadeus II or SoundStudio. Get links to these and other audio programs at the iTunes page on macilife.com. |
|