| The .NET Framework utilizes an object-oriented development style, whereas ActiveX components deliver encapsulated functionality through standard interfaces that communicate with the form on which they are placed. In order to allow a legacy ActiveX control to become accessible as a .NET class, it is necessary to encapsulate the ActiveX control within a wrapper, which serves as a proxy between the .NET and ActiveX development technologies.  | A wrapper is a software layer that acts as a control container for an ActiveX component and allows .NET code to treat the contained component as a normal Windows forms control. |
The Windows Forms ActiveX Control Importer ( aximp.exe ) The System.Windows.Forms namespace includes a wrapper class, AxHost , that is used to encapsulate ActiveX components. An instance of the AxHost class must be customized for the contained ActiveX control. This is accomplished using the Windows Forms ActiveX Control Importer ( aximp.exe ), as in the following example: -
Create a folder to house the imported control. -
Open the .NET command prompt, accessed through Start, Programs, Microsoft Visual Studio .NET, Visual Studio .NET Tools, Visual Studio .NET Command Prompt. -
Navigate to the folder created in step 1 and then enter the following code (here, we are importing the SysInfo control included with Visual Basic 6.0 on a system running Windows 2000; you may find this control at a different location if you're using an operating system other than Windows 2000): aximp c:\winnt\system32\sysinfo.ocx The importer will list the names of the files that were created by the import process: SysInfoLib.dll AxSysInfoLib.dll -
Open Visual Studio .NET and create a new Visual Basic .NET application with a form. -
Right-click the References node of the Solution Explorer and select Add Reference to open the Add Reference dialog box. -
Select the COM tab and browse to the folder created in step 1. -
Add references to both files created in step 3. -
Modify the form's code module as follows (you can find the code to modify by clicking the plus sign [+] next to the Windows Form Designer generated code region): Public Class SampleControl Inherits System.Windows.Forms.Form #Region " Windows Form Designer generated code " Public Sub New() MyBase.New() 'This call is required by the Windows Form Designer. InitializeComponent() 'Add any initialization after the InitializeComponent() call End Sub 'Form overrides dispose to clean up the component list. Protected Overloads Overrides Sub Dispose( _ ByVal disposing As Boolean) If disposing Then If Not (components Is Nothing) Then components.Dispose() End If End If MyBase.Dispose(disposing) End Sub 'Required by the Windows Form Designer Private components As System.ComponentModel.IContainer 'NOTE: The following procedure is required 'by the Windows Form Designer 'It can be modified using the Windows Form Designer. 'Do not modify it using the code editor. Friend WithEvents SysInfo1 As AxSysInfoLib.AxSysInfo <System.Diagnostics.DebuggerStepThrough()> _ Private Sub InitializeComponent() Dim resources As System.Resources.ResourceManager = _ New System.Resources.ResourceManager(GetType(SampleControl)) Me.SysInfo1 = New AxSysInfoLib.AxSysInfo() CType(Me.SysInfo1, _ System.ComponentModel.ISupportInitialize).BeginInit() Me.SuspendLayout() Me.SysInfo1.Enabled = True Me.SysInfo1.Name = "SysInfo1" Me.SysInfo1.OcxState = CType(resources.GetObject( _ "SysInfo1.OcxState"), System.Windows.Forms.AxHost.State) Me.SysInfo1.Size = New System.Drawing.Size(38, 38) Me.SysInfo1.TabIndex = 0 Me.AutoScaleBaseSize = New System.Drawing.Size(5, 13) Me.ClientSize = New System.Drawing.Size(292, 273) Me.Controls.AddRange( _ New System.Windows.Forms.Control() {Me.SysInfo1}) Me.Name = "SampleControl" Me.Text = "SampleControl" CType(Me.SysInfo1, System.ComponentModel. _ ISupportInitialize).EndInit() Me.ResumeLayout(False) End Sub #End Region Private Sub SampleControl_Load(ByVal sender As System.Object, _ ByVal e As System.EventArgs) Handles MyBase.Load MessageBox.Show(SysInfo1.OSVersion) End Sub End Class -
Switch back to the design view of the form to see the included instance of the SysInfo control (see Figure 9.1). Figure 9.1. A sample form displaying an instance of the imported SysInfo ActiveX component. 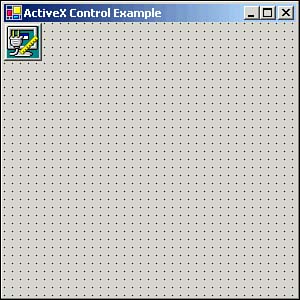 Importing Controls Using the Visual Studio .NET Toolbox Although the Windows Forms ActiveX Control Importer can be used to create the necessary files to import an ActiveX component, you may also perform this task using the Visual Studio .NET Toolbox. This is considered an easier method because most of the setup work is done for you when importing the desired COM component. The following example illustrates this capability: -
Open Visual Studio .NET and create a new Visual Basic .NET application with a form. -
Right-click the Toolbox window and select Customize Toolbox to open the Customize Toolbox dialog box. -
Select the COM Components tab in the Customize Toolbox dialog box, scroll down the list of registered controls on the system, and click the check box for any controls to import, as shown in Figure 9.2. Figure 9.2. The Customize Toolbox dialog box showing the Masked Edit control selected for import. 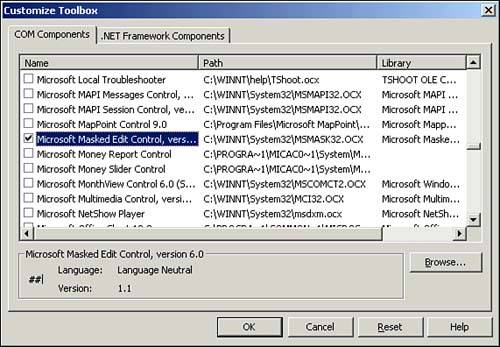 -
Click OK to add the imported control to the Toolbox window, as shown in Figure 9.3. Figure 9.3. The Visual Studio .NET Toolbox window showing the newly imported Masked Edit control. 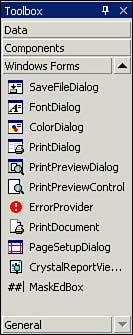 -
Drag and drop the imported control onto a form as with any other Windows forms control. | | The properties of an imported ActiveX control can be accessed using the Properties window, and you may also click the ActiveX Properties hyperlink at the bottom of the window in order to open the ActiveX control's property sheet directly. |
Drawbacks of ActiveX Controls Imported ActiveX controls can be used like any other type of Windows forms control; however, a few drawbacks must be considered: -
Performance Calls to the wrapper providing support to ActiveX components will generate additional delay, resulting in decreased performance as compared to pure .NET controls. -
Property names Some property names may change when importing an ActiveX component into the .NET Framework in order to avoid conflicts with existing properties. The most commonly encountered property name change is the State property, which is renamed to CtlState during the conversion process. -
Errors Because ActiveX components are not managed code, errors and memory-access issues can cause abnormal operation or undesired application termination. -
Deployment Including ActiveX controls can add to the complexity of application deployment because each workstation must have the ActiveX control properly installed and registered. |