Printing
| If your data is just normal stored data, see Printing Any Document Based on Fixed Data. If your data is from a data source, i.e. you're doing a mail merge, see Printing or Emailing Mail Merge Documents. Printing Any Document Based on Fixed DataJust choose File > Print; you're using fixed data so the program can handle printing it normally. See Chapter 12, Printing in Writer , on page 425. Printing or Emailing Mail Merge DocumentsUntil you follow the instructions in this section to bring up the Form Letter window and tell the program, "Yes, I really do want to print using this data," you get only blanks or the field names when you print.
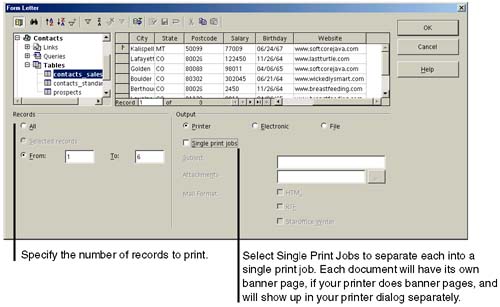
Note You can sort the data to print in a different order, and search for a particular record. See Sorting on page 918 and Filtering on page 918. Printing to a PrinterFigure 10-56 shows the options for printing to a printer.
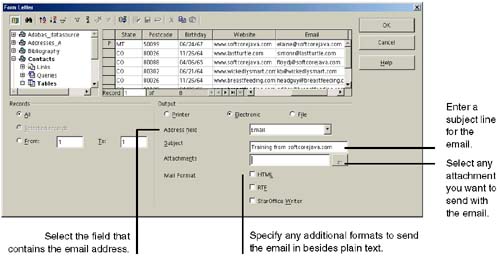
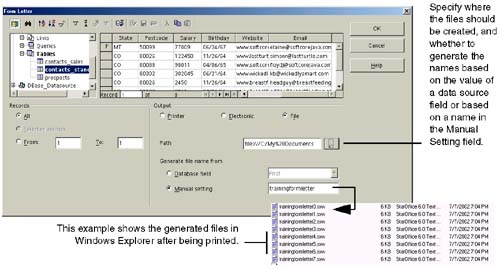
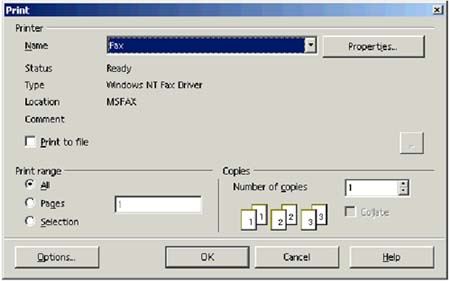
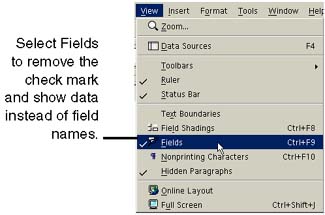
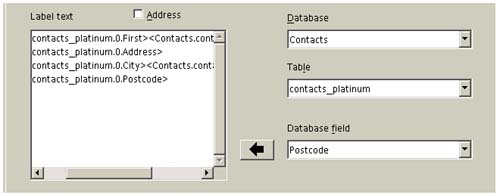
Emailing RecipientsFigure 10-57 shows the options for emailing recipients. Be sure your email program is already up and running, and that you're completely logged into it, before you click OK in this window. Figure 10-57. Emailing a document containing data source data Be careful about sending a document that has graphics in it. If you inserted the graphics using the Link option, your recipients won't be able to see the graphics if the link points to a location that only you can access, like your own hard drive or a folder on the network that only you have access to. It's a good idea to email PDFs if your document has any inserted objects. Printing to Writer FilesFigure 10-58 shows the options for printing to a printer, emailing the letter, or printing to a Writer file. Figure 10-58. Printing a document containing data source data to a file FaxingBe sure that your fax device is set up; see Setting Up Faxing Capabilities on page 63. Follow the procedure for letters ; see Printing or Emailing Mail Merge Documents on page 399. Select Printer as the output method and then, in the Print window, select your fax device. Figure 10-59. Selecting a fax device Printing and Layout TipsOften, your document will print beautifully the first time. If there's anything you need to tweak, take a look at the hints in this section. Showing Data Instead of Field Names, Onscreen Before You PrintWhen you create just about any document in this chapter, the name of the field, such as CONTACTS_FIRSTNAME, will be displayed instead of the data itself. Since the data source and name are hardly ever the same length as the data itself, this makes it hard to judge how much space the data will take up, whether the printed version will look good or wrap hideously, etc. In order to see the data instead of the field names, choose View > Fields to remove the check mark next to Fields. Fixing Spacing Between Data Source FieldsOften you'll be presented with a window like this that lets you insert the fields you want to appear in the document. Or you'll be able to simply drag the fields from the data source viewer. In either case, make sure you space the fields appropriately and put in the appropriate carriage returns, preferably in the insertion window or if necessary later in the created document. Otherwise you'll end up with: ElaineNelson626AspenLaneBerthoudCO80022 Fixing Problems With Empty Fields and LinesIf some records in the database don't have certain fields filled in, those empty fields will create extra spaces and blank lines in the mail merge. Use the following merge fields as an example. <PREFIX> <FIRSTNAME> <LASTNAME> <COMPANY> <ADDRESS> <CITY>, <STATE> <POSTALCODE> If a record doesn't have a Mr., Ms., Dr., or whatever in the Prefix field, the merge will show an empty space before the first name. Also, if the record doesn't have any company information entered, there will be an empty paragraph between the name and the address. The obvious answer is to remove the Prefix field entirely. However, if you want it in and some of your data just doesn't have a value for that field, here's how to make the merge remove the empty space and the blank line. (You can use the techniques in these procedures to tighten up other parts of mail merges.) Fixing the Empty Space ProblemThis procedure shows you how to fix empty space on a line caused by empty fields. A prime example of this issue is when a database record doesn't have a prefix (Mr., Ms., Dr.) for one of your contacts. So we use a <PREFIX> field as an example in this procedure. Note For more information about conditions, see Condition Syntax on page 866.
The condition you just entered means that if a PREFIX exists in a record, it will be printed with a space after it. If there's no prefix in the record, the line will begin with the first name. Fixing the Empty Line ProblemThis procedure shows you how to fix empty lines caused by empty fields. A prime example of this is when a database record doesn't have company information for one of your contacts, so we use a < COMPANY > field as an example.
The condition you just entered means that if there's nothing in the company field, create a hidden paragraph. That brings the address information just beneath the name information in the mail merge. Printing in a Different Order, or Restricting the Records to PrintYou can sort the data to print in a different order, and search for a particular record. See Sorting on page 918 and Filtering on page 918. Note It doesn't hurt to do a test run before printing everything to everyone in the data source, or before printing your business cards on the really nice cardstock. Print one record, and all the pages you need in order to judge whether it worked. This is probably only one page since address information is usually all at the beginning. |
EAN: 2147483647
Pages: 407
- ERP Systems Impact on Organizations
- ERP System Acquisition: A Process Model and Results From an Austrian Survey
- The Effects of an Enterprise Resource Planning System (ERP) Implementation on Job Characteristics – A Study using the Hackman and Oldham Job Characteristics Model
- Intrinsic and Contextual Data Quality: The Effect of Media and Personal Involvement
- Healthcare Information: From Administrative to Practice Databases