2.2. Installing Windows Server 2003 It's a fairly effortless procedure to install Windows Server 2003 onto new systems. Here are the steps: Turn the system power on and insert the Windows Server 2003 CD into the drive. If you receive a prompt asking you to select from what location to boot, choose the option to boot from the CD. The system will boot a minimal, text-only version of Windows Server 2003 into main memory and will begin the initial installation procedure. Figure 2-1 shows the beginning of this phase. Figure 2-1. The character-based Setup process 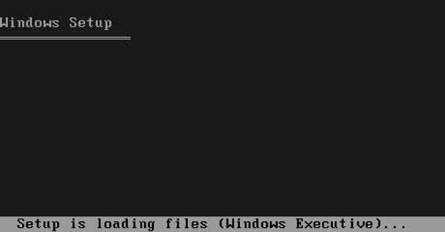 The Welcome to Windows Setup screen will appear. Press Enter to continue. Read the terms of the license agreement. If you accept (which, of course, you have to do to continue installation), press F8 to continue. A screen listing your current disk partitions will appear. You can simply move around the menu and select an existing partition on which to install by pressing the arrow keys and then Enter to confirm your selection. You also can delete partitions (be sure you have backed up your data first!) by selecting the partition and pressing the D key. Lastly, you can create a new partition by selecting the Unpartitioned space selection in the menu and then pressing the C key. Figure 2-2 shows the disk partitioning screen. Choose the best option for you, and then press the appropriate key. You'll now be prompted to choose a filesystem. Select the filesystem with which you want the partition formatted and press Enter to start the format. The formatting process can take up to one hour to complete, depending on your drive's size and speed, and then large amounts of files will be copied to the newly formatted partition. Now's a good time to catch up on your email backlog or to take a coffee break. Figure 2-2. The disk partitioning screen 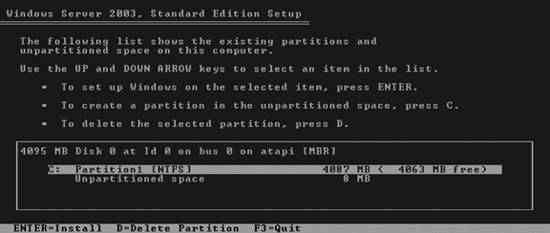 Once the format and file copy processes are complete, the system will reboot, and the next portion of the installation will commence in graphical mode. The process starts with the Regional Settings screen, which pops up soon after the reboot. On this screen, you can change the language, locale, and keyboard settings depending on your geographical location. Click Next to continue. Enter your name and organization. Click Next to continue. Choose your licensing mode, as explained earlier in this chapter. Figure 2-3 shows the options you are presented. Click Next when you're finished. Choose a unique name for this server (using alphanumeric characters), which can be up to 15 characters long. Click Next to continue. Enter a password for the administrator account. Windows will alert you if you choose what it considers to be an insecure password. You'll need to enter your password twice for verification. Once you're finished, click Next. Adjust the time zone and server time and date on the next screen. Click Next to continue. If Windows detects a modem, it will present the Dialing Locations screen. Here, input your area code and any dialing-related configurations (including a prefix digit for an outside line or a required area code). Click Next to continue. The network components of Windows Server 2003 are installed next. Windows will first detect the network adapter or adapters installed in the machine. It will then prompt you to confirm the selection of network protocols. On modern networks, you will typically want the Client for Microsoft Networks, File and Print Sharing for Microsoft Networks, and the TCP/IP protocol. The "typical" setting, as shown in Figure 2-4, will install these automatically. Click Next to proceed. Figure 2-3. Choosing the Windows Server 2003 licensing mode 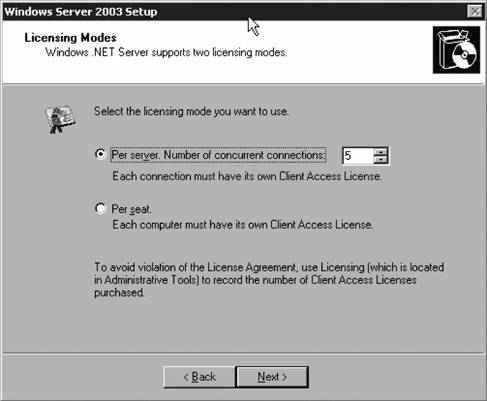 Figure 2-4. The networking options selection screen 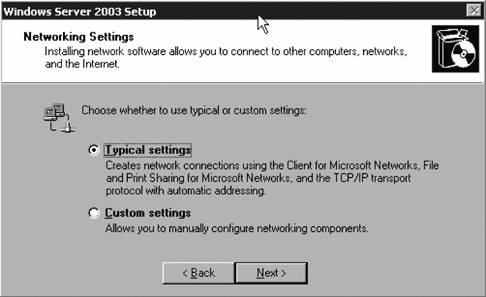 If you want to specify your own configuration, choose the Custom option and click Next. Otherwise, a screen prompts you to create or join an existing workgroup or domain. To create or join a workgroup, select the first option and input the name of the workgroup. To join a domain, click the second option and type in the name of the domain. To create a new domain later, choose the workgroup option for now. If you choose to join an existing domain now, a box will pop up asking for a username and password of someone who is authorized to join computers to the domain. I cover this process in detail in Chapter 5. Click Next to continue. Finally, files are copied and settings are finalized. This step can take an additional 20 minutes, enough time for perhaps another coffee break.
Your installation will be complete once the system restarts. It's important that you immediately visit Microsoft Windows Update, at http://www.windowsupdate.com, to apply the latest security fixes and service packs before placing the machine into production.  | In today's hostile Internet environment, I strongly encourage you to perform your installation on a machine that is at least protected by a firewall, and preferably on a machine that is completely disconnected from the network. You can complete step 14 after you initially boot, so you lose no functionality, but you reduce the risk of penetration and infection by viruses and worms to nearly zero by taking these protective steps. |
|
2.2.1. Understanding Product Activation Retail copies of Windows Server 2003 have a feature known as activation , which is an anti-piracy measure instituted by Microsoft. In essence, when you install Windows with a specific license key on a computer, a hash is created using the key and several attributes of hardware on the computer, including the network card's MAC address. (The exact way this hash is created is, of course, secret.) This hash can't uniquely identify a computer, but it identifies a specific installation of Windows. This hash is sent to Microsoft during the activation procedure. The theory is that if you later try to use the same product key for an installation on different hardware (for example, another computer), the hash created would be different, and activation would fail because it's likely you are trying to use more than one copy of Windows when you're licensed for only a single installation. You have 30 days to activate the product upon initial installation with a retail-purchased copy of Windows Server 2003. When you reach this deadline, you won't be able to log on to the system, though it will continue to run without console access until you reboot it. The catch to activation is this: if you change enough hardware in the same system to change the hash, Windows will complain that you need to activate the software again. You might need to actually telephone a toll-free number to speak with a representative in this case to explain why your hardware changed. This service is available 24 hours a day, 7 days a week, but it's a pain to spend time pleading your case. The service is fast and many users have reported the staff that runs the activation service is very helpful and usually quite accommodating, but it's really the principle of the situation. To avoid the hassle of activation, you can buy the volume license versions of Windows Server 2003 and other operating systems and applications. Special license keys and CDs are distributed as part of the volume license program that don't require activation. 2.2.2. Default Post-Installation Behavior If you perform a clean install of Windows Server 2003 with Service Pack 1 integrated, the new Windows Firewall is activated during Setup and during the first boot process. When the administrator logs on after Setup completes, Windows Server 2003 SP1 launches a new feature called Post-Setup Security Updates, shown in Figure 2-5. Figure 2-5. The Windows Server Post-Setup Security Updates screen 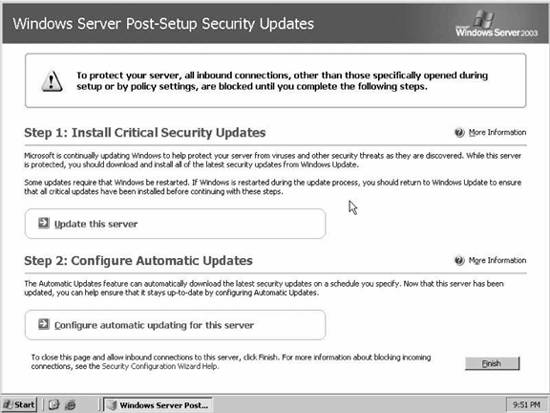
This new Post-Setup Security Updates feature simply shuts off any incoming network traffic except those that you might have configured through group policy objects that apply to this new machine, until you download any critical updates from Windows Update or, alternatively, forcibly cancel out the window. You can't get this screen to reappear after first boot, as the idea is simply to make sure the administrator is aware that patches are available, to allow him to turn on Automatic Updates, and to give him the opportunity to update that system before external hosts can access it. This screen is also not available from the Start menu. A one-shot deal, if ever there were one. You won't see this screen if you install the RTM copy of Windows Server 2003 and later apply the service pack separately; Microsoft probably figures that by that time you've already made the necessary security updates and configurations and won't need the default out-of-the-box protection. However, it is available to upgrades from Windows NT 4.0 to Windows Server 2003 SP1. |