11.2. Working with Pictures and Clip Art When you insert a picture into your document, Word places it in a frame, similar to a text box or the frame around a drop cap. And as with those other objects, you can resize it, move it, and wrap text around it. As far as Word's concerned , if it's a graphic filelike a .JPG, .TIF, or EMF filethen it's a picture. The contents can be a photo or a drawing; it's all the same to Word. Once you've placed a picture in your document, you can edit it using any of the Picture Tools (Figure 11-10). 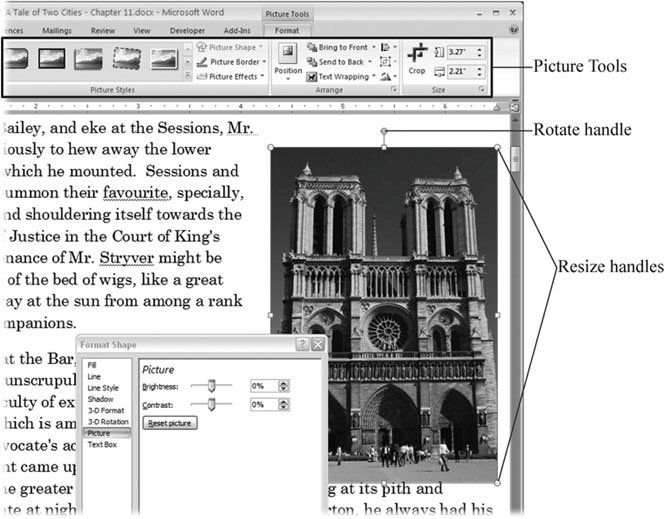 | Figure 11-10. Click a picture to select it, and the Picture Tools contextual tab appears on the right end of the ribbon. Use these tools to size , position, and modify your photos, line art, and other graphic images. | |
Note: As explained in the box in Section 11.1.1, Word's clip art collection also includes photos and drawings. The main differences between clip art and pictures are the source of the images and how you insert them into your document. Use the Insert  Illustrations Picture command to find pictures on your computer and place them in the document. Use the Insert Illustrations Clip Art command to search for photos in your clip art collection, including libraries of stock photos and artwork on the Internet. Illustrations Picture command to find pictures on your computer and place them in the document. Use the Insert Illustrations Clip Art command to search for photos in your clip art collection, including libraries of stock photos and artwork on the Internet.
11.2.1. Inserting Pictures into Your Document To get some practice with Word's picture tools, in these steps you'll insert a picture into your document and then adjust its formatting and positioning. -
Click to place the insertion point where you want to insert the picture . Don't worry about putting the insertion point exactly where you want the photo. You'll be able to fine-tune the placement after it's on the page. -
Choose Insert Illustrations Picture or use Alt+N, P to open the Insert Picture dialog box . The Insert Picture dialog box starts out showing you the contents of your My Pictures folder. You can use the tools along the left side and top of the box to navigate to any folder on your computer or network that contains image files. For example, if your computer is connected to a network, and you have a photo library on one of the other network computers, click the My Network Places button in the lower-left corner. -
When you find the picture you want to use, double-click it to place it in your document . Double-clicking does the same thing as selecting the photo, and then clicking the Insert button in the lower-right corner. The Insert Picture box closes , and you see your photo in your document. -
To resize the picture, Shift-click, and then drag one of the corners . When you close the Insert Picture box, your newly placed picture is selected, as you can see from the frame and sizing handles around the image. (If your picture isn't selected, click it.) You can resize your picture by dragging any of the sizing handles on the corners or edges of the picture. As you resize the picture, while you're still pressing the mouse button, you see both the full- sized image and a faint copy of the new size. Release the mouse button when the copy is the size you want. Usually, when you resize, one edge or corner of the image moves and the other edges remain in place. If you'd rather keep the center anchored while all the edges adjust to the new size, press Ctrl as you drag a sizing handle. Use the handle that's sticking out of the top to rotate your image (Figure 11-11).
Tip: To avoid squashing or stretching the image, press Shift as you drag, and your picture keeps its handsome proportions .
-
On the right side of the Picture Tools Format tab, click the Position menu, and then choose one of the positions for your photo . Generally, it's good design practice to place a picture in one of the corners or at one of the edges of your document. Occasionally, you'll want to place a picture smack dab in the middle. If one of these options works for you, you're in luck. Word's Position menu can place your picture in one of these typical locations, and automatically wraps the text around it. 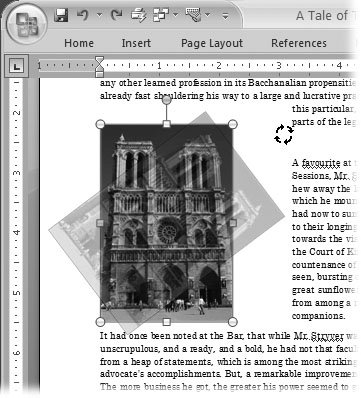 | Figure 11-11. Rotating a photoor just about any other object in Wordis simple. A handle extends from the top center of the photo. Drag this handle around in a circle, and you see a ghost image of the photo rotating. When the image is in the position you want, let go of the mouse button. | |
11.2.2. Finding and Using Clip Art Once you insert clip art into your document, it's really no different from any other photo or drawing. The difference between pictures and clip art in Word is all in the finding and inserting. Any photo or image file you store on your computer and insert into a Word document is a picture. Clip art refers to the tens of thousands of graphics and other media files in online libraries on the Internet and in libraries Word installs on your computer. Since you have such a wealth of images to sort through, you need a quick way to search those images and filter out the ones you don't want, so you can focus on a few good candidates for the job. Fortunately, that's exactly what the Clip Art task pane does (Figure 11-12). Here's how to find clip art and insert it into your document: -
Make sure you're on the page where you want to insert the clip art . It's not important to position the insertion point carefully because you can always position your picture later. -
Choose Insert Illustrations Clip Art or use the shortcut Alt+N, F . The Clip Art task pane opens at your screen's right.
Tip: If you want to, you can click the top bar of the task pane, and then drag it out of the Word window, like a separate palette (Figure 11-13).
-
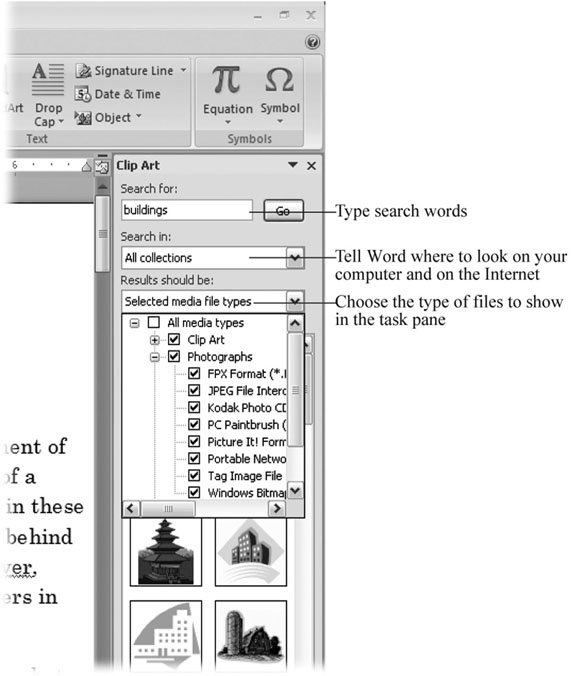
In the "Search for" box at the top of the Clip Art task pane, type a word or phrase that describes what you're looking for . For example, if you're looking for pictures of buildings , type buildings or architecture . If you want to reduce the number of images Word shows you, narrow it down by typing, say, buildings France or buildings England . The more specific you can be, the fewer images you'll have to look through. -
From the "Search in" drop-down menu, choose the collections and libraries you want Word to search . Click the checkboxes to select libraries for the search. Some of the libraries have different subdirectories of imagesyou can tell by the square button with a + sign next to their names . Click the button to expand the list, and then you can choose specific subdirectories for your search. -
From the "Results should be" menu, choose the types of files you want to see in the Clip Art task pane (Figure 11-12) . Another way you can narrow down the search is by choosing the type of files you're looking for. Clip art includes photos, drawings, audio files, and video files. If you aren't interested in audio and video clips, open the "Results should be" menu, and then turn off checkmarks from the Movies and Sounds boxes. -
Click the Go button to start the search . When you click Go, a message appears in the clip window to tell you that Word's searching for clip art. When it finds art that matches your search, the results of your clip art search appear as thumbnails in the main box in the Clip Art pane. (You see a small globe in the lower-left corner indicating art that's stored on the Internet.) -
Review the results and, if necessary, adjust your search terms . If Word can't find any images to meet your criteria, you see a message that says "(No results found)." You can do a couple things if your search fails. Double-check to make sure your computer is connected to the Internet. If it's not, Word can access only the limited number of clip art files on your computer. If you're connected to the Internet and still get no results, try expanding your search by changing your search words. For example, if cathedrals Paris didn't bring up any results, then try buildings France and see what pops up. If you limited the collection and libraries used for the search by using the "Search in" box, try expanding your search to include more sources. -
When you find an image you want to use, double-click to place it in your document . Once you find the perfect picture, the easiest way to pop that image into your document is to double-click the thumbnail. Or, when you click once to select an image, a drop-down menu button appears on the right side. When you click to open this menu, you see several options: -
Choose Insert to place the image in your document. -
Choose Copy to place a copy of the image on Word's clipboard. -
Click Delete from Clip Organizer if you don't want to see the clip in future searches. -
Click Make Available Offline to copy and store the image on your computer. Once the clip art image is inserted into your document, it's like any other picture or drawing. When you click to select the picture, the Picture Tools contextual tab appears on the right side of the ribbon. You can use all the usual formatting tools and commands to resize, position, and format your clip art, just as you would any other picture. 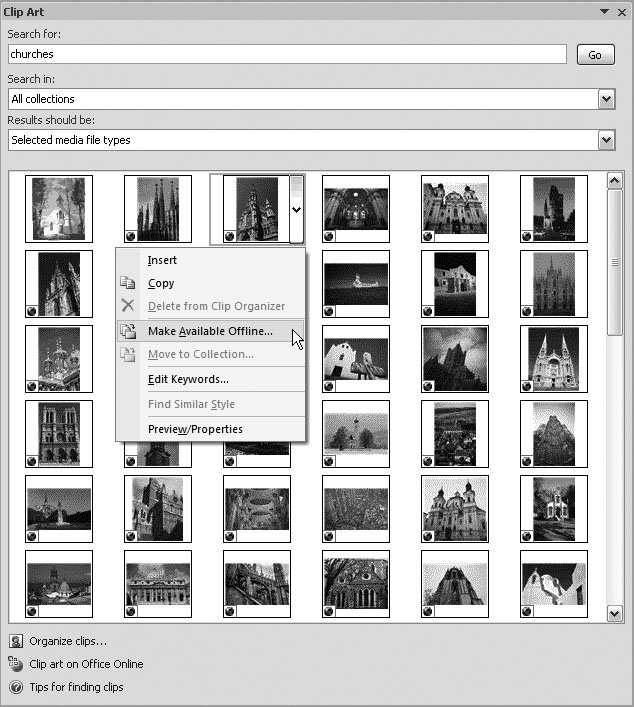 | Figure 11-13. If you'd like a little more room to inspect all the pictures in your Clip Art task pane, drag it out of the Word window by the top bar. Then you can drag any of the borders to resize the Clip Art pane to give you a better view. Each thumbnail has a drop-down menu that lets you insert or copy the clip. (If you're connected to the Internet when you search for clip art, Word shows you results from online libraries, indicated by a tiny globe icon.) | |
|