11.1. Drop Caps, Text Boxes, and WordArt Drop caps, text boxes, and WordArt let you turn text into a design element. Although these elements lose their impact if you overdo them, putting a little pizzazz in your text can direct your audience's attention to important information. UP TO SPEED
In Graphic Terms | | People use the word graphic to mean any kind of visual representation or illustration, whether they're thinking of a photograph, a line drawing, a chart, or what-have-you. Word works with several types of graphics, each of which looks and acts a little differently in your document. Here's a guide to what all these graphic terms mean: -
Pictures . With the Insert Picture command, you can find photos and drawings you've created or saved on your computer and place them in a Word document. As long as it's in a computer graphic file formatlike .jpg, .tif, or .emfWord thinks of it as a picture. You insert pictures, along with the following four items, from the Insert  Illustrations group . Illustrations group . -
Clip art . Word comes with a huge library of photos and pictures that you can add to your documents for free. Also, although they're not technically clip art, you can find media files like movies, music, and other sounds in the Clip Art task pane. Some of these files are on your computer and others are in libraries on the Internet. The task pane lets you search for just the right image, video, or audio out of the thousands available. (Obviously, you'll use the video and audio files in documents destined for the Web or email rather than print.) -
SmartArt . Part graphic and part text, SmartArt is a new type of graphic introduced in Word 2007. All you have to do is type text into a box and SmartArt handles all the formatting and placement chores, creating a great looking graphic image. When you make changes to the words, SmartArt is smart enough to make everything fit. -
Shapes . Word includes a library of simple shapes, lines, arrows, and common icons. They're easy to size , position, and format. You can use them to create your own charts and illustrations. -
Chart . Charts are different from other images in that data is behind the graphic. Charts take numbers and translate them into lines, bars, or pie charts. You tell Word what kind of a chart to create, and then you provide the labels and numbers . -
Drop caps, text boxes, and WordArt (Insert Text) . These graphic elements are a little different from the other items in this list because theyre character- based, but when it comes to sizing and positioning them, they behave much like photos and drawings. |
For example, you can use a text box to create a pull quote that highlights your company's stellar performance. Drop caps, text boxes, and WordArt take color, font, and design cues from the theme you've selected for your document. When you see color choices, the theme colors are usually presented at the top of the menu. Later, if you decide to change the theme for your document, the accent colors and font styles in your graphics change to match.
Note: To work with pictures, drawings, and SmartArt, you need to be in Print Layout or Web Layout view. In Draft or Outline view, your graphics appear as placeholder boxes. In these views, you can position the placeholder boxes, but you can't modify the graphics. (If you don't see a placeholder box in your document, just click the empty space where the graphic should be. You then see a box that you can drag to a new location.)
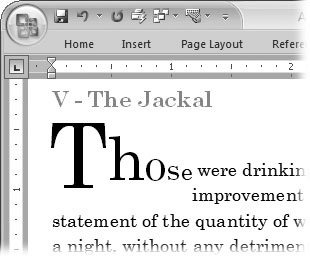
11.1.1. Adding a Drop Cap to a Paragraph Drop caps are a decorative feature with a practical purpose. They give a paragraph an added sense of importance as the beginning of a chapter or document. Drop caps attract readers' attention and draw their eyes to the beginning of the text, inviting them to start reading (Figure 11-1). With Word you can easily add a drop cap to any paragraph, and if you're in the mood, you can fiddle around with it to create your own special effect. 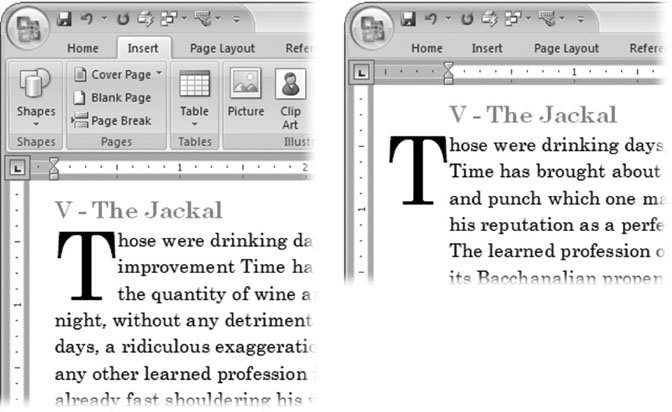 | Figure 11-1. Word provides two styles of drop caps.
Top: Dropped is the most common style and fits within the body of the paragraph.
Bottom: The In Margin style places the drop cap by itself in the left margin. | |
Here are the two simple steps for creating a drop cap: -
Click within the paragraph you want to have a drop cap . You don't have to select the letter. Word knows that a drop cap is going to be the first letter of the paragraph. -
Choose Insert Text Drop Cap, or use the shortcut Alt+N, RC, and then choose from the three styles on the menu . The choices available are: None, Dropped, and In Margin. Dropped, as shown at the left of Figure 11-1, is the most familiar style. The In Margin style places the oversized initial in the left margin. When you click your choice, the menu disappears. Word changes the initial cap in the paragraph to about three lines tall and positions it according to the option you chose. That's all there is to it. 11.1.1.1. Modifying a drop cap When you create a drop cap, Word places the initial character in the paragraph in a frame of its own and positions it either in the paragraph or in the margin, but you can do lots of things to modify the design. Word provides a Drop Cap dialog box where you can make some changes (Figure 11-2), but it's just as easy to edit the drop cap right in the document. 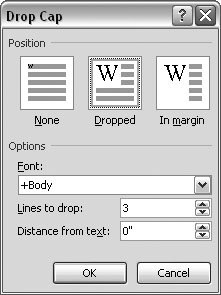 | Figure 11-2. Using the Drop Cap box, you can choose one of the three styles and adjust the font, size, and position of the initial. | |
Because the cap is in a frame, you can drag it anywhere you want. To resize the drop cap, simply drag on a corner or side of the frame. Click inside the frame, and then select the letter to format it. Use any of Word's font formats to modify the letter. The color, shadow, emboss, and engrave options are great for drop caps. You can even add letters to the Drop Cap frame, so you can create a drop word, as shown in Figure 11-3.
11.1.1.2. Removing a drop cap Use the same menuInsert Text Drop Capto remove a drop cap from your paragraph. Just select the None option, and the drop cap and the frame disappear. The paragraph goes back to its regular shape, with the initial letter back in line and sized like its compatriots. 11.1.2. Inserting a Text Box Text boxes are another element that's designed to capture readers' interest and lure them into reading the text (Figure 11-4). Text boxes often contain an intriguing quote from the text designed to pique interest. Sidebars are another common use for text boxes. Like a footnote, but much more attractively formatted, sidebars provide additional, specific information that's not included in the text. 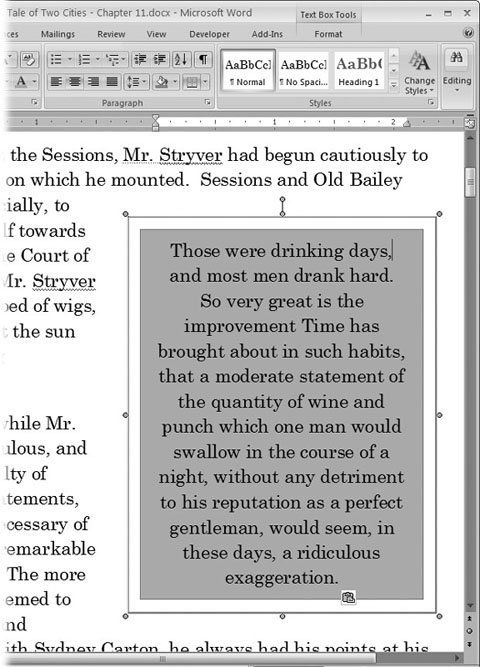 | Figure 11-4. Word's text boxes are preformatted with a background shade , border, font, and font style. Either type into the box, or copy and paste from your document. Either way, Word formats the text to match the text box style. | |
Whether it's a pull quote or a sidebar, you create the text box the same way: -
On the ribbon, choose Insert Text Text Box (Alt+N, X), and then select a text box style (Figure 11-5) . The menu shows you good-sized thumbnails of the different styles, making it easy to choose one for your document. Make your decision based on the general appearance of the text box; don't worry about positioning or even the size. You can modify those details later.  | Figure 11-5. The Text Box menu is in the ribbon's Text group with WordArt and Drop Caps. Use the scroll bar on the right to view the preformatted text box styles. You see two types: boxes designed for pull quotes and boxes designed for sidebars. | | -
Click in the box and begin typing . If the text box is a pull quote, you can copy text from your document (Ctrl+C), and then click in the box and paste it (Ctrl+V). The box formats the text you enter to match the style. -
Size the box to fit your text by dragging the corners or borders . You may need to adjust the box to fit your material. If you have big empty spaces in the text box, you can shrink it, or, if you don't have enough room for your text, drag an edge to make it bigger. -
Position the text box by dragging it or by using the Position drop-down menu . To drag a text box to a new position on the page, hover the mouse over a part of the text box where there isn't any text, and your cursor changes to the "move" icon (a cross with four arrows). Drag the text box to a new position. The other way to position the text box is with a ribbon command. When you click the text box, the Text Box Tools contextual tab appears. Choose Text Box Tools Arrange Position to open the Position menu (Figure 11-6). 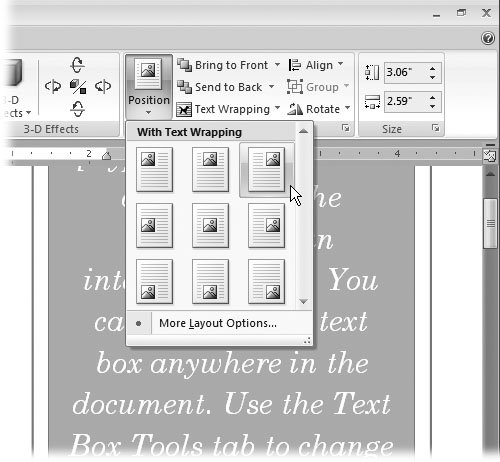 | Figure 11-6. Use one of the options from the Position menu to place your text box on the page and set the text wrapping behavior. | |
11.1.2.1. Customizing your text box When you select a text box in your document, the Text Box Tools contextual tab appears on the right side of the ribbon (Figure 11-7). Using the commands on the Format tab, you can make all sorts of changes to your text box. The colors and effects make use of your document's theme. Here are some of the ways you can change the look of your text box: 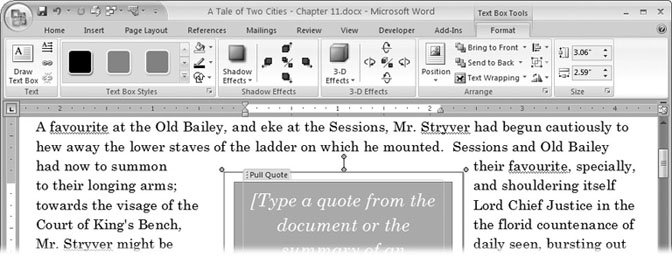 | Figure 11-7. Use the tools in the Text Box Tools contextual tab to fine-tune the look of your text box. The ribbon groups include Text, Text Box Styles, Shadow Effects, 3-D Effects, Arrange, and Size commands. | |
-
Text Direction, Alt+JX, G . With a click of a button, you can change the direction your text runs. For example, for a heading or a special effect, your text can run up from the bottom of the page. -
Create Link, Alt+JX, C . You can create sidebars where the text continues from one page to the next . Select the first text box, click the Text Box Link button (Layout Text Text Box Link), and then click the second box. Text flows from one box to the next, just like normal text flows from page to page. Just keep an eye on the end of your text in the last box to make sure its a good fit. -
Text Box Styles, Alt+JX, K . Click one of the colors in the Text Box Styles group to change the highlight colors for your box. Choices include solid colors and blends. Using other options in the styles box, you can adjust the fill and outline colors and even the box's shape. -
Shadow Effects, Alt+JX, V . Most of the text box styles include drop shadows. Use the tools in the Shadow Effect group (Text Box Tools Format Shadow Format Shadow Effects) to modify the types of shadow and the direction. The drop-down menu (Alt+JX, D) provides preformatted effects (Figure 11-8). The tool to the right of the menu gives you controls to turn the drop shadow effect on and off and to change the shadows position. -
3-D Effects, Alt+JX, U . The 3-D effects work like the shadow effects. They change the background of the text box, but the text stays put. Use the dropdown menu (Alt+JX, 3) to choose predesigned effects, or use the tool to the right of the menu to create your own custom effect. -
Arrange, Alt+JX, P . Use the tools in the Arrange group (Text Box Tools Format Arrange) to position your text box in relationship to the page and other items. The Position drop-down menu (Figure 11-6) automatically places the text box on the page and sets the word wrap options. As an alternative, you can use the separate Align (Alt+JX, AA) and Text Wrapping (Alt+JX, TW) tools. 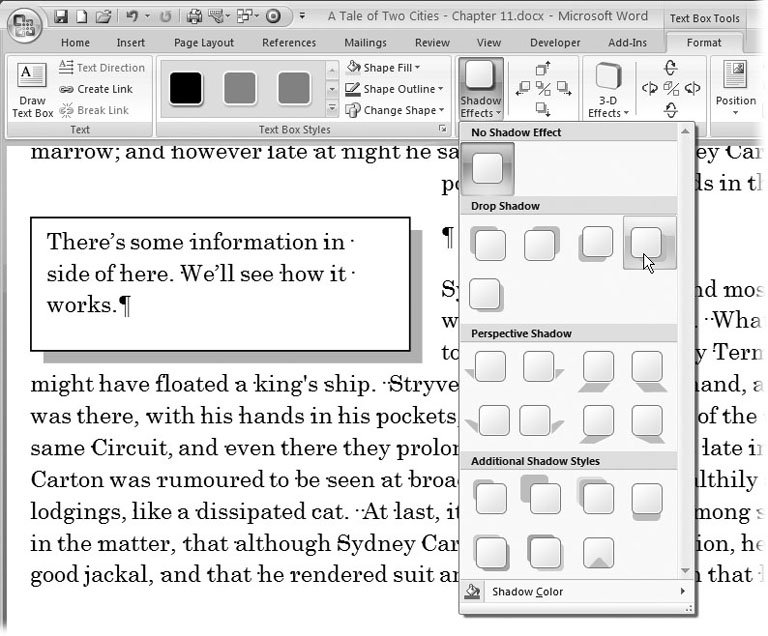 | Figure 11-8. The Shadow Effects and 3-D Effects are set up the same way in the Text Box Tools ribbon. The drop-down menu on the left provides preformatted designs. With the tools to the right of the menu, you can customize the position of the drop shadow or the rotation of the 3-D effect. | |
11.1.3. Bending Words with WordArt WordArt is a lot more fun than it is useful. How often do you really need arched headlines in your documents? On top of that, you can waste a lot of time fiddling with all the options to see the cool effects you can produce (Figure 11-9). 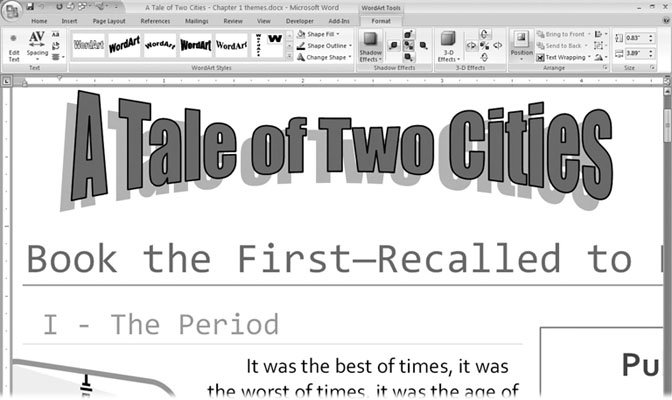 | Figure 11-9. WordArt is way too much fun to be a serious business tool. You'll waste precious minutes trying out different bending, spacing, and twisting options when you should be working on that quarterly report for the VP. | |
To transform a word in your document into WordArt, double-click to select the word, and then choose Insert Text WordArt to see the menu of WordArt designs. If you click the one that suits your artistic purposes, you see your word transformed. 11.1.3.1. Modifying WordArt When you click to select your WordArt creation, the WordArt Tools contextual tab appears on the right side of the ribbon. The commands are very similar to the text box commands described in Section 11.1.2.1. You can make adjustments to 3-D effects (Alt+JW, U) and drop shadows (Alt+CW, V) and specify the text wrapping options (Alt+JW, TW). In spite of the incredible ways you've transformed your word, it's still text to Microsoft. So if you catch a misspelling or need to make other changes, choose WordArt Tools Format Text Edit Text to open the Edit WordArt Text box, where you can fix things up. |