Overlays from AE
If you designed a menu in AE, and also need a highlight layer, here's what to do.
-
Go to an appropriate frame and choose Composition>Save Frame As>Photoshop Layers .
-
Open the file in Photoshop.
-
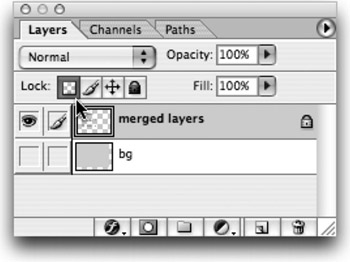
Turn off the visibility icon for all layers which are not part of the Overlay
-
Select one of the visible layers, and choose Merge Visible from the layer palette submenu.
-
Lock the transparency for this new merged layer by clicking on the Lock transparent pixels box.
-
Choose Edit>Fill and fill with Black (or White, depending on your DVD application).
-
Create a new Empty layer and place it in the background.
-
Select All and Fill this layer with White (or Black, again depending on your DVD application.
-
Delete any unused layers.
-
Choose File>Save As and save a flattened PICT or TARGA file to create an overlay layer. Again, you don't need to save layers or alpha channels.
-
Save the layered PSD file in case you have changes.
EAN: N/A
Pages: 447