3D Assistants II: Lights
By Jim Tierney, Digital Anarchy
While Lights exist in 3D space, they aren't technically 3D layers. This means you can't use the 3D Assistants to setup or animate a large number of lights. However, you can attach lights to Null objects, which can be 3D Layers . That means you can use lights with the 3D assistants, provided that the lights are parented to null objects.
| Note | this tip assumes you've assembled the cylinder from the previous tip. |
Let's try and pull this off.
-
Create a light with the following settings:
Type: Spot
Intensity: 80
Cone Angle: 90
Cone Feather: 70
-
Now create a null object. Make the null object 1 pixel by 1 pixel in size and then turn on the 3D switch. This creates a 3D null object, which we can now attach the light to.
-
Set the light position to match the null object position exactly. This will essentially put the light on top of the null object. Now parent the light to the null object.
-
Duplicate the light and null object five times, and link each light with its associated null object.
-
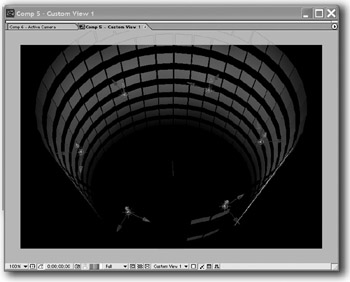
That gives us six lights to orient around the Cylinder. We are going to orient them around the outside because the panels should be letting the light through and the lights will illuminate the panels.
-
Select the 6 null objects and choose Window>Cylinder Creator Lite. Set it up with the following settings and click Apply:
X: 3000
Y: 20
Z: 3000
Distance Between Layers Vertically: Doesn't matter
Frequency of Layers Around Cylinder: 60 degrees
And just like that, we have used the 3D assistants to arrange our lights.
EAN: N/A
Pages: 447