| Photoshop's actions technology lets you record nearly every command (or better yet, a series of commands) and then play them back on another image. You can use basic actions, such as a resize or file format change, to quickly convert files at a push of a button. These simple actions can be recorded, and then mapped to empty function keys (F-keys, F1F12) on your keyboard. By using combinations of Shift and Option (Alt) as key modifiers, a standard keyboard has 4860 customizable keys. 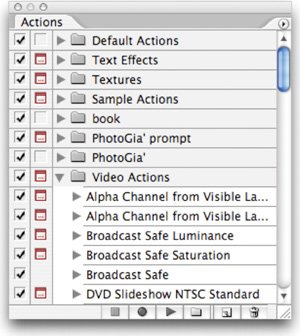 Meet the Actions Palette To use actions, let's take a closer look at the Actions palette. If the Actions palette is not visible, choose Window > Actions. If the palette does not look like a list, go to the palette's submenu and make sure that the Button mode is not checked.
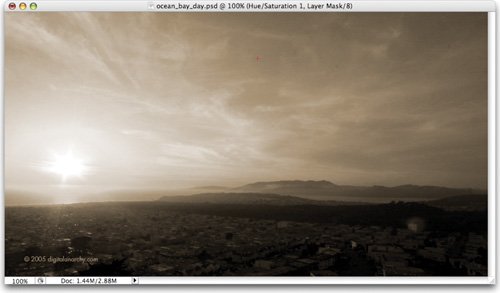
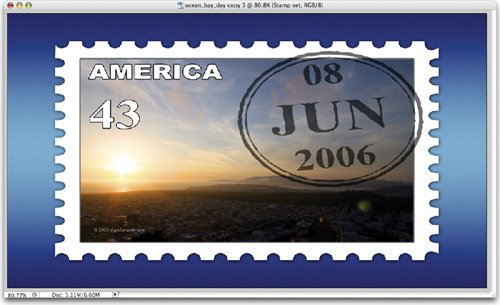
If your Actions palette looks like this, you are using Button mode. This is a useful way to access actions, but you cannot create or modify actions when using Button mode. 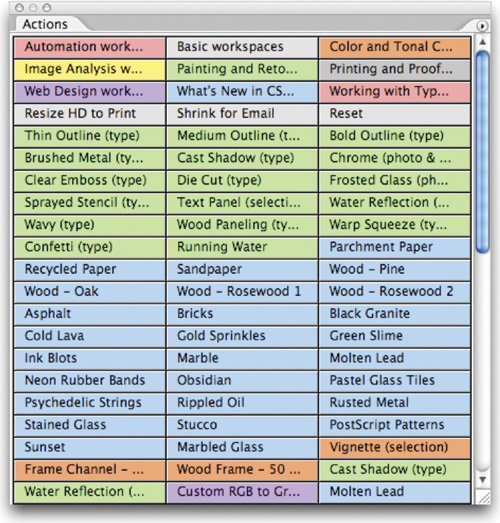 If you look at the interface, it has fairly clear controls. There are Stop, Record, and Play buttons, and they behave as you expect. The folder icon creates a new set to store actions, and the page icon creates a new (empty) action. The trash icon can be clicked to delete the highlighted items, or you can drag actions or sets into it. Let's practice with actions by using some of the built-in actions: 1. | Open the file ocean-bay-day.psd from the Chapter 15 folder on the DVD-ROM.
| 2. | From the Actions palette submenu, choose Image Effects. This menu item loads a set of actions that will process the image to a different look using a combination of filters and adjustments.
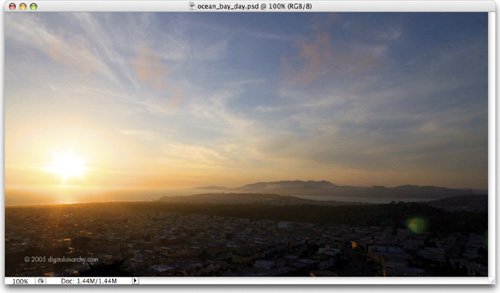 PHOTO BY DIGITAL ANARCHY (www.DigitalAnarchy.com) 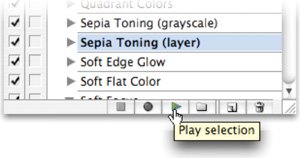 | 3. | Choose the Action Sepia Toning (layer) and press Play.
| | | 4. | The action should take very little time to process the image.
 | 5. | Delete all but the bottommost layer and try other actions from this set to see the diversity.
| 6. | You can explore the steps in an action by clicking the triangles in the Actions palette to look at how elaborate some actions are. You may be thinking that these are interesting, but will get stale quickly as they create the same look each time.
This is not the case. It's very easy to modify an action. The easiest way to do this is by turning dialog boxes on. Normally, an action will play all the way through, using the original values assigned to the filters or image adjustments. However, if you click in the column next to each step, you can enable dialog boxes for a filter or adjustment (click a second time to disable). These dialog boxes let you enter variables and influence an action's outcome.
| 7. | Let's try this out. Go back to the Sepia Toning (layer) action. Click the actions triangle so you can expand it and see all of its steps. You may find it useful to expand individual steps to better see what command they perform.
| 8. | The final step, Make, creates a new adjustment layer for the tinting. Click next to its name to enable the dialog box.
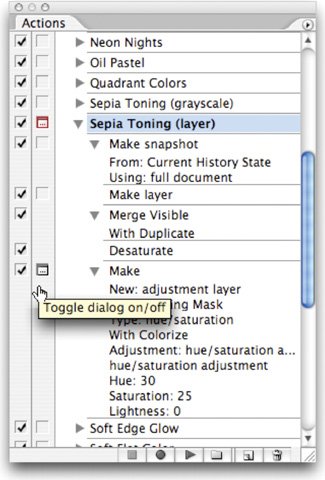 | 9. | By modifying these actions, several different outcomes are possible. Expand the triangle next to the action's name to see the list of steps. It is possible to turn on only some of the dialog boxes by clicking next to a specific step.
| 10. | Run the action again. This time a dialog box opens for the final step and you can customize the tint effect. Click OK to create the adjustment layer. You can now modify the tint effect, and then click OK to finish the action.
|
We have only scratched the surface of what's possible. Actions open up all sorts of options, both for creative and technical outcomes. Working with Third-Party Actions There are an innumerable amount of actions available on the Internet. The previously mentioned Adobe Studio Exchange Web site (www.adobexchange.com) is an excellent starting point. Most actions are available for free; some of the most creative and useful are sold affordably by both small and large developers. Let's try out some third-party actions and learn how to load and use them. 1. | Open the file ocean-bay-day.psd from the Chapter 15 folder. If it is still open from before, choose File > Revert.
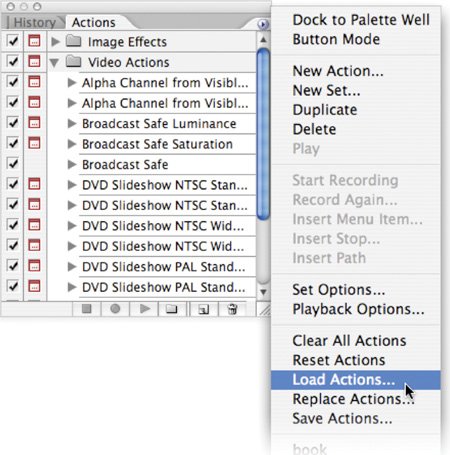 | 2. | In the Actions palette, click the submenu to choose Load Actions.
| 3. | Also inside the Chapter 15 folder you'll find a folder called Panos FX. The folder contains four sets of actions from the creative mind of Panos Efstathiadis (www.PANOSFX.com). Load the action Stamp v2 by Panos.atn.
| 4. | Select the README first! action and press Play to run the action. Follow the onscreen instructions.
| 5. | Select the !!! STAMP !!! round stamp action and press Play.
| 6. | Follow the detailed onscreen instructions. You can substitute the Enter button for clicking the Commit check mark if you want.
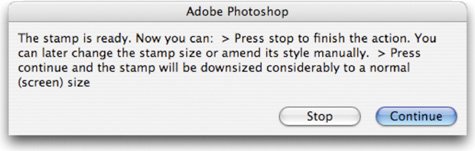 | 7. | When the action gets to the very end, it asks you to make a choice. You can stop and preserve the high-res version or click Continue to reduce the image to a very small size for screen resolution. I recommend clicking Stop.
| | | 8. | All of the important layers are in a group (also called set) already. You can drag this group into a new document or save it to use later.
|
  There are three more sets and a total of nearly 20 actions to explore. These are some wonderful samples of how powerful and devoted the Photoshop community is. Creating Actions By now, actions should seem pretty appealing. You've explored using built-in actions, as well as loading (and finding) third-party actions. Now it's time to create your own. You must first create a set to hold your personal actions. Sets hold actions, and there's no limit to how many actions can be placed into a set, or how many sets you can load. Let's give it a try:  1. | Open the file downtown_close_day.psd.
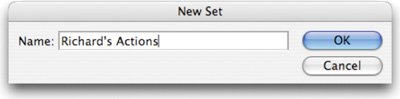
| 2. | Call up the Actions palette and click the folder-shaped button to create a new set.
| 3. | Name the set using your name and click OK.
| | | 4. | Click the New Action icon. You can give the action a name now or rename it later. In this case, I called it Cartoon Look.
 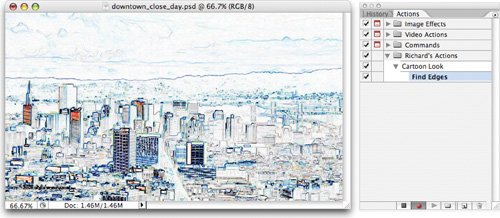 | 5. | Run the Find Edges Filter by choosing Filter > Stylize > Find Edges. There is no dialog box for this effect.
| 6. | To achieve the look we need to fade the filter, choose Edit > Fade Find Edges.
| 7. | Try the Overlay blending mode and adjust the Opacity slider to taste. Depending on the source image, you may need to try different blending modes.
 | | | 8. | To enable flexibility, turn on the dialog box for the Fade step.
| 9. | Click Stop
|
Congratulations, you've created your first action from scratch. The recipe above is one of my own, but the technique works with most filter recipes. Let's try making one more. 1. | Open the file downtown_close_day.psd or, if it is still open from the last action, choose File > Revert.
| 2. | Click the New Action icon. You can give the action a name now or rename it later. In this case, I called it Zoom Blur. The action is now recording.
| 3. | Duplicate the background layer by pressing Cmd+J (Ctrl+J).
| 4. | Strip the color from the duplicate layer by pressing Cmd+Shift+U (Ctrl+Shift+U).
| 5. | Now we'll make the image zoom from a center point. Choose Filter > Blur > Radial Blur. Set the method to zoom and use an amount of 100 at Good quality. Move the center point by dragging within the dialog box, then click OK.
| | | 6. | Repeat the Blur filter by pressing Cmd+F (Ctrl+F).
 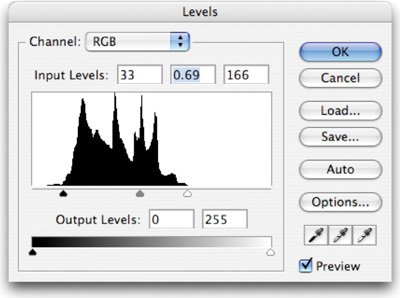 | 7. | On the topmost layer, make a Levels adjustment by pressing Cmd+L (Ctrl+L). Bring the black and white Input sliders towards the center. Move the gray slider (the midpoint) away from black.
| 8. | Change the blend mode of the top layer to Screen mode.
| 9. | Press Option+[ (Alt+[) to select the previous layer.
| 10. | Press Cmd+Option+F (Ctrl+Alt+F) to run the zoom filter again with options.
| 11. | Set the amount to 30 and click OK.
| 12. | To achieve the look we need to fade the filter, choose Edit > Fade Radial Blur. Lower the Opacity of the effect to 30% and click OK.
| 13. | Click Stop
|
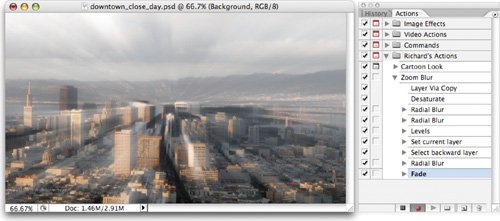 Experiment and create your own looks. Virtually every menu command or button can be recorded (although items from the Toolbox do not record properly). Actions can be duplicated, modified, and deleted. Be sure to explore all of the options in the Actions palette submenu. Be sure to dissect actions made by others to get ideas of what is possible. With a little practice and imagination, you'll be amazed at what you can accomplish. If you want to check out the actions we just created, compare them to a set I've saved in the Chapter 15 folder. Saving Actions Actions are stored in a temporary cache. If you delete the set or load a replacement, your new actions could be overwritten. Therefore, it's important to save your actions so they can be backed up and reloaded in the future. Tip: Sharing Actions If you create useful actions, you can post them to the Adobe Studio Exchange community to share with other users (www.adobexchange.com).
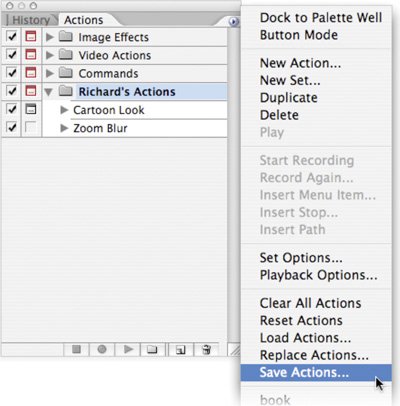
1. | Click an action set; you can use the one created in the previous exercise. You must click the whole set, not just an action in that set.
| 2. | Go to the Actions palette submenu and choose Save Actions.
| 3. | The Photoshop Actions folder (inside the Presets folder) will be chosen by default. If it isn't, manually locate it in your Presets folder.
| 4. | If you add to the set later, just be sure to resave it to the same location with the same name.
|
 Tips for Creating Better Actions Brush strokes, cloning, and most manual tools from the Toolbox do not record properly with actions. Instead, use an alternative, such as a Gradient Fill layer (Layer > New Fill Layer > Gradient) instead of the Gradient tool. To play a single step of an action, double-click it. If you make a mistake in an action, click Stop. Delete the incorrect steps by dragging them into the Actions palette trash can. Choose Edit > Step Backward as many times as needed. Then click Record and start again from the last good point. Button mode lets you launch actions quicklyjust click an action and it runs. You can access the command from the Actions palette's submenu. You'll need to disable Button mode to access recording and editing features. Choose Playback Options from the Actions palette submenu. Specify that you want the actions to play back an action accelerated. Photoshop can process faster than it can redraw the screen. Be sure to back up your custom actions to two locations; the default location and a secondary backup location. This way, a reinstall or upgrade won't blow your custom actions away. To create an action that will work better on all files, set the rulers set to measure using percentage. Use File > Automate > Fit Image to resize an image for a specific height or width. Photoshop records the names of layers as you select them. This may cause playback issues, because the action will look for specific names. Use keyboard shortcuts to select layers and such so that the action won't look for a specific name for that step. For more on layer shortcuts, see Chapter 8, "Compositing with Layers."
Outcome | Mac | PC |
|---|
Choose layer above | Option+] | Alt+] | Choose layer below | Option+[ | Alt+[ | To move the current layer | Up the layer stack | Cmd+] | Ctrl+] | Down the layer stack | Cmd+[ | Ctrl+[ | To the top | Shift+Cmd+] | Shift+Ctrl+] | To the bottom | Shift+Cmd+[ | Shift+Ctrl+[ |
|
|