| So by now, you should be feeling more comfortable making Layer Masks. However, there's always room for improvement (at least where masks are concerned). Let's take a look at three ways to refine or adjust a mask. Choking a Mask with Levels While we've used Levels to adjust a channel to create a mask, we can also turn to the flexible command to refine a mask after it has been created. By moving the gray slider, you can expand or contract an existing mask. Let's give it a try: 1. | Open the file Cactus.tif from the Chapter 7 folder.
 | 2. | Select the layer's mask.
| 3. | Soften the mask slightly by running a Gaussian Blur (Filter > Blur > Gaussian Blur). A low value like 1 or 2 is enough to feather the mask around the spikes of the cactus. Click OK.
| 4. | Run a Levels adjustment by pressing Cmd+L (Ctrl+L).
Adjusting the Layer Mask better refines the transparent areas. Look closely at the edges of the image and the spines on the cactus. The ones on the right are more clearly defined.  | 5. | Move the gray (middle) slider to adjust the gamma. To the right will contract the mask, to the left will expand it. Experiment with adjusting the mask to improve the border around the cactus spines.
| 6. | Click OK when you are satisfied.
|
Maximum and Minimum Photoshop offers two specialty filters for refining masks. Lumped into the amorphous "Other" category, most users miss the Minimum and Maximum filters. Both are useful for modifying a mask as they can expand or contract. 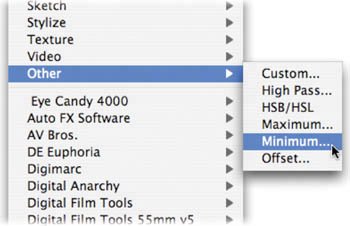 Maximum: The Maximum filter applies a choke, which spreads the white areas and chokes the black areas. This filter will grow a Layer Mask outward, which is useful if the matte is hiding too much of the image. Minimum: The Minimum filter applies a spread, which expands the black areas and shrinks the white areas. This filter will shrink a Layer Mask and contract it inward. This is useful if the matte has a fringe around the outside edge.
The Minimum filter modified the Layer Mask by contracting it. The minor adjustment removed the dark edge. 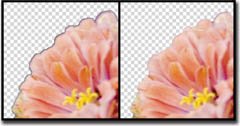 1. | Open the file Flower.psd from the Chapter 7 folder. Notice how there is a thin black border around the flower.
| 2. | Select the Layer Mask's thumbnail.
| 3. | Choose Filter > Other > Minimum to contract the mask. A value of 57 pixels should be enough to contract the edge to remove the border. Click OK when satisfied.
|
Using Smudge and Blur Sometimes a mask is close to being ready, but needs a little touch-up. What better way to do this than to paint? By using the Blur and Smudge tools you can polish problem edges. Blur: Choose the Blur tool to soften a hard edge that looks unnatural. Just be sure the mask is selected before blurring. Smudge (Lighten): Choose the Smudge tool and set its mode to Lighten in the Options bar. This is useful for gently expanding the matte. Leave the Strength set to a low value to make gentle changes. Smudge (Darken): Choose the Smudge tool and set its mode to Darken in the Options bar. This is useful for gently contracting the matte. Leave the Strength set to a low value to make gentle changes.
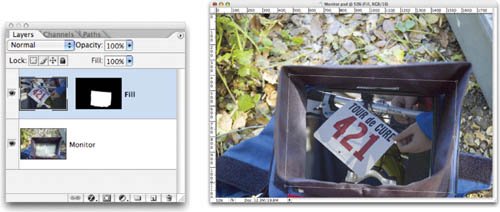
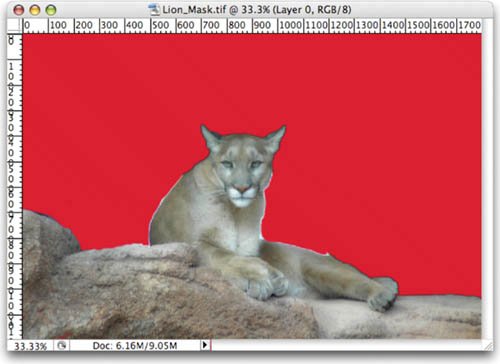 Open the file Lion_Mask. tif to try out the Smudge and Blur tools. Adjusting Content Within a Mask By default, Layer Masks are linked to their respective layers. Applying a transformation (such as a Free Transform command) will affect a layer and its Layer Mask. However, there are times when you won't want this default behavior. Sometimes it is useful to adjust the contents of a masked layer without repositioning the mask. Let's give it a try: 1. | Open the file Monitor.psd from the Chapter 7 folder. While the Layer Mask is accurate, too much of the layer's content is obscured.
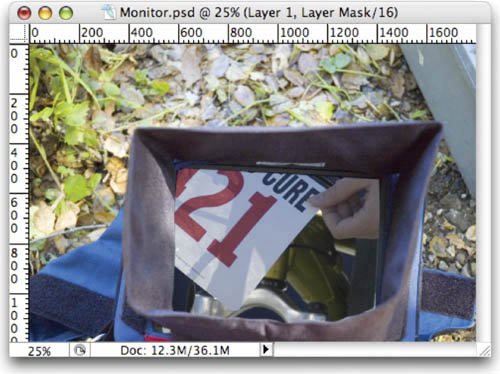 IMAGE COURTESY AMERICAN DIABETES ASSOCIATION (tour.diabetes.org) | | | 2. | Click the chain icon between the layer thumbnail and Layer Mask icons for the Content layer. You can now manipulate the layer Content or its mask independently.
 | 3. | Select the Content layer's thumbnail to modify the visible pixels of the layer.
| 4. | Press Cmd+T (Ctrl+T) to invoke the Free Transform command. Scale the Content layer smaller and rotate it slightly to better match the angle of the monitor. Click the Commit button to apply the transformation.
|
|