Creating Interleaved Builds


So far, you have created builds that progress linearly from one to another when you click. Keynote also offers the ability to interleave elements, so the animations happen concurrently. For instance, you might have a line of text and an image that you want to reveal at the same time. Let's examine a basic application of this technique.

1.

Select slide 2 in the slide organizer.

2.

Click the slide's title "San Francisco Tourism" so you can add a text animation.

3.

In the Build Inspector, click Build In. Then choose the following options:

  • Effect: Character Effects > Scale Big

  • Direction: From Edges

  • Delivery: All at Once

  • Duration: 2.50 s

4.

Select the photo on the slide. You are going to animate the photo scaling so it appears dramatically on the slide.

5.

In the Build Inspector, click Build In. Then choose the following options:

  • Effect: 2D Effects > Scale

  • Direction: Down

  • Duration: 2.50 s

    In the animation thumbnail, you'll see that the photo is added after the text. You are going to change that.

6.

Click the More Options button at the bottom of the Build Inspector.

The Build Order drawer opens and allows you to specify the order of the builds on your slide.

Tip

You can drag items to change their order.

7.

In the Build Order drawer, click item 2 so it is highlighted.

8.

In the pop-up menu under Start Build, choose Automatically with build 1.

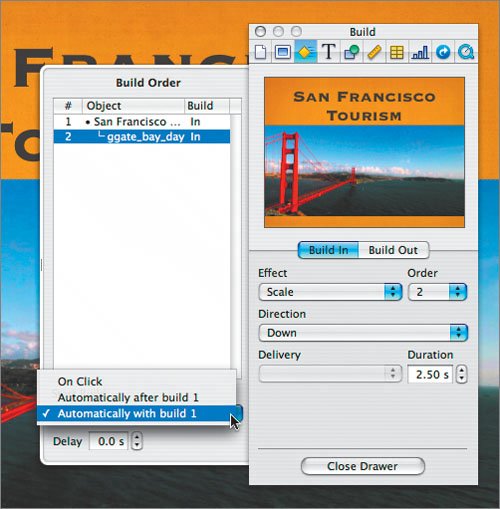
This option makes two objects appear at the same time. You can also specify the amount of time specified in the Delay field. The two builds must occur consecutively in the Build Order list.

The On Click option in this menu initiates the build when you click any key or the mouse button. The Automatically after build [#] option initiates the build after the build number indicated (which is always the previous build). You can also specify the amount of delay between the two builds.

9.

Select slide 2 in the slide organizer and choose Edit > Copy, or press Command-C.

The animated title slide is now copied to your clipboard.

10.

Select slide 8 in the slide organizer and choose Edit > Paste, or press Command-V.

The animated title slide is now pasted into your presentation for a second instance. There are two copies of the title slide at the endone with animation and one without.

Look closely in the upper-right corner of the slide's thumbnail in the Navigator. The three dots indicate animation.

11.

Select slide 10 in the Navigator and press Delete to remove the static slide from your presentation.

You now have animated title slides at the start and end of your presentation.

12.

Save your work.

You can compare your presentation to the file 03Presentation1_Stage3.key from the DVD-ROM.


Apple Training Series. iWork '06 with iLife '06
Apple Training Series: iWork 06 with iLife 06
ISBN: 0321442253
EAN: 2147483647
Year: 2004
Pages: 171

flylib.com © 2008-2017.
If you may any questions please contact us: flylib@qtcs.net