ASP Objects
|
|
When you work in ASP, you interact with the seven basic objects of the language. It's helpful to think of objects as virtual items that you can create, set, query, and destroy. For example, the values of all form fields submitted to a target web page are kept within a collection of variables in the Request object. Therefore, to find the value of a specific form field named "name", you request its value from the Forms collection of the Request object.
request.form("name") Although there are seven objects in ASP, much of the time you interact with only a few objects that let you transfer data back and forth between your database and the client browser. However, you need to be familiar with all the following objects:
Response Sends information to the client
Request Retrieves information from the client
Server Communicates with the server
Application Stores information about your application
Session Stores information about a specific browser instance
ObjectContext Initiates and controls transactions
ASPError Obtains information about errors during ASP engine processing
The Response Object
When the browser requests data from the server, the server does one of three things:
-
Redirects the request
-
Returns the requested data
-
Returns an error
In each case, the server takes action by way of the Response object. Regardless of the response, there are two components: a header and the data. The header contains a great deal of information, such as the type of content, the expiration date, cookies, and so on. Elements of the Response object that you might use in web-database development are Response.Cookies, Response.Buffer, Response.Write, Response.Flush, Response.End, and Response.Redirect.
Response.Cookies
As you may know, cookies are messages passed to a web browser from a web server. If allowed, the web browser saves these messages as text files on a user's computer. All cookies specific to the current website are then forwarded as a collection of cookies to the web server with each subsequent page request the user makes to the website. Web servers and web applications primarily use cookies to identify users. However, as the developer, you can store any piece of information that fits into the three parts of a cookie—a variable name, a value, and a date or time of expiration. To write to the collection of cookies on a user's computer, you use the Response.cookies command. Using the Response object, you can write a variable name, a value, and an expiration date to the visitor's computer as a cookie. Cookies are extremely useful if you want to establish where and when the user accessed your site or if you want to know whether the user is a new or returning visitor. For example, the script in Listing 13.1 writes the database ID of a new visitor to the visitor's computer. You can then retreive the visitor database ID at any time to properly identify the visitor.
On the CD-ROM You'll find all the listings in this chapter on the accompanying CD.
Listing 13.1: COOKIEWRITE.ASP
<% Response.cookies("userSid") = "007" Response.cookies("userSid").expires = "12/31/2030" %> <html> <head> <title>Cookie Write</title> <meta http-equiv="Content-Type" content="text/html; charset=iso-8859-1"> </head> <body> </body> </html>
Response.Buffer
As your ASP script file generates HTML data, that output is usually held in a temporary buffer until all the ASP script processes are complete. You can turn this buffer off or on using Response.Buffer. To set the buffer, insert Response.Buffer = TRUE in the first line of your ASP script file, as shown in Listing 13.2:
Listing 13.2: RESPONSEBUFFER.ASP
<% Response.Buffer = TRUE %> <html> <head> <title>Hello World</title> <meta http-equiv="Content-Type" content="text/html; charset=iso-8859-1"> </head> <body> Example of RESPONSE.BUFFER </body> </html>
Response.Write
You use Response.Write to write data to the browser screen. There are two methods for using Response.Write, Response.Write and a shortcut notation <%= %>. As you can see in Listing 13.3, both methods output "Hello World!" to a browser screen. You can see the results in Figure 13.1.
Listing 13.3: RESPONSEWRITE.ASP
<html> <head> <title>Hello World</title> <meta http-equiv="Content-Type" content="text/html; charset=iso-8859-1"> </head> <body> <% response.write("Hello World!")%> <br> <%= "Hello World!" %> </body> </html> 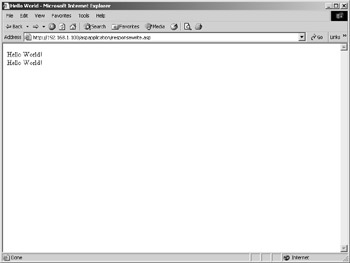
Figure 13.1: Viewing the output from response- Write.asp in Internet Explorer
Response.Flush
Response.Flush sends all current output data held in the buffer of an ASP script page to the requesting browser. To use Response.Flush, Response.Buffer must be set to True. Being able to send all data to the browser is of great benefit when you are executing a long function or script. You can use Response.Flush to send bits of data to the screen as data is generated instead of waiting until the script ends. Listing 13.4 shows an example of the Response.Flush command. You can see the result in Figure 13.2.
Listing 13.4: RESPONSEFLUSH.ASP
<% Response.Buffer = TRUE %> <html> <head> <title>Hello World</title> <meta http-equiv="Content-Type" content="text/html; charset=iso-8859-1"> </head> <body> This is sent to the screen... <% response.flush %>... before this line. </body> </html>
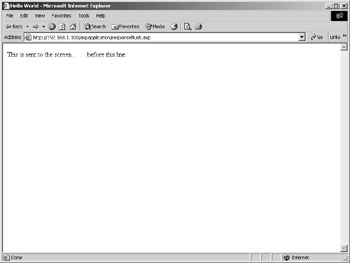
Figure 13.2: Viewing the output from response- Flush.asp in Internet Explorer
Response.End
Response.End stops all processing in the current ASP script file. Combining Response.Flush and Response.End is a common debugging technique among ASP programmers. It effectively allows you to insert break points in your ASP script file to more effectviely track down programming bugs. For example, in our script example of Response.Flush, we send one line to the browser before another line can execute. Suppose we suspected that the second line caused an ASP error on the page. By inserting Response.Flush and Response.End at different points on the page, we could effectively confirm our suspicion that the error is caused by the second line. To demonstrate, Listing 13.5 flushes the beginning portion of the script page to the browser and stops all processing before our suspected ASP error line appears. You can see the result in Figure 13.3.
Listing 13.5: RESPONSEEND.ASP
<% Response.Buffer = TRUE %> <html> <head> <title>Hello World</title> <meta http-equiv="Content-Type" content="text/html; charset=iso-8859-1"> </head> <body> This is sent to the screen and processing stops... <% response.flush %> <% response.end %> ...before this line which may have an error. </body> </html>

Figure 13.3: Viewing the output from response- End.asp in Internet Explorer
Response.Redirect(URL)
Response.Redirect stops further processing of the current ASP script file and sends the visitor to a different URL. A typical implementation of Response.Redirect is a script that protects a page with a login procedure. The basic concept is to include this script, which you might name pageSecurity.asp, at the top of any ASP page you want to protect from the general public. The pageSecurity.asp looks for a passed form field and compares the value to an authorized login. If the login values do not match, the pageSecurity.asp redirects the user to the login.asp page shown in Listing 13.6.
Listing 13.6: LOGIN.ASP
<!DOCTYPE HTML PUBLIC "-//W3C//DTD HTML 4.01 Transitional//EN"> <html> <head> <title>Login Form</title> <meta http-equiv="Content-Type" content="text/html; charset=iso-8859-1"> </head> <body> <form name="Login" method="post" action="pageSecurity.asp"> <label>Your Name:</label> <input name="Name" type="text" size="25" maxlength="25"> <input type="submit" value="Submit"> </form> </body> </html>
To create a script that can secure a page from unauthorized prying eyes, let's begin with our earlier example demonstrating how to request the value of the submitted Name form field. Next add a bit of IF THEN logic and the Response.Redirect command and you have the pageSecurity.asp shown in Listing 13.7.
Let's take the pageSecurity.asp page one step at a time. In the first line, we use the following:
<% if len(trim(request.form("Name"))) = 0 then response.redirect("login.asp") end if %> to see if the form field Name has been passed to the page and if the passed form field has a value. To do so, we use the LEN command to return the number of characters of the value in the Name form field. If the form field was passed, the LEN command returns a positive value. If the Name form field was not passed, the LEN command returns 0. Also notice we use the TRIM command to remove any spaces from the form field value. The TRIM command ensures that we test only real values and not a space. In the end, if the number of characters in the passed Name form field is 0, the Name form field doesn't exist. If the Name form field does not exist, we use Response.Redirect to send the visitor to a login page. If the number of characters in the passed Name form field is greater than 0, the Name form field was passed and it has a value. At this point, we can move on to comparing the Name form field to an authorized value.
To do so, we add a bit more IF THEN logic to our script. We add an ELSE to the script and check to see if the passed Name form field value matches our authorized Name "admin". If the Name form field value does not match our authorized login value, the script redirects the viewer to login.asp. However, if the Name form field was passed and the Name form field value is "admin", the page executes as normal. Pretty simple, but very effective. What's more, to quickly protect any page you like from unauthorized view, you can simply copy and paste the following code into the top of any ASP page.
<% if len(trim(request.form("Name"))) = 0 then response.redirect("login.htm") else if trim(request.form("Name")) <> "admin" then response.redirect("login.htm") end if end if %>
Listing 13.7: PAGESECURITY.ASP
<% if len(trim(request.form("Name"))) = 0 then response.redirect("login.asp") else if trim(request.form("Name")) <> "admin" then response.redirect("login.asp") end if end if %> <!DOCTYPE HTML PUBLIC "-//W3C//DTD HTML 4.01 Transitional//EN"> <html> <head> <title>Page Security Example</title> <meta http-equiv="Content-Type" content="text/html; charset=iso-8859-1"> </head> <body> If you've logged in appropriately, you can see my page. </body> </html>
The Request Object
Similar to the Response object, which sends content to the browser, the Request object receives content from the browser. It does so in the shape of collections of variables that encapsulate the data for each request. Essentially, the Request object consists of collections of information sent by the browser to the server. You will often use the following Request collections in your ASP development—Request.Form, Request.Querystring, Request.Cookies, Request.ServerVariables, and Request.clientcertificates.
Request.Form
When a form using the submission method Post is targeted to the current ASP page, the collection of submitted form values are available to you through the Request.Form command. For example, HelloWorld_form.htm shown in Listing 13.8 targets an ASP page (HelloWorld_action.asp, shown in Listing 13.9) that prints out the submitted form values. Figure 13.4 shows the input form as viewed in Internet Explorer, and Figure 13.5 shows the page displayed after the user clicks Submit.
Listing 13.8: HELLOWORLD1_FORM.HTM, THE INPUT FORM FOR AN ASP PAGE THATUSES REQUEST.FORM
<!DOCTYPE HTML PUBLIC "-//W3C//DTD HTML 4.01 Transitional//EN"> <html> <head> <title>Hello World Form</title> <meta http-equiv="Content-Type" content="text/html; charset=iso-8859-1"> </head> <body> <form name="HelloWorld" method="post" action="HelloWorld1_action.asp"> <label>Your Name: <input name="Name" type="text" size="25" maxlength="25"></label> <input type="submit" value="Submit"> </form> </body> </html>
Listing 13.9: HELLOWORLD1_ACTION.ASP, WHICH TAKES INPUT FROM HELLOWORLD1_FORM.HTMVIA REQUEST.FORM
<!DOCTYPE HTML PUBLIC "-//W3C//DTD HTML 4.01 Transitional//EN"> <html <head> <title>Hello World Action</title> <meta http-equiv="Content-Type" content="text/html; charset=iso-8859-1"> </head> <body> Hello World, my name is <% Response.Write(Trim(Request.Form("Name"))) %> </body </html> 
Figure 13.4: Viewing Hello- World1_form.htm in Internet Explorer
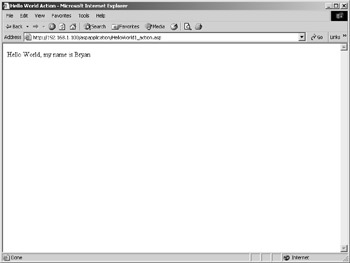
Figure 13.5: The results of HelloWorld1_ action.asp displayed in Internet Explorer
You can specify two methods to submit a form—Get and Post. Using the Get method, all form values are passed to the form Action target through the URL address. Therefore, the value red for the form text field "color" is passed to the action target form_action.asp as
form_action.asp?color=red
Using the Post method, all form values are passed to the form Action target in the HTTP headers that are a part of every web page request.
Request.Querystring
Request.Querystring is a collection of value pairs passed in the URL to an ASP page. For example, when a form using the submission method Get is targeted to the current ASP page, the collection of submitted form values are available to you through the Request.Querystring command. For example, the form in Listing 13.10 targets an ASP page (Listing 13.11) that prints out the submitted form values. Figure 13.6 shows the input form in Internet Explorer, and Figure 13.7 shows the resulting display
Listing 13.10: HELLOWORLD2_FORM.HTM, THE INPUT FORM FOR AN ASP PAGE THAT USES REQUEST.QUERYSTRING
<!DOCTYPE HTML PUBLIC "-//W3C//DTD HTML 4.01 Transitional//EN"> <html> <head> <title>Hello World Form</title> <meta http-equiv="Content-Type" content="text/html; charset=iso-8859-1"> </head> <body> <form name="HelloWorld" method="get" action="HelloWorld2_action.asp"> <label>Your Name: <input name="Name" type="text" size="25" maxlength="25"></label> <input type="submit" value="Submit"> </form> </body> </html>
Listing 13.11: HELLOWORLD2_ACTION.ASP, WHICH TAKES INPUT FROM HELLOWORLD2_FORM.HTM VIA REQUEST.QUERYSTRING
<!DOCTYPE HTML PUBLIC "-//W3C//DTD HTML 4.01 Transitional//EN"> <html> <head> <title>Hello World Action</title> <meta http-equiv="Content-Type" content="text/html; charset=iso-8859-1"> </head> <body> Hello World, my name is <% Response.Write(Trim(Request.Querystring("Name"))) %> </body> </html> 
Figure 13.6: Viewing Hello- World2_form.htm in Internet Explorer
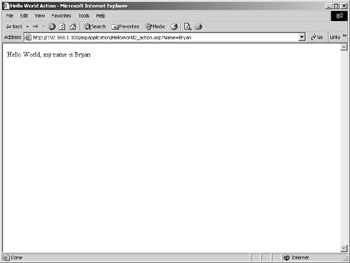
Figure 13.7: The results of HelloWorld2_Action.asp displayed in Internet Explorer
Likewise, you can pass variable names and values to an ASP page by hand-coding the variable name and value in the address targeting the ASP page. For example, the following link accomplishes the same thing as our Get method form.
<a href="helloworld2_action.asp?name=Popeye">Hello World</a>
Request.Cookies
Request.Cookies allows you to read a value from the collection of cookies your site has written to the user's computer. As mentioned earlier, cookies are extremely useful if you want to find out where and when the user accessed your site or if the user is a new or returning visitor. For example, the following line reads the database ID of the returning visitor (which our web application had previously written).
CurrentUserSID = Request.cookies("userSid") CurrentUserSID_expires = Request.cookies("userSid").expires
Request.ServerVariables
Any HTTP header information is available to you through the Request.ServerVariables command and its associated variables. The Request.Cookies, Request.Querystring, and Request.Form collections actually get most of their information from server variables. For example, when a form is submitted to an ASP page, the form method (Get or Post) is listed in the HTTP header of the form and can be determined by executing the following line:
Request.ServerVariables("Request_Method")In addition to Request_Method, many other server variables are available to you. Fortunately, Dream- weaver MX makes it simple to choose one. Server variables is the first object Dreamweaver MX displays in the ASP tab in the Insert bar. To insert one of the server variables listed in Table 13.1, simply click the server variable icon shown here, and choose from the Server Variables dialog box shown in Figure 13.8.
| Variable | Description |
|---|---|
| Request.ServerVariables("ALL_HTTP") | All HTTP headers sent by the client. |
| Request.ServerVariables("AUTH_PASS") | The password corresponding to REMOTE_USER as supplied by the client. |
| Request.ServerVariables("AUTH_TYPE") | If the web server supports user authentication, this is the authentication method. |
| Request.ServerVariables("GETEWAY_INTEGFACE") | The revisionof the CGIspecification to which this sever complies |
| Request.ServerVariables("PATH_INFO") | The path information of the request. For example, relative paths, such as pdfs/mypdf.asp, can access request pages. The extra information in the path information is sent as PATH_INFO. |
| Request.ServerVariables("PATH_TRANSLATED") | The translated version of PATH_INFO with virtual-to- physical mapping. In the PATH_INFO example, the PATH_TRANSLATED value may be "C:\inetpub\ wwwroot\test\pdfs\mypdf.pdf". |
| Request.ServerVariables("QUERY_STRING") | Any information that follows the ? in the URL address of the current page. |
| Request.ServerVariables("REMOTE_ADDR") | The IP address of the remote host making the request. |
| Request.ServerVariables("REMOTE_HOST") | The host name making the request. |
| Request.ServerVariables("REMOTE_IDENT") | If the HTTP server supports RFC 931 identification, this variable is set to the remote user name. |
| Request.ServerVariables("REMOTE_USER") | If the server supports user authentication, this is the authenticated user name. |
| Request.ServerVariables("REQUEST_BODY") | The body of the request. Used with Post messages to access the posted information. |
| Request.ServerVariables("REQUEST_METHOD") | The form submission method of the request. |
| Request.ServerVariables("SCRIPT_NAME") | The virtual path to the script being executed. |
| Request.ServerVariables("SERVER_NAME") | The server's host name, DNS alias, or IP address. |
| Request.ServerVariables("SERVER_PORT") | The port number of the request. |
| Request.ServerVariables("SERVER_PROTOCOL") | The name and revision of the information protocol. |
| Request.ServerVariables("SERVER_SOFTWARE") | The name and version of the information server software. |
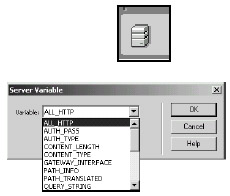
Figure 13.8: The ASP tab in Dreamweaver MX
Request.clientcertificate
Request.clientcertificate is a collection of certification fields passed with a page request from the browser. If the browser is currently using the Secure Socket Layers (SSL) protocol, the protocol sends certificates to the server that identify the browser to the web server, allowing for secure data transactions. If the browser is not using the SSL protocol, the Request.clientcertificate collection is empty. Before you can use the Request.clientcertificate collection, you must configure your web server to request client certificates.
The Request.clientcertificate collection has one argument—Key. Key is a string that specifies the name of the field to retrieve. A certificate contains the seven fields listed and described in Table 13.2.
| Field | description |
|---|---|
| Certificate | A string containing the binary stream of the entire certificate content. |
| Flags | Two flags provide additional client certificate information. The ceCertPresent flag indicates a client certificate is present. The ceUnrecognizedIssuer flag indicates the last certification in this chain is from an unknown user. |
| Issuer | A string containing the subfield values that provide information about the issuer of the certificate. |
| SerialNumber | A string that contains the certification serial number.Subject A string containing the subfield values that provide information about the subject of the certificate. |
| ValidFrom | The date when the certificate becomes valid. |
| ValidUntil | The expiration date of the certificate. |
For example, to display the expiration date of the client certificate, you use the following:
<%= Request.ClientCertificate("ValidUntil") %> Issuer and Subject have an additional argument to pass local information—Subfield. Table 13.3 list and describes the subfield arguments.
| Argument | Description |
|---|---|
| C | The name of the country of origin |
| CN | The common name of the user |
| GN | A given name |
| I | A set of initials |
| L | A locality |
| O | The company or organization name |
| OU | The name of the organizational unit |
| S | A state or province |
| T | The title of the person or organization |
ASP is a forgiving language. If you aren't exactly sure what collection a variable is in, you can search the ASP collections for that variable. For example, you can reference the submitted form field "birthDate" as
request.("birthDate") or as
request.form("birthDate") However, we mention this alternative as a caution, not as an option. When you force ASP to search through all collections looking for a variable, it can slow execution time and create code that is difficult to debug. Furthermore, ASP returns the value of the first variable match it finds. Therefore, the returned value might or might not be the value of the variable you want.
The Sever Object
The Response and Request objects send data to and from the server. In a web application, you often need information about the server itself, and that's where the Server object comes in. It provides access to server information in the form of properties and methods. You need to know the following properties and methods: ScriptTimeout, Execute, HTMLEncode, URLEncode, MapPath, GetLastError, and CreateObject. Using these properties and methods, you can create objects, execute code, translate paths, and perform other server-side tasks.
ScriptTimeout
Infinite loops are bad. An infinite loop, or a process that continues to call itself forever, eventually consumes so many resources that your web server will crash. To avoid infinite loops, ASP is set to time out, or end a script, if the script executes longer than 90 seconds. However, at times a complicated script can require longer than 90 seconds to execute. The ScriptTimeout property lets you set the runtime in seconds for an ASP script. For example, use the following code to force a script to time out if its processing exceeds 200 seconds.
<% Server.ScriptTimeout = 200 %>
Likewise, you can retrieve the current ScriptTimeout value as follows:
<% ScriptTimeout = Server.ScriptTimeout %>
Execute(Path)
Execute lets you call another ASP script page from within an ASP script page. Once the called ASP script page executes completely, the calling ASP script page continues. From a programming perspective, Execute is similar to calling a function or a subroutine. For example, you can create an ASP script page named GetCurrentTime.asp whose sole purpose is to generate and display the current date, as shown in Listing 13.12.
Listing 13.12: GETCURRENTTIME.ASP
<html> <head> <title>Get Current Time</title> <meta http-equiv="Content-Type" content="text/html; charset=iso-8859-1"> </head> <body> <%= FormatDateTime(Date, 1) %> </body> </html>
You could use Execute to run the GetCurrentTime.asp script page from any other ASP script page, such as your site's home page as shown in Listing 13.13.
Listing 13.13: DEFAULT.ASP
<html> <head> <title>Default Home Page</title> <meta http-equiv="Content-Type" content="text/html; charset=iso-8859-1"> </head> <body> This is my home page. Below you can see the date. <HR> <% Server.Execute("GetCurrentTime.asp") %> </body> </html>
HTMLEncode
To print certain characters in an HTML page, you must use a special character code. For example, when a browser encounters the < character, it does not display the character. To display the < character in a browser, you use the charcter code <. Luckily, you don't have to memorize every character code. HTMLEncode lets you convert any character to the alternative HTML character code. To demonstrate, the following line displays the < character in a browser.
<% Server.HTMLEncode("<") %>
URLEncode
Similar to HTMLEncode, URLEncode converts a string of characters to the URL-encoded format. Spaces are replaced with +, and special characters are converted to hexadecimal. For example, the following line converts "Have a nice day" to "Have+a+nice+day".
<% Server.URLEncode("Have a nice day") %>
MapPath(Path)
MapPath returns the physical path on the server of a relative or virtual path. For example, to return the physical path on the server to the current directory of the executing ASP script file, you write the following:<% PhysicalPath = Server.MapPath("\") %>Likewise, to return the physical path to the currently executing ASP script file, you write the following:
<% PhysicalPath = Server.MapPath("\mypage.asp") %>
GetLastError
GetLastError returns an instance of the ASPError object that lets you access detailed information about an error that has occurred. GetLastError stores the error information in nine properties: ASPCode, ASPDescription, Category, Column, Description, File, Line, Number, and Source. You must access these properties before any data is send to the client browser. Listing 13.14 is an example of accessing the ASPError properties.
Listing 13.14: ASPERROR.ASP
<% Dim objErrorInformation Set objErrorInformation = Server.GetLastError Response.Write("ASPCode = " & objErrorInformation.ASPCode) Response.Write("ASPDescription = " & objErrorInformation.ASPDescription) Response.Write("Category = " & objErrorInformation.Category) Response.Write("Column = " & objErrorInformation.Column) Response.Write("Description = " & objErrorInformation.Description) Response.Write("File = " & objErrorInformation.File) Response.Write("Line = " & objErrorInformation.Line) Response.Write("Number = " & objErrorInformation.Number) Response.Write("Source = " & objErrorInformation.Source) %>
CreateObject(ObjectID)
CreateObject lets you create an instance of a server object to use in an ASP script. The most common server object you create will be to connect to a database and retreive data. To do so, you work with an ADODB.Recordset server object.
The ADODB.Recordset server object represents an entire set of records pulled from a database table. Listing 13.15 demonstrates how to create, fill, and close a recordset with information from a database. Notice that we use an include statement to pull in the ASP file that defines our database connection we created in Chapter 10.
Listing 13.15: RECORDSET.ASP
<%@LANGUAGE="VBSCRIPT"%> <!--#include file="Connections/book_connection.asp" --> <% Dim Recordset1 Dim Recordset1_numRows Set Recordset1 = Server.CreateObject("ADODB.Recordset") Recordset1.ActiveConnection = MM_ book_connection _STRING Recordset1.Source = "SELECT * FROM Titles" Recordset1.CursorType = 0Recordset1.CursorLocation = 2 Recordset1.LockType = 1 Recordset1.Open() Recordset1_numRows = 0 Recordset1.Close() Set Recordset1 = Nothing %>
The Application Object
Through a process known as task switching (or multitasking), the server manages to complete multiple tasks in a short period of time, making each user feel as though they are the only visitor at your site. Here's how it works:
-
As the server receives each request, it stores the request in a queue (a list of items that's constantly updated).
-
The server chooses a predetermined number of tasks—known as threads—from the queue.
-
The server loads the first thread and works on it for a while, maybe for a few millionths of a second.
-
The server then loads the second thread and works on it for a while. The server continues in this fashion until the first thread is complete.
-
Once a thread is complete, it's removed from the queue.
The more threads you have, the longer it takes to complete each task, but the loss in performance is hardly noticeable in most systems. IIS gives you the choice of balancing the two needs: performance or multiple tasks. The ASP engine starts with three threads. You can increase or decrease this number depending on your needs—choose to process one thread quickly or to process several threads simultaneously. When sharing resources to process multiple threads, you'll use the Application object. Specifically, Application methods let you limit processing to only one thread.
The Application object is the sum of all ASP files within your web application. As such, you can share information across the application. You use the Application object to share, store, and retreive information pertinent to your entire web application. For example, a useful application variable is the e-mail address for all your forms. You set the e-mail address once as an application variable, and that variable is available to all threads running in your application. If you need to change the e-mail address throughout your application, you simply change it once. For example, the following code sets the e-mail address throughout the application.
<% application("emailAddress") = "webmaster@helpmedia.com" %> | Warning | Don't use the Application object to store your recordset data. Looking up data makes the Application object unavailable to other threads until the value is retrieved, which can seriously slow down all your threads. |
The Session Object
The term session is subject to the context in which it's being used. In simplest terms, a session refers to the time a client spends connected to your web application. Similar to the Application object, the Session object has start and end events. Specifically, a session begins when a browser makes a request and ends when the connection is terminated. The Session object stores values associated with a particular client, providing an easy method for storing and tracking individual client (user) IDs.
For example, when a client not currently connected to your website makes a request, the web server creates a Session object and assigns a session ID for that new client. This session is maintained even when the user requests different pages within the same application. Only when the session is terminated does the server destroy the Session object. For this reason, storing the ID of a visitor in a session variable is a great alternative to continually referring to the ID in a cookie. For example, the following code reads the userSid of the cookie we set in an earlier example and places it in a session variable that is available across all pages in your web application.
<% session("userSid") = Request.cookies("userSid") %> You can control when a session terminates in two ways:
-
Use the Timeout property to define a limit to inactivity.
-
Use code to specify conditions for terminating the session.
If you don't need tight control, you have two other choices:
-
Shut down IIS, which ends all sessions.
-
Modify the global.asa file (see the next section), which stops all the applications and ends all sessions, but doesn't act until the next request by any browser.
The browser can also opt to end the session by refusing the SessionID cookie. Neither the application or IIS has any control over this choice, nor will the server know in advance which browser might refuse a cookie.
| Note | A web server maintains a Session object only for browsers that support cookies. |
The global.asa file
The global.asa is a file that can reside in the root directory of your web application. If it exists, ASP locates global.asa as the first request is made to your web application. As an application and a session begin and end, the global.asa file executes commands based on the following events and in the following order:
-
Application_OnStart is executed when the first user requests a page from your ASP application. This event is reset if the web server is restarted or if you edit the global.asa file.
-
Session_OnStart triggers every time a new user requests a page from your ASP application. It occurs directly after the Application_OnStart event.
-
Session_OnEnd is triggered when a user or the site ends a session. This typically happens when a user has not requested a page for 20 minutes.
-
Application_OnEnd ends the application when the last user connected to the ASP application ends their session, when the server stops, or when the global.asa is altered.
You can use the global.asa file to initialize and define application and session variables or run processes. For example, you can place the application and session code examples in the web application global.asa file as shown in Listing 13.16. Notice that we added code to destroy the variables in the session and application end events.
Listing 13.16: GLOBAL.ASA
Sub application_OnStart application("emailAddress") = "webmaster@helpmedia.com" End Sub Sub session_OnStart session("userSid") = Request.cookies("userSid") End Sub Sub session_OnEnd session("userSid") = null End Sub Sub application_OnEnd application("emailAddress") = null End Sub
The ObjectContext Object
You use the ObjectContext object to manage transactions with the Microsoft Transaction Server (MTS) that have been initiated by an ASP script file. The ObjectContext object lets you commit or abort a transaction and set a process to follow either event. When the @transaction directive is specified in the first line of an ASP script file, the file runs in a transaction until the transaction succeeds or fails. We mention ObjectContext for completeness. Initiating and managing transactions with ASP and MTS is outside the scope of this introductory chapter. For more information, consult www.microsoft.com.
The ASPError Object
The ASPError object exposes detailed information about the last error that occurred. This error information is stored in nine properties. To access this information, you must use the Server object, GetLastError. (See the "GetLastError" section earlier in this chapter.)
You can utilize hundreds of resources to find out more about ASP. Three of the most-visited ASP-oriented websites are www.microsoft.com, www.w3schools.com/asp/, and www.4guysfromrolla.com. For some great training and reference books such as Mastering Active Server Pages 3, visit www.sybex.com. To keep current with tips and techniques, we suggest Active Server Developer's Journal at www.elementkjournals.com. Finally, nothing substitutes networking with people in the know, so check out your area ASP user group.
|
|
EAN: 2147483647
Pages: 214
- Key #1: Delight Your Customers with Speed and Quality
- Key #2: Improve Your Processes
- Making Improvements That Last: An Illustrated Guide to DMAIC and the Lean Six Sigma Toolkit
- The Experience of Making Improvements: What Its Like to Work on Lean Six Sigma Projects
- Six Things Managers Must Do: How to Support Lean Six Sigma