Getting Started with UserForms
The best way to get started with UserForms is to create a simple macro that opens a custom dialog box and uses it to display information. In this section, you'll create a music trivia macro that asks the user a simple question about a popular rock-and-roll instrument. Along the way, you'll learn the three fundamental steps of creating a Visual Basic UserForm: designing the user interface, setting properties, and writing event procedures.
NOTE
The process used to create UserForms is identical in Microsoft Word, Microsoft Excel, and Microsoft PowerPoint. You'll find the same toolbox controls and property settings in each application.
Designing the User Interface
A UserForm is simply a custom dialog box that you create in the Visual Basic Editor by using programmable interface objects called toolbox controls. To open a UserForm in the Visual Basic Editor, you choose the UserForm command from the Insert menu. Each UserForm appears in a separate Project window in the Visual Basic Editor, and it's also listed in the Forms folder in Project Explorer. The first UserForm is named UserForm1, and subsequent UserForms are named UserForm2, UserForm3, and so on.
Whenever a UserForm is active in the Visual Basic Editor, a palette of toolbox controls also appears in a window, which allows you to add programmable interface objects to your UserForm. (See Figure 40-1.) If you have used a drawing program such as Paint, you have many of the skills you need to use toolbox controls. To build the interface objects, you click a control in the toolbox, and then you draw the interface object by dragging with the mouse. This task is usually a simple matter of clicking to position one corner of the object and then dragging to create a rectangle that's exactly the size that you want. After you create the object— a text label, for example— you can resize it by using the selection handles, or you can relocate it by dragging. You can also resize or move the UserForm itself to create a dialog box in exactly the size and location you want.
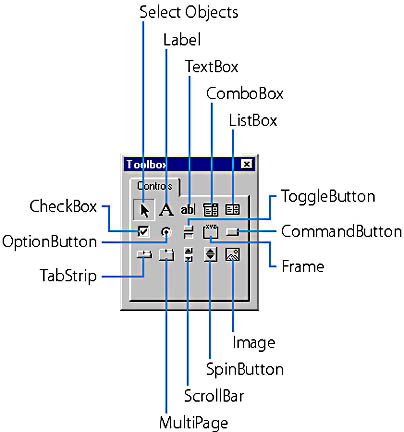
Figure 40-1. You create interface objects on your form using toolbox controls.
Buidling a Custom Dialog Box
Follow these steps to create a UserForm using the Label, Image, and CommandButton controls:
- Start Microsoft Word. (If Word is already running, open a new, blank document.)
ON THE WEB
The MusicTrivia macro is located in the Chap61 document on the Running Office 2000 Reader's Corner page. The Guitar.bmp file (a supporting bit-mapped graphic) is also on the Reader's Corner page.
Word opens the Macros dialog box, the place where you create and run Visual Basic macros.
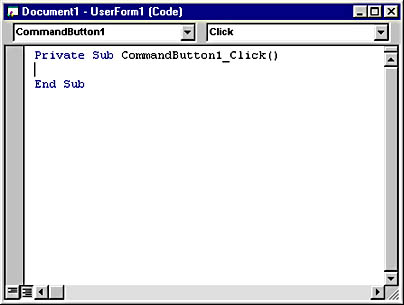
Word starts the Visual Basic Editor and opens a new macro procedure named MusicTrivia in the Code window.
Load UserForm1 UserForm1.Show |
Every macro that opens a UserForm needs these two program statements to bring the UserForm into memory and display it. In this simple macro, you'll type only two lines in the macro. You'll type the remaining program statements into event procedures associated with the objects on the UserForm. (More about event procedures later.)
The Visual Basic Editor opens a new UserForm in a window and displays the toolbox controls. The UserForm is named UserForm1.
![]()
The Label control is selected, and the mouse pointer changes to crosshairs when it rests on the form. The crosshairs are designed to help you draw the rectangular shape of a label. When you hold down the left mouse button and drag, the label object takes shape and snaps to the grid formed by the intersection of dots on the form.
TIP
To learn the name of a control in the toolbox, hold the mouse pointer over the control until its tool tip appears.
The purpose of a label object is to display formatted text on a UserForm. The first label object on a form is named Label1, and subsequent labels are named Label2, Label3, and so forth. You'll add text to the label object later.
Each label object on a UserForm maintains its own set of properties and methods. By creating two separate label objects, you'll be able to manipulate them individually using program code.

The purpose of an image object is to display clipart, photographs, bitmaps, and other electronic artwork on a UserForm. (Specifically, an image object can display .ico, .wmf, .bmp, .cur, .jpg, and .gif files.) You'll use this image object to display a photograph of the musical instrument that demonstrates the answer to the musical trivia question.

The purpose of a command button object is to create dialog box buttons on a UserForm. Typical command buttons include OK and Cancel, but you can also create your own button types.
You're finished creating objects on your UserForm. If the final dialog box doesn't look like the one shown in Figure 40-2, use the mouse to fine-tune the size and location of your objects.
Figure 40-2. A UserForm with five objects.
Setting Properties
After you create objects on your UserForm using toolbox controls, your next step is customizing the objects by using property settings. As you learned in Chapter 37, a property setting is a quality or characteristic of an object that can change as your macro runs. You can change the property settings for objects on a UserForm by using the Properties window at design time (when your macro is being built), or by using program code at run time (while your macro is executing).
Follow these steps to set properties in the MusicTrivia macro's UserForm:
- Click the first label object on the UserForm.
Before you can set a property for an object, you must select the object on the UserForm. When you select the first label object, its name (Label1) appears at the top of the Properties window in the Object drop-down list box.
TIP
To see more of the Properties window, double-click its title bar to display it in its fully expanded position. To return the Properties window to a docked position, double-click the title bar again.
The default text setting for the Caption property is deleted. Now enter a new caption.
The contents of the Label1 object on the form change to match your trivia question. Because the label object's WordWrap property is set to True by default, the text wraps inside the label object.
You'll keep the answer hidden until the first command button is pressed.
Now you'll set the PictureSizeMode, Picture, and Visible properties of the image object to display a photograph of a bass guitar when the user clicks a command button.
This property setting resizes artwork in an image box so that it fits exactly.
A dialog box appears prompting you to select a piece of artwork for the image box.
ON THE WEB
The Guitar.bmp graphic is located on the Running Office 2000 Reader's Corner page.