Printing Your Publication
Watching the pages of your publication emerge from a printer can be pretty exciting. No matter how carefully you've studied your document on the computer screen, it just looks different in print. To ensure that this moment isn't disappointing, plan for printing at the beginning of your project, because the print options you specify will directly impact how your publication looks and the message it conveys.
You have three basic options: you can print a publication on your desktop printer, take a proof from your printer to a copy shop, or send the publication files to a commercial printing service. You'll choose one of these options based on the quality and quantity requirements of your publication.
If you want to print a small number of copies, using standard-sized paper (or a custom size supported by your printer) in low resolution black and white or full color, you'll probably choose to handle the printing process on your home printer. (Table 29-1 defines many of the most frequently used terms in print production.)
TABLE 29-1. Printing Terms
| Term | Definition |
|---|---|
| Resolution | The quality of detail a printer can produce, measured in dots per inch (dpi); usually the higher the resolution, the better the quality. |
| Dpi | Dots per inch, a measurement of how many dots per linear inch a printer can produce. Business quality output is 600 dpi. |
| Color Separation | Commercial printers separate artwork into its component colors (cyan, magenta, yellow, and black) and make film separations for each ink that will be used in your publication. |
| RGB | Red-green-blue are the kinds of colors seen on a computer screen. They don't translate exactly into print. |
| CMYK | Cyan-magenta-yellow-black describes the kind of color model a printer uses. |
| Pantone Matching System | A standardized color specification; you can select from 500 colors contained in a swatch book at your commercial printer. |
| Spot Color | Printed with premixed inks, each color is printed using a separate plate, and provides a cheaper color option than full color. |
| Process Color | Separating each block into CYMK components reproduces color; choose process colors from a color-matching system like Pantone Matching System. |
Setting Up the Printer
Before you begin to create a publication, check the default printer settings, because Publisher composes your publication based on this printer. To get to the Printers folder, click the Start button on your desktop's taskbar, point to Settings, and then click Printers. In Windows 98, the default printer has a small check in front of it. If you right-click the default printer, a pop-up menu appears. Click Properties and use the Properties dialog box to control the features of your particular printer. Here you can modify specifications relating to paper size, page orientation, printer resolution and other printer options. The settings that you choose in this dialog box will stay in effect for all the publications you print in Publisher until you change them.
Setting Printing Options
To customize your printing options from within Publisher, open the publication you want to print and choose Print Setup from the File menu. The Print Setup dialog box appears, which lets you control the paper size, orientation, and source (whether you will place the paper in the printer's input bin or manually feed it through.) Click the Properties button in the Print Setup dialog box to specify a custom resolution for this print job. To specify how you want graphics to be handled, click the Advanced Button and make your changes in the Advanced Graphics Settings dialog box. The settings you make from within Publisher will remain in effect for this particular publication.
When you are ready to print your publication, click Print on the File menu, and the Print dialog box appears. Here you can specify more advanced print settings that allow you to further refine how your publication will look when it emerges from your home printer. The Print Settings dialog box shown here appeared after we clicked Advanced Print Settings in the first Print dialog box:

Using Commercial Printing Services
If you want to print on both sides of the paper (and your home printer doesn't support this), select from a wide variety of special papers and sizes of paper, or specify binding or laminating for your publication, you can take it into a copy shop. They can also print more copies of your document in higher quality color than you could at home. It's always a good idea to call the copy shop to find out how they'd like you to set up your publication before you deliver it to them.
PostScript vs. Publisher FilesWhat is the difference between sending a PostScript file to a commercial printing service and sending a Publisher file to that printing service? And which one should you choose?
A commercial printing service often makes the decision for you. If they use the current version of Publisher in their shop, you can save your publication in its native format (.pub files). Then you can use Publisher's Pack And Go command to prepare your work to hand off to the service.
The advantages to this method are several: Publisher checks that all linked and embedded graphics are present, embeds the TrueType fonts selected, and compresses the file to hand off. The commercial printing service then performs all the necessary prepress tasks— creating color separations, making color corrections, and checking that fonts and linked graphics are available. The disadvantage is that the printing service might not have the TrueType fonts you specified and might substitute ones you don't like. (Call first and ask which fonts they have on hand.) Or they might not use the particular programs you used to create linked or embedded objects and so cannot fix any problems with those images.
If the printing service you selected specializes in high-quality, professional-level printing, they might only accept files in PostScript format. (The Office Assistant offers detailed information about which PostScript printer driver you have or should install.) After verifying that you have the correct printer driver installed, you can format your publication as a PostScript file by clicking Save As on the File menu. In the drop-down list box for Save As Type, click PostScript file (.ps). Publisher then translates all the information needed to print your document into PostScript, a page description language that prints exactly the same on any PostScript printer.
You can't edit a PostScript file. You must edit the source file and then make a new PostScript file for your publication. Therefore, it's a good idea to do your own prepress work quite carefully. Employ Publisher's Design Checker. Make sure that all linked and embedded graphics are present. Print your own color separations. Then compress the file to hand off to the printing service.
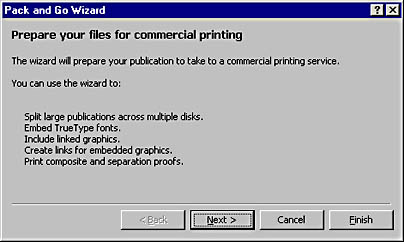
If you want your finished product to display high-resolution black-and-white, spot-color, or process-color printing, and you have the appropriate amount of turn-around time at your disposal, you'll want to take your publication to a commercial printing service. You don't even have to really understand what these options mean, because a Publisher 2000 wizard will walk you through the preparation process. (But the more you know about how color looks on your computer screen and on the printed page, the better desktop publisher you'll become.) To set up your publication for a commercial printing service, or to prepare it for a copy shop, follow these steps:
- Point to Pack And Go on the File menu. Then click Take To A Commercial Printing Service. The Pack And Go Wizard dialog box appears.
- The Pack And Go Wizard asks you to choose where you'll save your files. (This could be a floppy disk on drive A, or a folder on your desktop.) Click the drive, or click Browse to search your computer for a location.
- Specify how you want Publisher to handle fonts, linked graphics, and links for embedded graphics in your publication. Then click Next to continue.
- Your publication is almost packed and ready to go. Click Finish, and the wizard will compress your publication into a file and store it along with an Unpack.exe file, which the printing service uses to unpack these files.
When you're communicating with your commercial printing service, you'll find that they are probably familiar with Microsoft Publisher. If not, you can tell them that Publisher supports process-color, spot-color, and black-and-white printing; it also supports RGB, HSL, CMYK, and Pantone color models; and finally, it supports automatic and manual color trapping.
EAN: 2147483647
Pages: 228