| Among the many ways to work with FCP, there isn't really any one way that's intrinsically superior to any othersmost are a matter of habit and what feels comfortable to you. You need to know what your options are though; you may find some features will help you be more efficient or enable you to handle the application more fluidly. If you can learn to use these features and incorporate them into your workflow, you'll find you can optimize your process and use your time more effectively. Configuring Functional Settings Many of the tools in Final Cut Pro can be modified and adapted to better meet your needs. As you experiment and test different settings, you'll discover new techniques that will enhance your use of the application. Handling Media Under the General tab in the System Preferences window are options to help you synchronize independent media sources and determine when you should be alerted about dropped frames. When you're working with professional equipment that requires a separate audio interface with video genlock input, or audio that needs to be synchronized with video, you need to make sure that the Sync Audio Capture To Video Source If Present check box is selected.  To ensure the integrity of your video files at all times, select the Report Dropped Frames During Playback, Report ETT/PTV On Dropped Frames, and Abort Capture On Dropped Frames check boxes. With these options selected, FCP will issue an alert when frames are dropped while you're capturing or during general editing; and when you're performing the Edit to Tape function or printing to video. 
Modifying Editing Tools A number of settings under the Editing tab in the User Preferences window allow you to alter the default behavior of some of FCP's editing tools. When your project involves working with still images or creating freeze frames, it's useful to be able to set the default duration. The Still/Freeze Duration setting is especially important if you're importing an animated image sequence and want to be able to import several files at once with a set duration. Once they're imported, you can edit them into your sequence without further need to adjust their duration. In FCP, duration refers to the interval between In and Out points. You can modify the duration of individual clips once they have been imported.
1. | Open the User Preferences (Option-Q) window and click the Editing tab.
| 2. | Enter a value of 5 seconds (00:00:05:00) in the Still/Freeze Duration field.
| 3. | In the Lesson 11 Project.fcp file, choose File > Import > Folder.
| 4. | Locate the Still Images folder in the Lesson 11 Media directory and click Choose.
| 5. | Double-click the Still Images bin to open a separate bin window.
| 6. | Double-click Shuttle 001.jpg to open it in the Viewer.
The image will appear to be squashed because FCP does not yet recognize it is anamorphic.
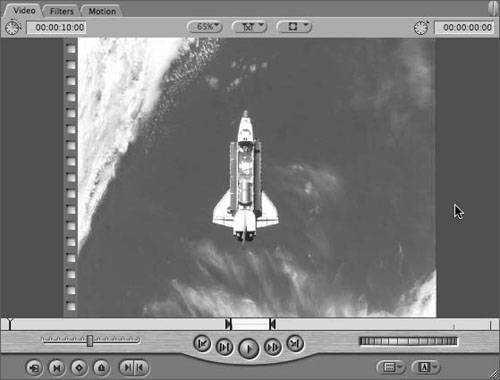 | 7. | Scroll to locate the Anamorphic column in the Browser and click to insert a checkmark next to Shuttle 001.jpg.
 The image should now be displayed correctly in the Viewer.
Tip You can also select anamorphic display in the Item Properties window. 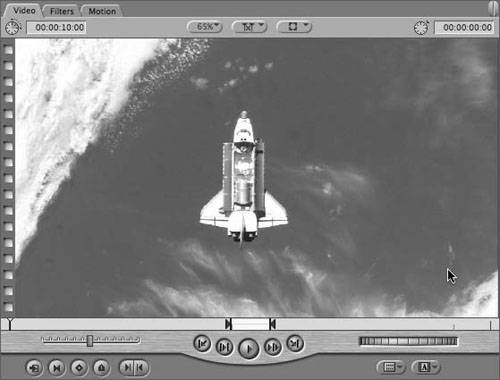 Also notice that the default duration is set to 5 seconds, but that this can be modified by changing the in and out points. Also notice that the default duration is set to 5 seconds, but that this can be modified by changing the in and out points.
| 8. | Change the name of the bin to Still Images Long.
| 9. | Open the User Preferences window (Option-Q) and click the Editing tab.
| 10. | Change the Still/Freeze Duration value to 1 frame (00:00:00:01) and click OK to apply your change.
| 11. | Re-import the Still Images folder and double-click the new Shuttle 001.jpg image to open it in the Viewer.
Note that it has a set duration of 1 frame.
 | 12. | Insert checkmarks in the Anamorphic column of the Browser for all of the image files in the new Still Images bin.
 You have to do this manually because QuickTime media files do not currently support embedded anamorphic metadata flags. You have to do this manually because QuickTime media files do not currently support embedded anamorphic metadata flags.
| 13. | Hold down the Option key and choose File > New Sequence (Option-Cmd-N).
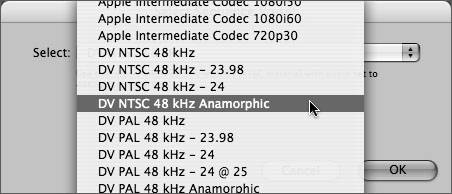
| 14. | Choose DV NTSC 48 kHz Anamorphic from the pop-up menu and click OK to create the new sequence.
 | 15. | Rename the sequence Stills and double-click to open it in the Timeline window.
| 16. | Select all the images in the new Still Images bin and drag them into the sequence.
| 17. | Press the spacebar to play.
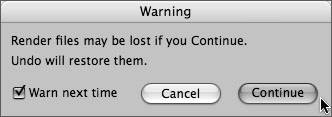
Because each image has a set duration of 1 frame, the sequence should appear to play like standard video. If you encounter unrendered frames, you can increase the size of the Still Cache (refer to the earlier section in this lesson for specific instructions) or render the sequence before you can watch all of it. When you use the Play Around Current control, the number of frames FCP plays before and after the playhead is determined by the Preview Pre-roll and Preview Post-roll settings, respectively. Increase the number of frames to extend the number of frames FCP will play whenever you use this feature.  When your workflow involves film matchback or the online will take place in a tape-to-tape suite, the Dupe Detection controls are especially useful. Assign a value to the Handles field to identify frames that may be lost during the negative cut, and enter a Threshold value to require a specified number of duplicate frames be detected before you receive a warning. There are six colors used to indicate individual sets of duplicated frames: red, green, blue, white, black, and purple. If there are more than six instances, the colors are reused. More Info See the "Options for Displaying Duplicate Frames" section of the Final Cut Pro user's manual for specific details. Customize the way tools behave in the Trim Edit window. When you work with dynamic trimming, enabled edit points automatically follow the position of the playhead. The Trim With Sequence Audio option allows you to hear all of the audio tracks in the sequences while you work with the J, K, and L keys. Choose Trim With Edit Selection Audio (Mute Others) to mute everything but the selected audio tracks in a sequence. Enter a new value in the Multi-Frame Trim Size field to change the default length of the multiframe trims you create with the Trim Back and Trim Forward buttons.  By default, whenever you click the visibility buttons in the Timeline, FCP will issue an alert if the change affects render files. Prevent FCP from automatically losing render files whenever you hide tracks by selecting the Warn If Visibility Change Deletes Render File check box.  Modify the way that FCP records keyframes by choosing different options from the Record Audio Keyframes pop-up menu to increase or reduce the number of keyframes the application creates as you adjust the controls. 
|
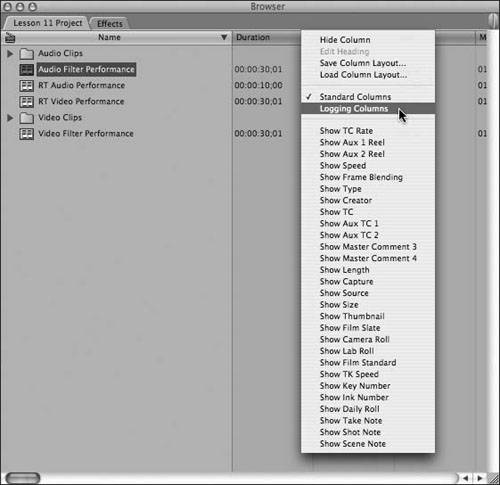
Customizing Default Options Although Final Cut Pro can adapt to accommodate a wide range of workflows, editors often develop habits or ways of working that suit their needs. If every time you create a new project you find yourself modifying the same settings and preferences, you should modify the default options to better suit your workflow. Modifying the Interface Not every column in the Browser will be relevant to your workflow, and different information can be more significant at different points in your project. Ctrl-click the headings to show and hide columns until you have access to the information you require. As with other elements in FCP you can save customized column layouts. By default, FCP includes standard column and logging layouts. You can also create your own to meet special needs.  Tip You can drag individual columns or use the hide and show feature to rearrange the Browser.
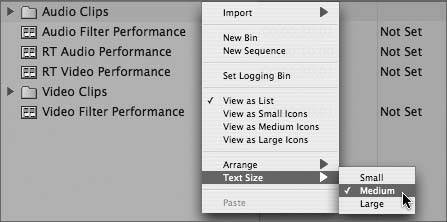
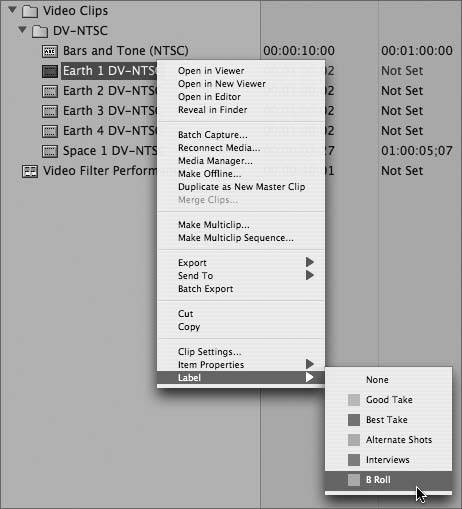
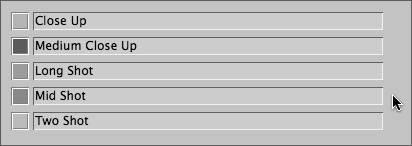
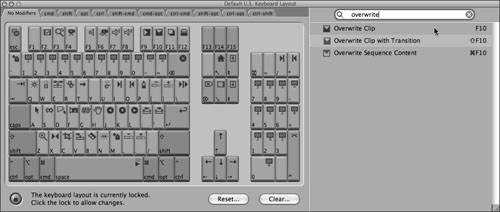
New to Final Cut Pro 5 is the ability to modify the text size displayed in the Browser. Open User Preferences (Option-Q) and use the Browser Text Size pop-up menu under the General tab, or Ctrl-click in the Browser and choose a size from the Text Size submenu.  Use labels to color-code items in the Browser. Ctrl-click clips, sequences, or bins, and choose colors from the Label submenu.  Change the meaning of individual labels by using the Labels tab in the User Preferences window.  The Timeline Options tab is accessible through the User Preferences window. Use it to change the starting timecode of your sequences, define the default number of tracks in a sequence, and change the way tracks are displayed. This is only for new sequences. Don't forget the sequence settings also. A lot of editors like to work with keyboard shortcuts. If you find the default commands awkward or are more familiar with a different layout, Final Cut Pro provides tools to remap keys and create your own custom layouts, which you can then share amongst users and systems. To manage shortcuts, choose Tools > Keyboard Layout > Customize (Option-H).  Each window in FCP contains a button bar, to which you can add buttons to create easier access to commonly used functions. Final Cut Pro 5 includes default button layouts for Audio Editing, Media Logging, and Multiclip (choose Tools > Button Bars). You can easily add buttons using the Button List window (Tools > Button List)simply search for the action you require and drag the button to the button bar you find most convenient. 
Streamlining FCP Operations Final Cut Pro 5 includes a new feature that allows you to designate which directories FCP should search when you're reconnecting media files, which is especially useful when you're working with large SAN volumes. Open the System Settings (Shift-Q) window and click the Search Folders tab to specify which areas Final Cut Pro is to search. If your workflow involves sharing still images, video, or audio clips with other applications, you can increase the efficiency of your workflow by defining the default external applications you use to modify files. Select the External Editors tab in the System Settings window to choose your preferred solution.  Note Final Cut Pro also includes increased integration with other applications in the Final Cut Studio suite to increase efficiencies in round-trip workflows.
By default, FCP will return to the last open project whenever it is launched. This can be inconvenient if you're working on different large projects, and it takes the application a while for everything to load, or if you're working on a shared system and you have to close someone else's project before you can get to work. Deselect the Open Last Project On Application Launch check box under the General tab of the User Preferences to disable this feature. 
|


 Also notice that the default duration is set to 5 seconds, but that this can be modified by changing the in and out points.
 You have to do this manually because QuickTime media files do not currently support embedded anamorphic metadata flags.