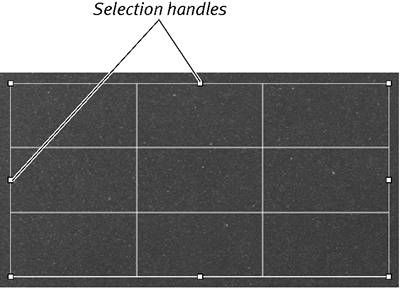
| To work effectively with a table, you'll need to know how to select its elements. You can select an entire table; one or more rows and columns; an individual cell or multiple cells; and nonadjacent cells , rows, or columns . To select the entire table - Click once anywhere in the table.
Eight selection handles will appear at the edges of the table, which you can use to resize the table ( Figure 7.4 ).
To select a single cell - With no part of the table selected, double-click in the cell that you wish to select. If any part of the table is selected, click once on the cell you want.
The border of the selected cell is highlighted in yellow ( Figure 7.5 ). This indicates that you have entered text edit mode . In this mode, any text that you type will replace any text that already appears in the cell. You can move between cells in the table by pressing the arrow keys on your keyboard.

To place a text insertion point in a cell - Double-click to select a cell. A text insertion point will appear inside the cell ( Figure 7.6 ).
When the insertion point appears in a table cell, you can move the cursor between table cells by pressing Tab.
To select a contiguous group of cells - Double-click the first cell, hold down the Shift key, then click the last cell.
The selected cells will be highlighted in yellow ( Figure 7.7 ). You can use this technique to select any rectangular group of cells, be it a row, column, or any other area of the table.
You can also use the Selection buttons in the Table Inspector to select a row or a column ( Figure 7.8 ). Double-click in a cell, then click the Row or Column button. You can select the outside borders of selected cells with the Borders buttons.
To select nonadjacent cells - Double-click the first cell, hold down the Command key, then select additional cells.
The selected cells will be highlighted in yellow ( Figure 7.9 ).
 Tips Tips -
If you have the text inside of a cell selected, Command-clicking the cell deselects the text, and selects the cell. -
Clicking a cell border will select that border for the entire row or column. Option-clicking a cell border selects only that segment of the border that is the edge of the single cell you clicked. For example, in Figure 7.9, if you clicked the vertical border between the cells containing Building and Equipment, the entire vertical border would be selected, down to the bottom of the table. But if you Option-clicked the vertical border between those two cells, only that short segment will be selected.
To copy the contents of one cell into another | 1. | Select the contents of a single cell, hold down the mouse button for a moment, then drag the contents to another cell.
As you drag, you'll see a ghost image of the contents of the cell that you are dragging, and the destination cell will be highlighted in blue.
| | 2. | When you have reached the destination cell, release the mouse button. The contents of the first cell will be copied into the second cell ( Figure 7.10 ).  | Tips -
The cell contents you are dragging will be appended to the contents of the destination cell, if any. -
If you select multiple cells (like a row or a column) and drag, the contents of all the cells will be moved to the destination cells. If you select multiple cells and Option-drag, the contents of all the cells will be copied into the destination cells.
To select a cell border | 1. | Click once outside the table to make sure that no table element is selected, then click once in the table to select it.
| | 2. | Click a border within the table to select the entire row or column border ( Figure 7.11 ).  Click the border again to select a single border segment (i.e., the border of just one cell). You can also use the Border buttons in the Table Inspector. | Tip
|